
Yes! It is finally done!
But if you're a perfectionist, don't read this post. It will only irritate you. :)
To recap: I bought this argyle double knit fabric from Mood last June with Antoinette. At $18/yard, it was the most expensive fabric I've ever bought (per yard price) (Filling out the bio for the PR NYC weekend made me think about that a bit, as one of the questions was "what's the most you've ever spent on a single cut of fabric?" For me, it's buying ponte roma knit at Joann's, 5 yards at a time with a 40% off coupon...).
Anyway, I tried to make a StyleArc demi drape top out of it, and it was a total bust, still to blog about that.
And then I thought I'd make a vest out of it, and then when I cut it out and held it up to me, inspiration struck and I thought I'd make a dress. Only that's a lot of argyle for one dress and I had already cut up my yard and a half a bit too much to make adress from it. So, I google image searched "argyle dress" and saw something somewhat like what I came up with.
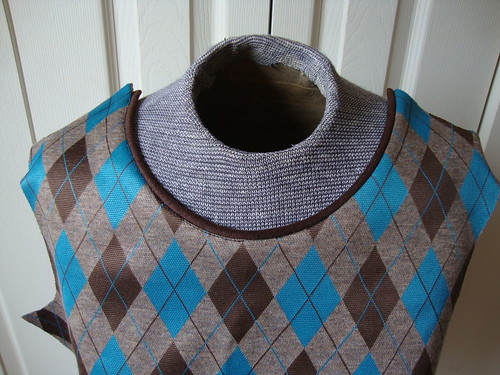
I took NewLook 6071, my favorite dress of all time, as the starting point, using the bottom of the front and the entire back. Then I sort of drafted a new top for the front...I free handed it on the fold of the fabric, then traced this in case I ever wanted to make this dress again
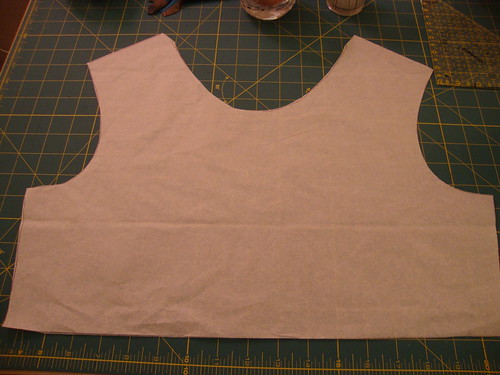
I then interfaced the armholes and neckline so it wouldn't stretch (here I made the pattern for the interfacing) (cue foreshadowing...)

Then I wrote the other posts...peter pan collar or no? sleeves or no?....
I decided not to go for the collar because like many commenters said, it was very cutesy, maybe overly cutesy that way. More "professional" without the collar. So, I left the collar off. Then I asked about the sleeves, and agreed with the majority, sleeveless is better. Trembelina had mentioned brown binding...I was thinking piping!!
So last week I had a visitor at work (hi Claire!) who also sews, and she talked about making her own piping, that she loves to make her own piping. I had thought piping would be a lot of work...but when the brown piping I had bought was not as large as I wanted, I decided to make my own.
At PR weekend Philly, Kenneth King had talked about using rattail to making piping...that you don't have to use the plain cording sold at Joann's for this purpose. I didn't use rattail but it gave me the idea to use regular cording I had bought for some other project....
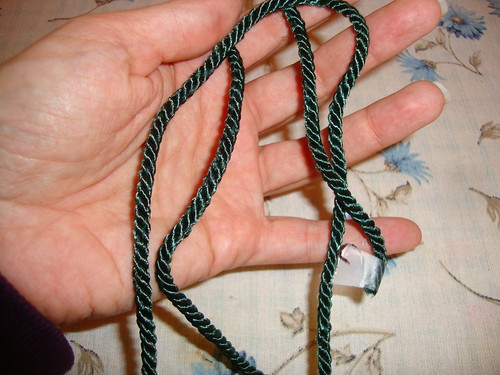
I used the instructions in the Singer Complete Photo Guide to sewing (Though they don't call it piping, they just call it cording--it's in the section on binding pillows).
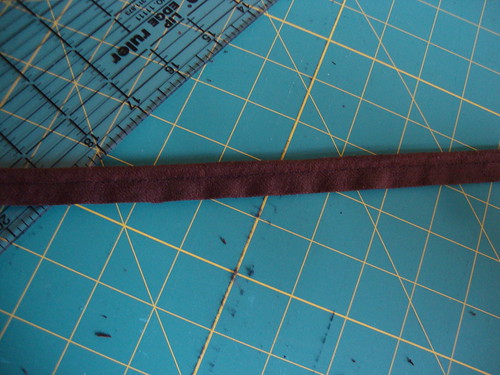
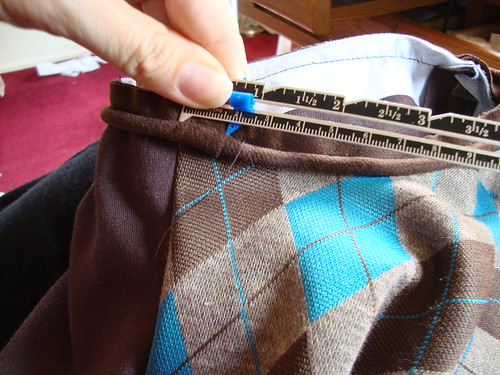
This isn't meant to be a tutorial, just showing you that it's easy if you have the right tools. Used my cutting mat which already had 2" bias guides, my clear ruler and my rotary cutter (the fabric is the type used to make Pocahontas costumes at Halloween, it feels soft and fun to touch):

Put the cord into the strip at the halfway point, with the zipper foot on my machine:

I found it helpful to hold some cording out the back to start, to keep the cording in the center (no photo of that, though). So not all the cording was covered by the fabric, because I was holding some of it at the back.
Then I cut about a quarter inch off

And then it looked like this
I then made a sample (Elizabeth from SEWN was asking if anyone makes samples)..

Here I topstitched one half of the neckline, while leaving the other half untopstitched. By seeing the sample, I knew I didn't want to topstitch when it came to the real deal....
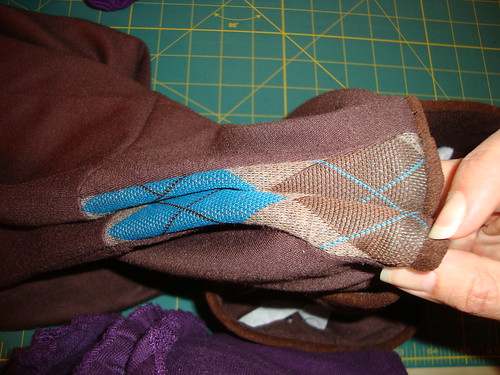
Another note to make is to be careful about where you start sewing the cording on. At the end you overlap the edges but in this case the overlap meant it wasn't at the stitch line of front to back
So I fixed that by ripping it all out and starting again sewing about an inch BEFORE the seamline and now they match.

The piping didn't look to be the same width right vs left armhole, even though I used the same cording. So on Monday night I stitched closer to the piping that was too wide, to make it more like the piping width on the other side.

I also thought on Sunday night that I had stretched out the armhole. Carolyn (Cmarie12) said I should interface to prevent stretching, and I had done so, but the interfacing was not fused on too well...but when I removed the horrible hem and resewed the hem, I found that a stretched armhole wasn't really the problem.
You know what the problem was?
The two sides are not actually symmetrical.
I don't know WHY I didn't notice that like, way way way earlier on in the process. Like the first step.

Here on Emma the difference is noticeable in that the seamline is rising up....

I wore it anyway....ha ha ha ha ha! The hemline is even since I took the asymmetry into account.
OH, and my swayback....here I cut the line to make the swayback tuck (Then sewed it with a 3/8 seam, tapering to nothing on the edge...)

It could probably use a bit more swayback tucking:

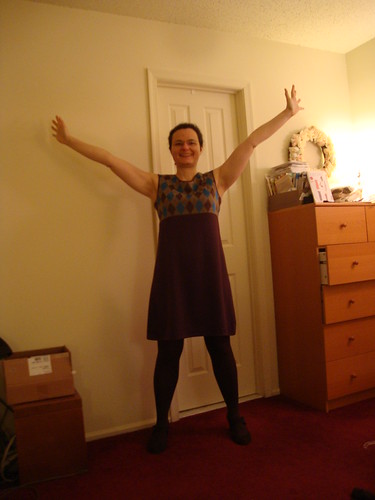
But it's done:
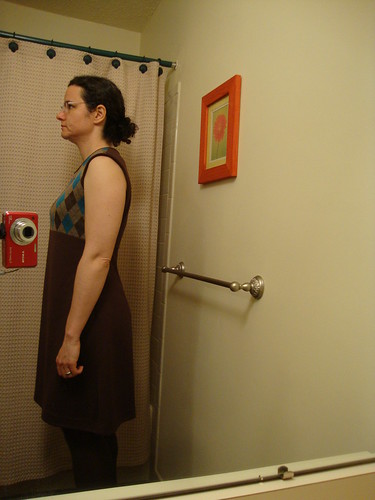
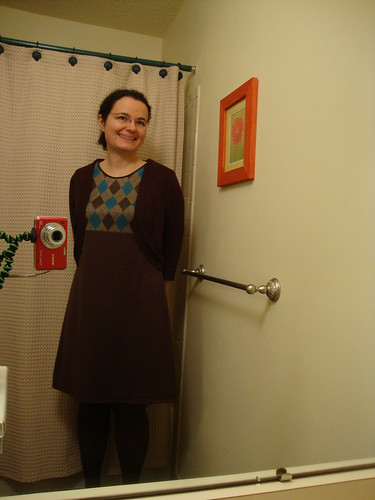
How I wore it to work (with purchased cardi):


I still have more of that fabric left--will probably make the vest after all. and maybe a tank top too. But it's time to give that fabric a rest and go back to solids for a bit!
Be well and have a great Sunday!
It looks like a success to me! No one will notice the "imperfections" you know are there!
ReplyDeleteLooks great! Especially likin' it with the brown cardie (well I did vote for sleeves :). Excellent stuff!
ReplyDeleteYour imperfections are a job well done for me!! My imperfections are huge glaring mistakes.
ReplyDeleteYour cardi looks great with the dress. I've enjoyed watching this come together.
ReplyDeleteAfter all is said and done, I really like what you did!! And thanks for the mini tutorial on piping, I have not attempted that yet, and you did an excellent job with it!
ReplyDeleteYay. It looks great. And the cardi is a good match.
ReplyDeleteI think you did a great job, and it looks just lovely on you. Your new cardigan looks like it was made to go with it!
ReplyDeleteI like that dress a lot, I've got a very soft spot for argyle, along with tartan, gingham, and houndstooth. It's a great mixture of plain and patterned fabric and any imperfections went right over my head.
ReplyDelete