In February last year I sewed up my first Sewaholic Renfrew muslin. What attracted me to this pattern was the amazing collar in view C, and while the collar turned out great, the rest did not....
My issues:
- I sewed the shirt in a double knit. Oops. Tight fitting + sleeves + double knit != good combination.
- I started with the size 8. That was too small to start.
- It was too small in the back--the bra lines are not a good look
- It was too small in the front in the armpit area, creating lots of wrinkles. It generally felt uncomfortable. Somehow I wore this shirt on a 6 hour flight but I don't know how!!!
- I also was not loving the bottom band. It wasn't wide enough really for my hips.
- Not loving the swayback either.
Sooo...recently Beth of Sunny Gal Studio announced on her blog that she is teaching others to sew in her home...in SF. I commented that if I lived near her I would have her teach me a few specific things, one of which is fitting the Sewaholic Renfrew.
Two weeks ago, I cut out a muslin from blue sweater knit in 33% stretch crosswise. I started with a 12 this time, after following how to do flat pattern measurements in the Tilton's Craftsy Class "The Ultimate T-shirt". I went to the get my hair cut. I came back and Beth had emailed me to tell me her ideas on how to get the Renfrew to fit. Great!!!
We fit the Renfrew through emailing pictures and Skype!
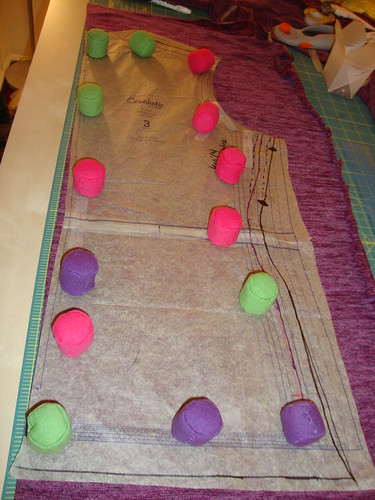
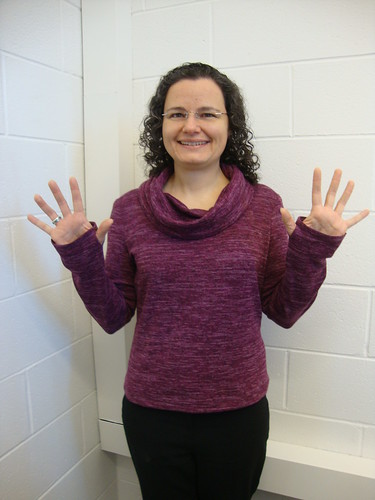
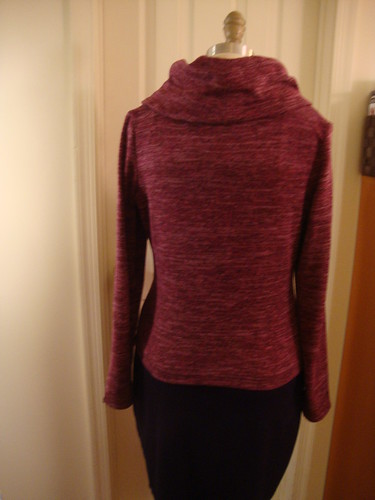
Here is the end result of the pattern adjustments. These pix were taken on the fabric I used for the real deal.
1. Make more space in the armhole area. There's a lot going on in this photo, but essentially the slope of the shoulder seam was adjusted to add a half inch to the armhole. The sides of the front of the top were "fanned" outward to give more room in the bust. An inch was added in the bust area of the front of the top but not the back. I drew in notches on the front and back side seam bust area following New Look 6405 (which had this feature) as my guide. Basically the back of the top is stretched while sewing the side seam in the notch area. This gives more room to the bust without changing the side seam length.
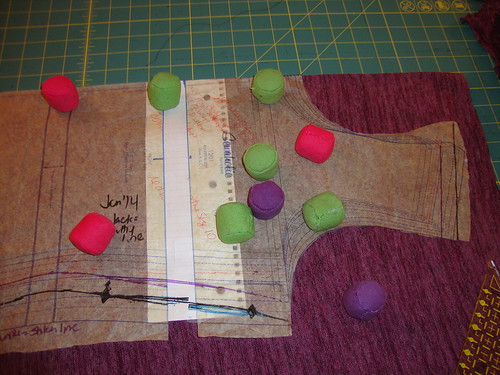
2. Made a 1" CB swayback adjustment. The shoulder area was adjusted just like the front (from original starting place at neckline out to an additional half inch at the armhole. The notches were added.
2. Made a 1" CB swayback adjustment. The shoulder area was adjusted just like the front (from original starting place at neckline out to an additional half inch at the armhole. The notches were added.
I cut the pattern across the back at the waistline and overlapped 1". Then I placed the pattern on the fold. This means it is a bit wider across the back here but it is shorter.
So I am laughing at my wonky cutting lines. I had traced the stitching line from my muslin to the pattern in purple and then added SA in black. Sadly it wasn't til near the end that I remembered that Jacqui gave me the SA curve ruler to make that process easier. I evened the lines out while I cut the shirt out.
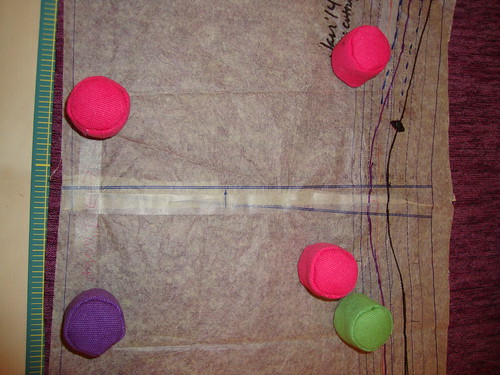
Here's a closeup of the shoulder adjustment. As Beth explained, this makes the armhole area larger and makes the sleeve drop, which makes the whole thing MUCH more comfy as there is more room!

3. Because a half inch was added to the armhole, the sleeve cap needed a half inch added to it.

Soooo....all these adjustments, plus the fact that my "real deal" fabric had 50% crosswise stretch, lead to a VERY comfy top.
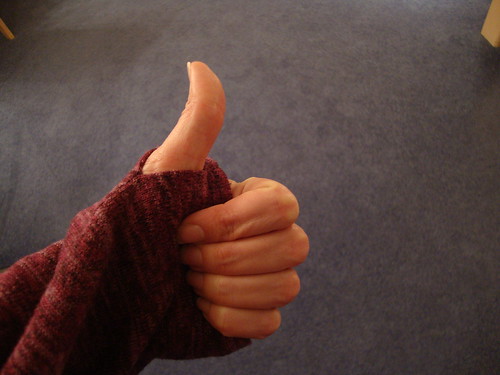
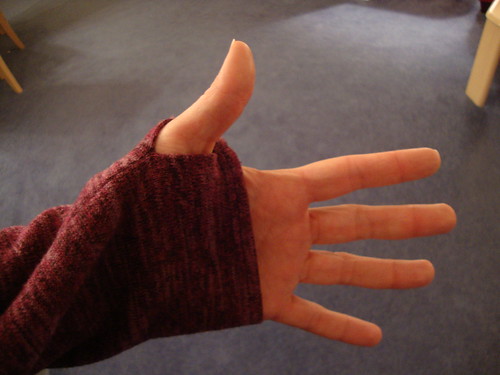
Also, I added a little feature....the thumbholes!
This picture reminds me, I sewed all hems using Emma Seabrooke's SewKeysE interfacings and then twin needled the hems. I'll have to write about that in another post.
This one was sewn on my sewing machine; the next one I want to sew on my serger. The fabric is the same, it's just a different color.
Ok, some more pix
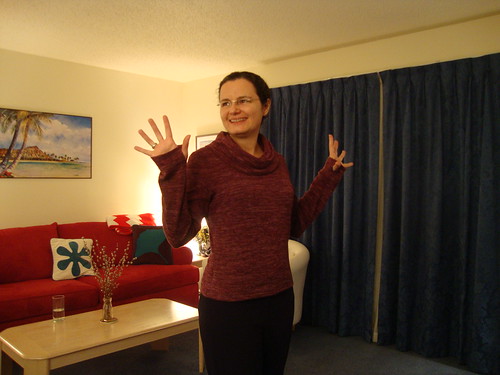
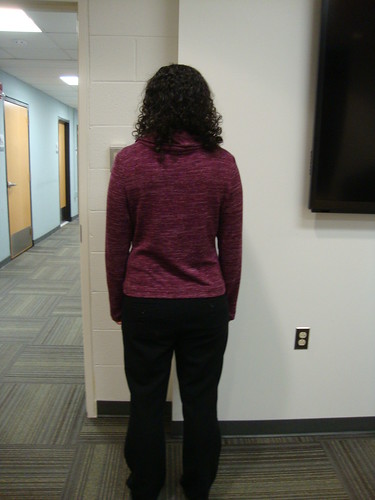
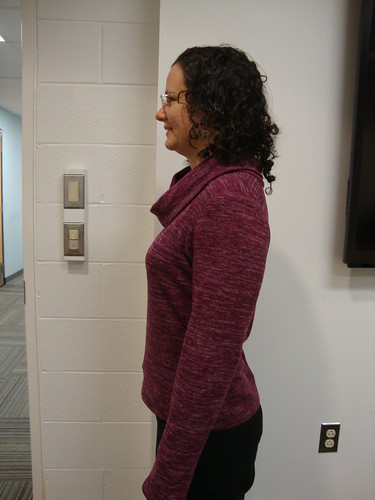
My coworker took the "at work" pix
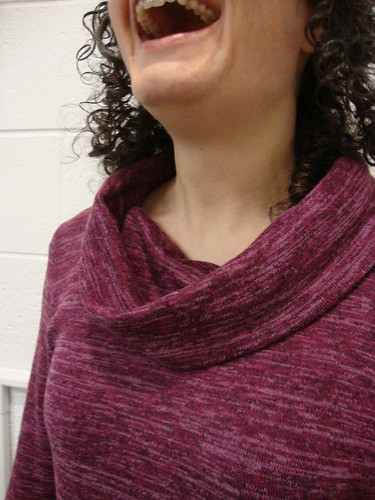
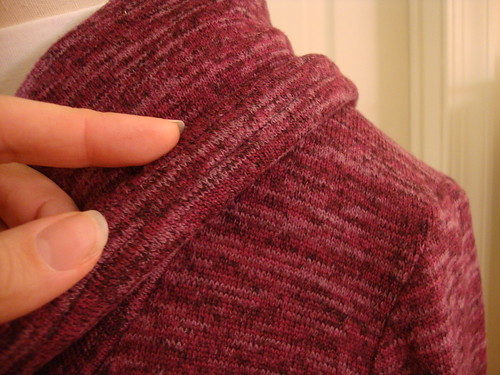
Collar close up
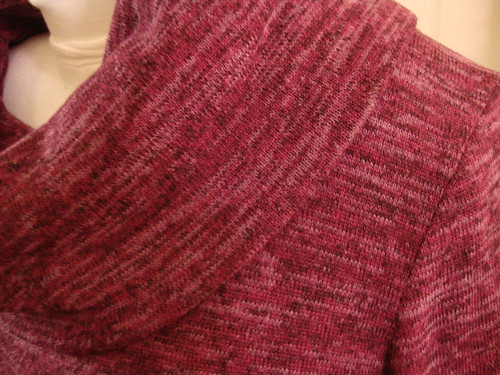
It is hard to see but here I have flipped the collar up to show you that instead of cutting off the SA, I edgestitched it then stitched again a half inch away. This makes the collar roll quite nicely.


The fabric is from Stone Mountain and Daughter, from PR weekend 2013 in SF.
I want to make two more of these! Like I said, the next one will be on my serger. I've never sewn a garment on my serger before. Just serged the raw edges of wovens to keep them from unravelling.
Also, a word about the armpit wrinkles. I really wanted to eliminate them and Beth said it's impossible to do that unless you put a dart in, and darts can look weird in knits. The Tiltons put a dart in, in the armhole itself, and I may try that sometime in my quest for a wrinkle free world. But for now, I'm letting it go. ALL of my RTW knit tops have the armpit wrinkles. Part of why I sew is to get a fit that's better than RTW but for now, the top is comfy and I love the collar and the fabric so I have at least 2 more versions I want to sew.
Thank you Beth for helping me fit the Renfrew! I would not have gotten this far without you! Sewing friends are the best, aren't they???
Be well!