Sunday, September 25, 2016

Epic Jean Jacket Post #3: Turning faux pocket flaps into real pockets

IMG_20160903_171524

Thank you for your comments on the topstitching post for the #epicjeanjacket--I know that was a long one; congratulations if you read the whole post!!!

I was surprised that the StyleArc Stacie jean jacket pattern had faux pocket flaps instead of real ones, and since I like using jacket pockets I decided to add my own.   Initially I wasn't sure how to do that, but I ultimately got the idea to take the pocket facing that comes with the Islander jean jacket pattern and extend it to create a pocket bag, much like how an interior zipper pocket is constructed.

First, I folded out some of the facing width (as the Islander pattern pocket flap is larger than the Stacie pocket flap), and I wanted the pocket opening to fit between my existing topstitching.

IMG_20160903_161931

I then cut out that space above, and sewed on the extended facing, RS together.  Turned RS out and then topstitched the facing in purple
IMG_20160903_165913
Then I folded the pocket bag to create the pocket.
IMG_20160903_163533
Then I serged the pocket together--without sewing it to anything else!  :)

I added my label as a little joke to myself.
IMG_20160903_171013
My MetroCard fits in there perfectly!  I forgot it was in there and accidentally ironed it, but I used my MetroCard this past weekend and it still works!
IMG_20160903_171031

At this point, I felt like it would be a good idea to add the buttonholes to the pocket flaps and add the jean shank button, and those who replied on IG agreed!  It was waaaay easier to add the buttonholes to the flap while it wasn't attached to the jacket.  Then I sewed the flap across the top.

I'm going to cover the buttonholes and jean shank buttons in a later post. For now, I'll say that these buttonholes use the real jean topstitching thread on top and regular purple Coats & Clark thread in the bobbin.


IMG_20160903_211841
That's a little compass on each jean shank button--I made sure to have North pointing up on each one.

Next post:  the sleeve and the construction of the "cuff".

Be well!

Tuesday, September 20, 2016

Epic Jean Jacket Post #2 StyleArc Stacie: The Topstitching

IMG_20160912_190500
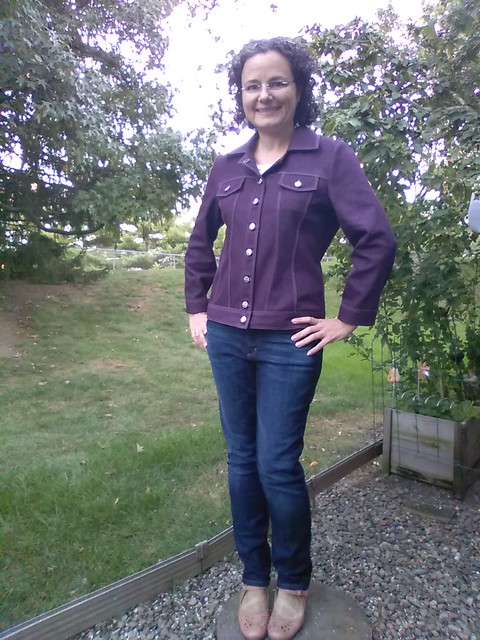
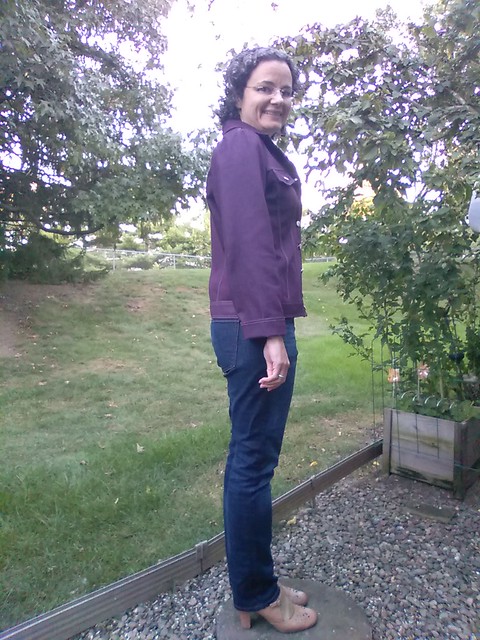
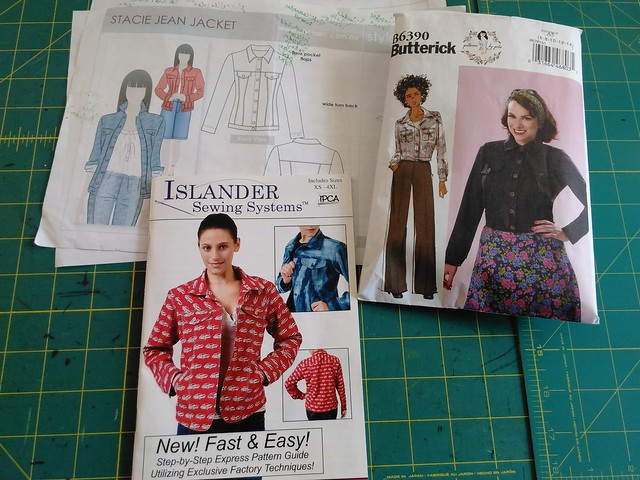
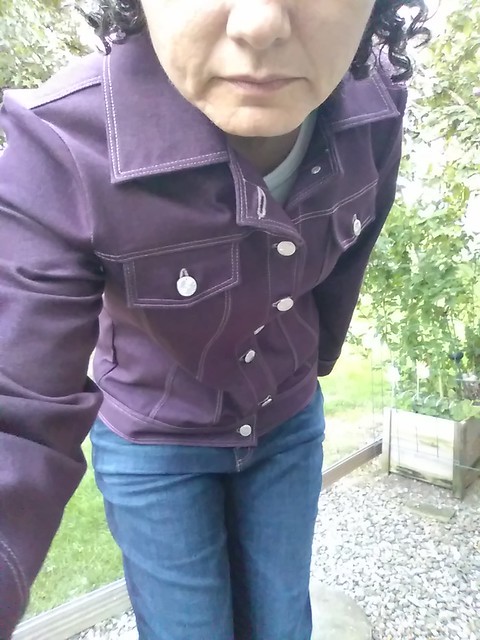
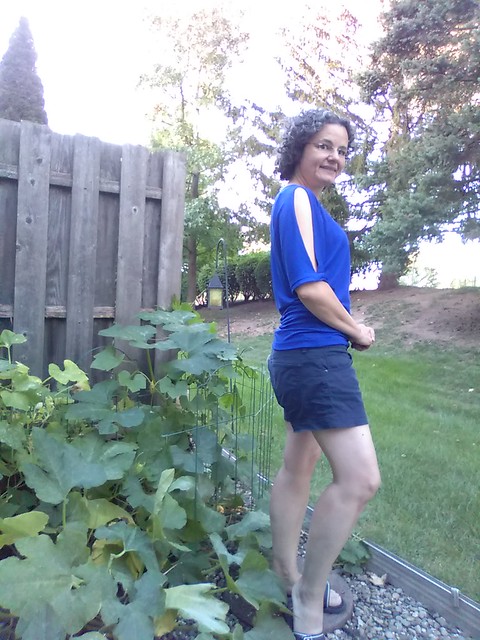
Thank you for all your kind words about my 
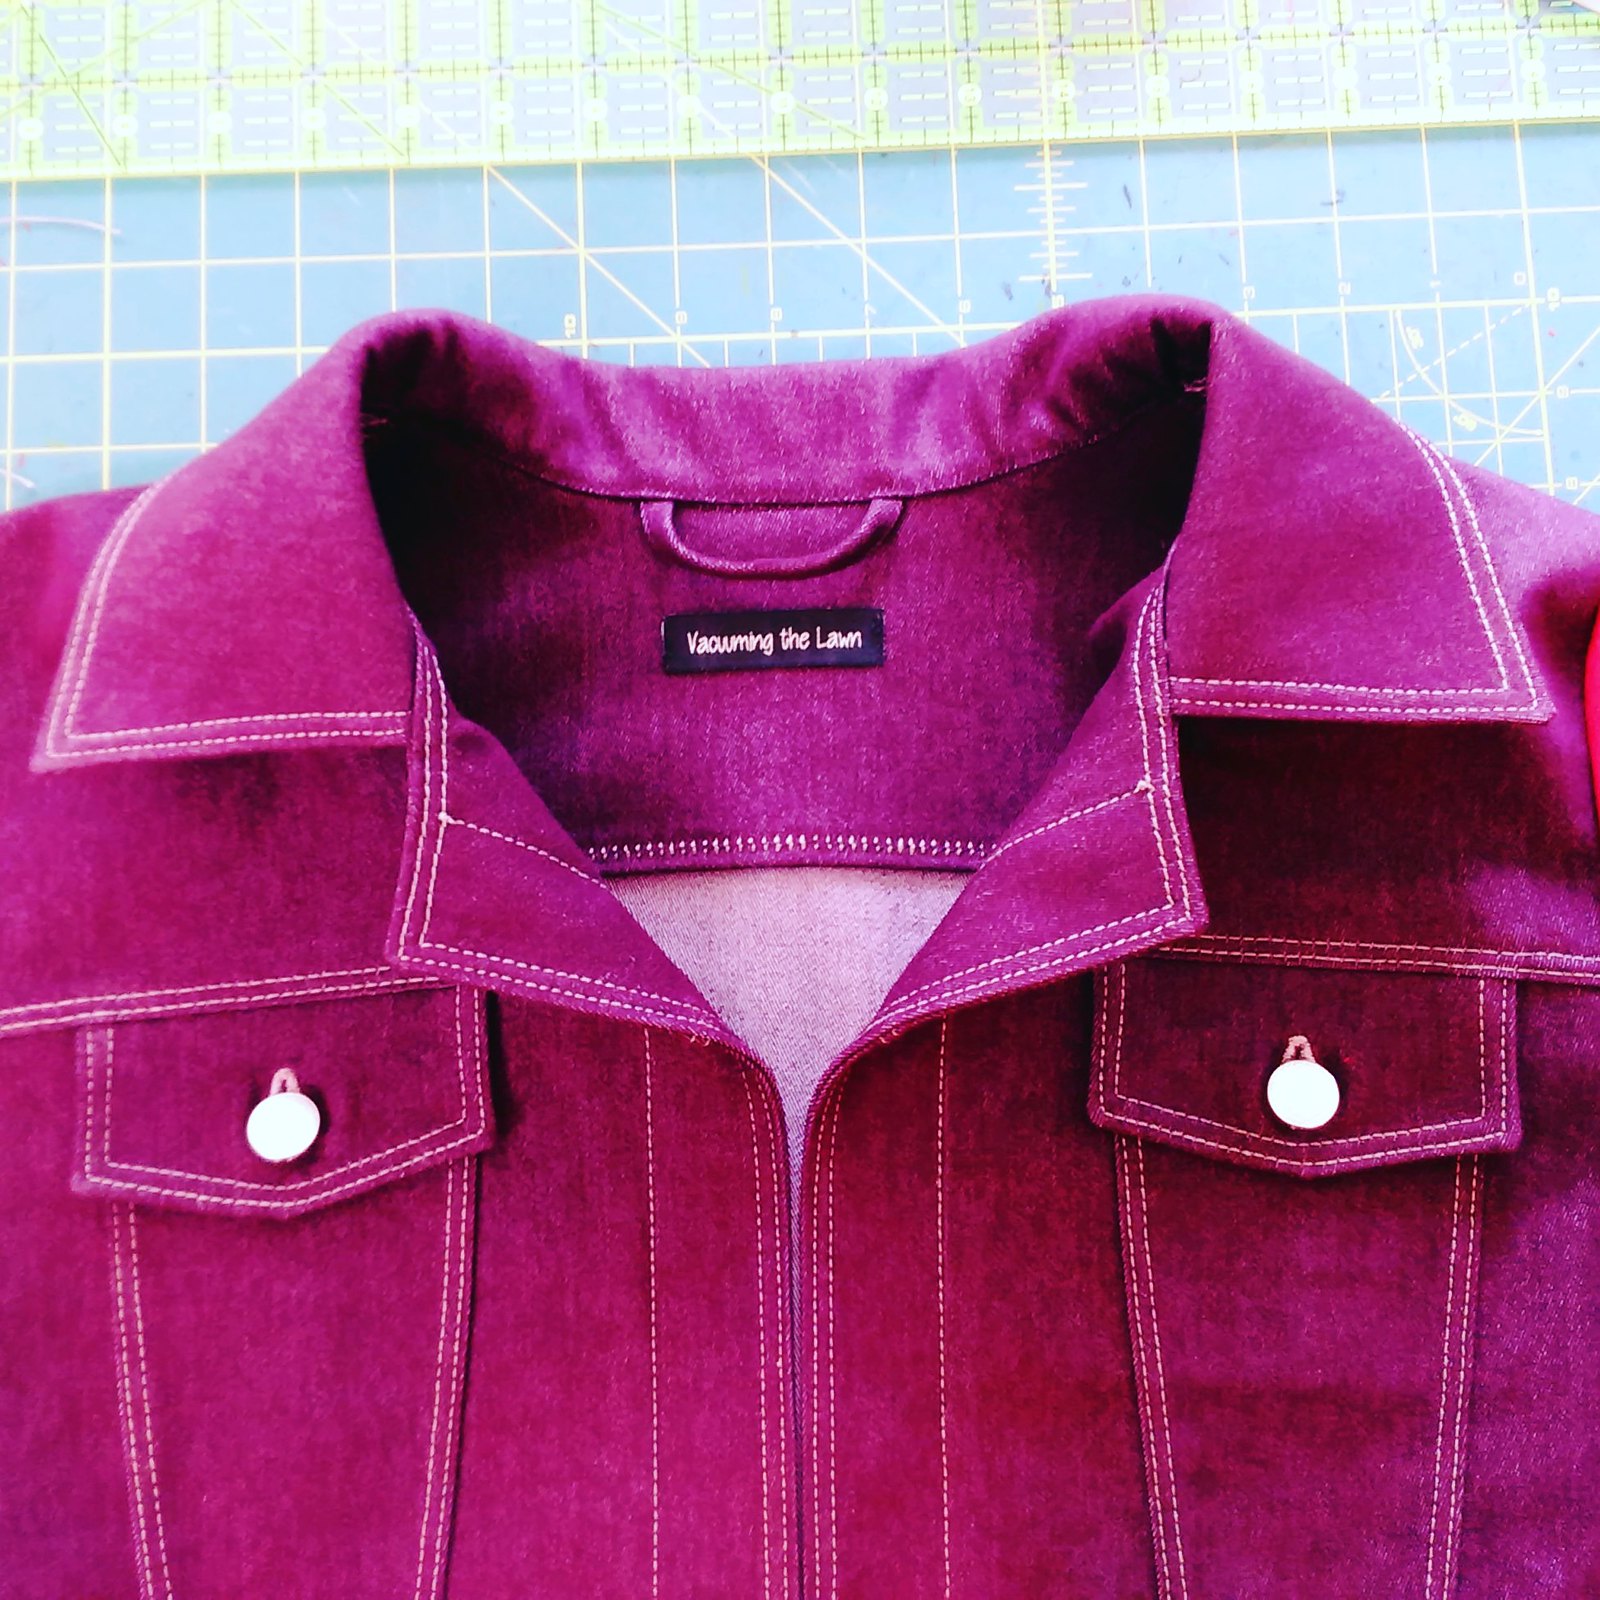
StyleArc Stacie jacket!!
IMG_20160911_142903

IMG_20160912_190601
Since I have so much to say about this jacket, I'm divvying it up into several posts.   This post focuses on the topstitching!!!  Topstitching is NOT for the weak; there is an "ugh" moment when it doesn't look great, but there is a HUGE rush when it turns out looking great!
IMG_20160904_153351

Auditioning Topstitching Thread Colors
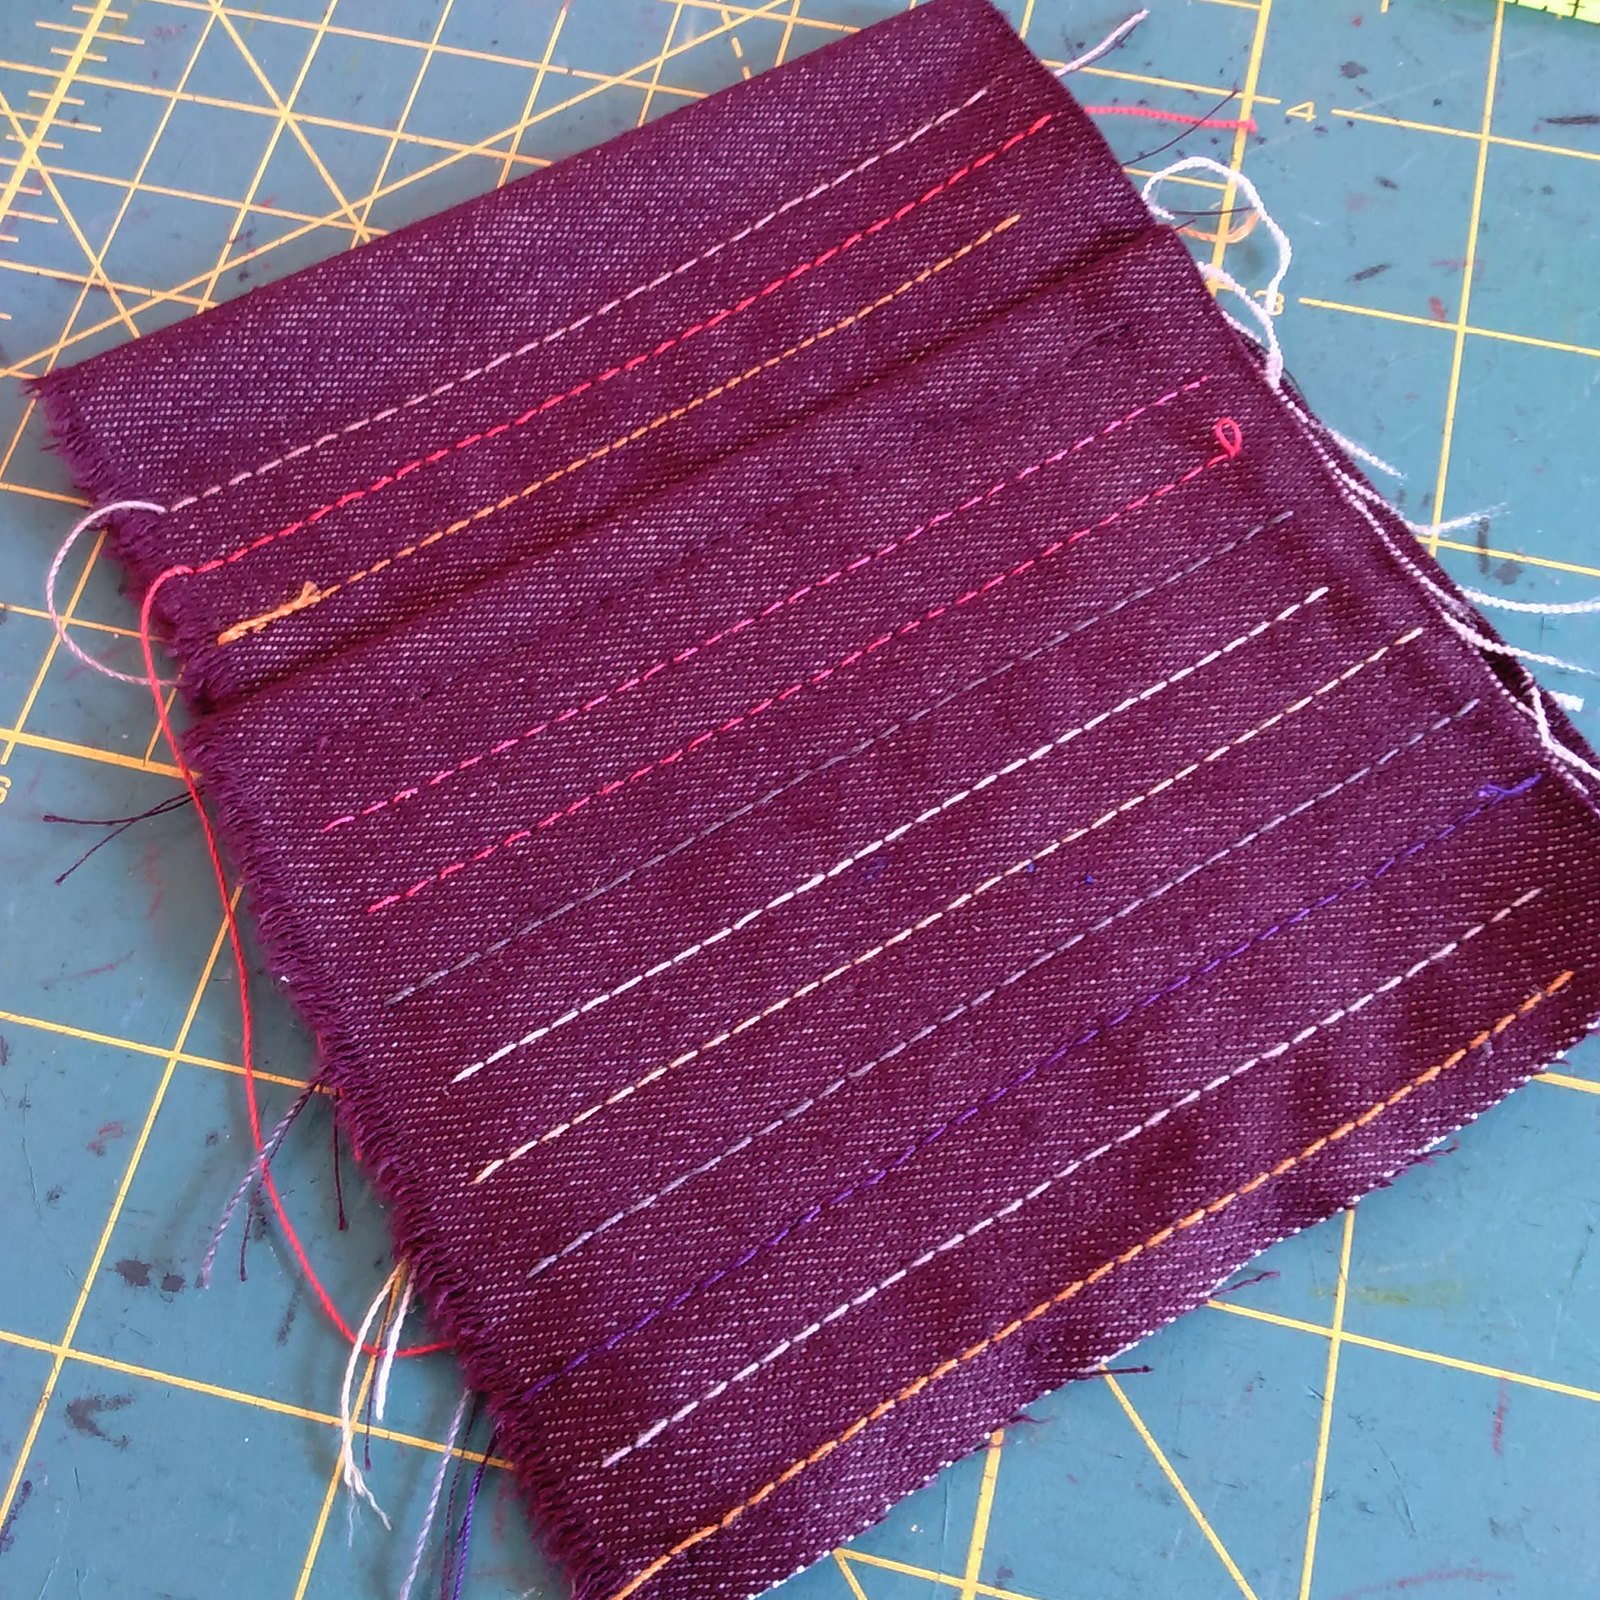
As per Janet Pray's "Sew Better, Sew Faster:  Garment Industry Techniques" Craftsy class, I "auditioned" several topstitching threads on a scrap of fabric.  Some of these threads were regular Coats and Clark poly thread, some were Coats and Clark "heavy duty" or "jeans" thread, and the ones on the wooden spools are 80 weight topstitching thread from the Wawak catalog.  I went a bit overboard buying topstitching thread from Wawak in 2012 after I made my first pair of jeans, but it was also great because I had plenty of choices.
IMG_20160920_211023
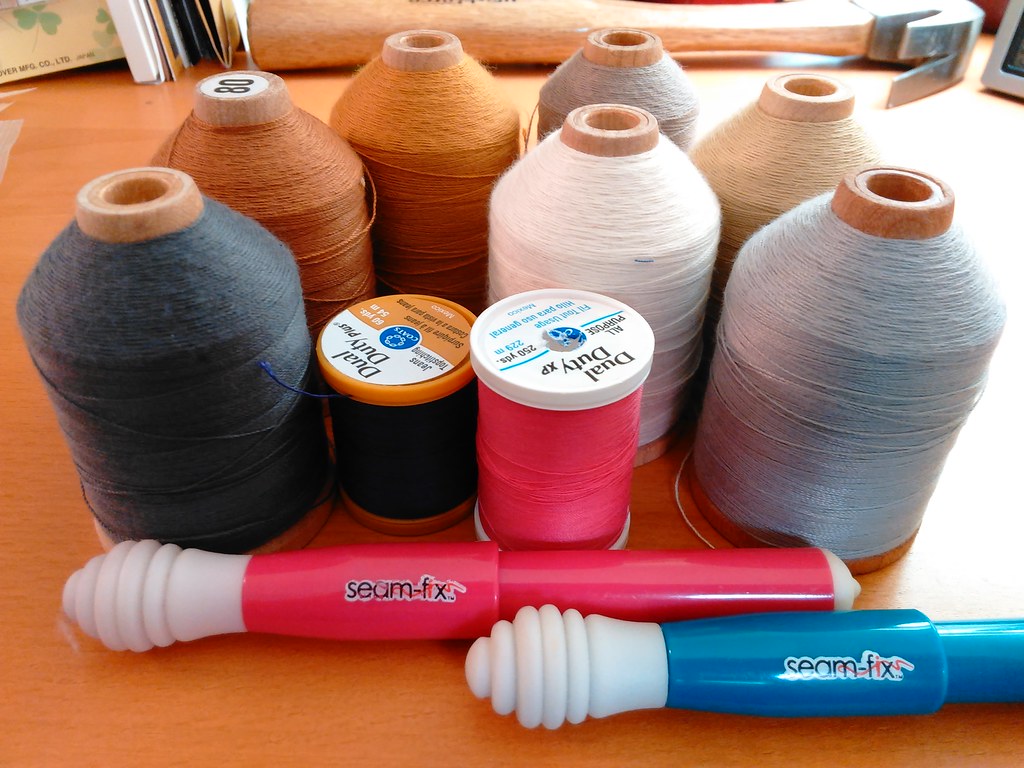
Also included, the "Seam Fix" which I discuss further down...
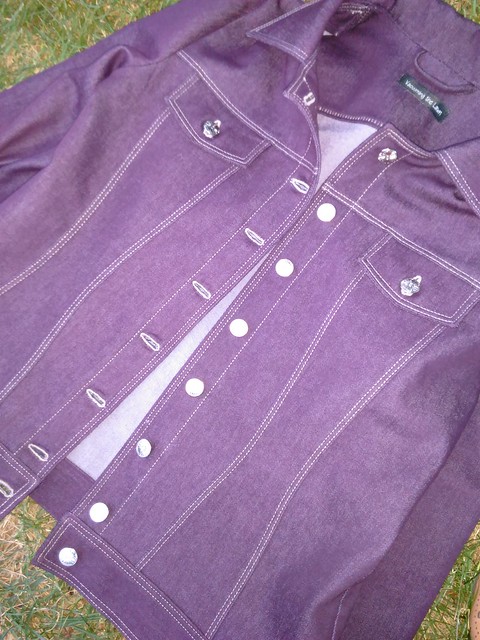
IMG_20160902_161410
Sew, Jean Margaret 
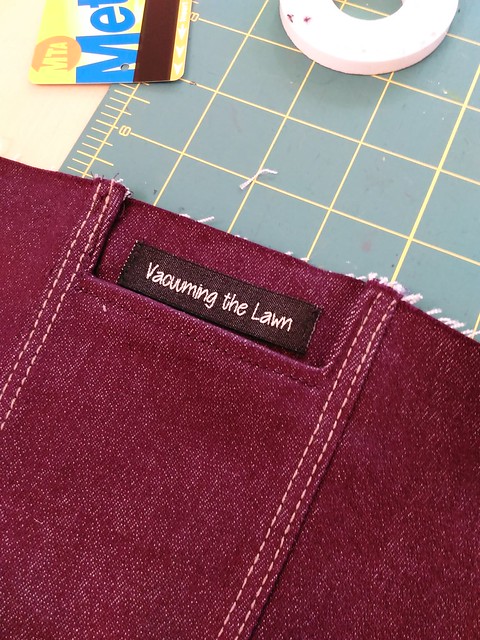
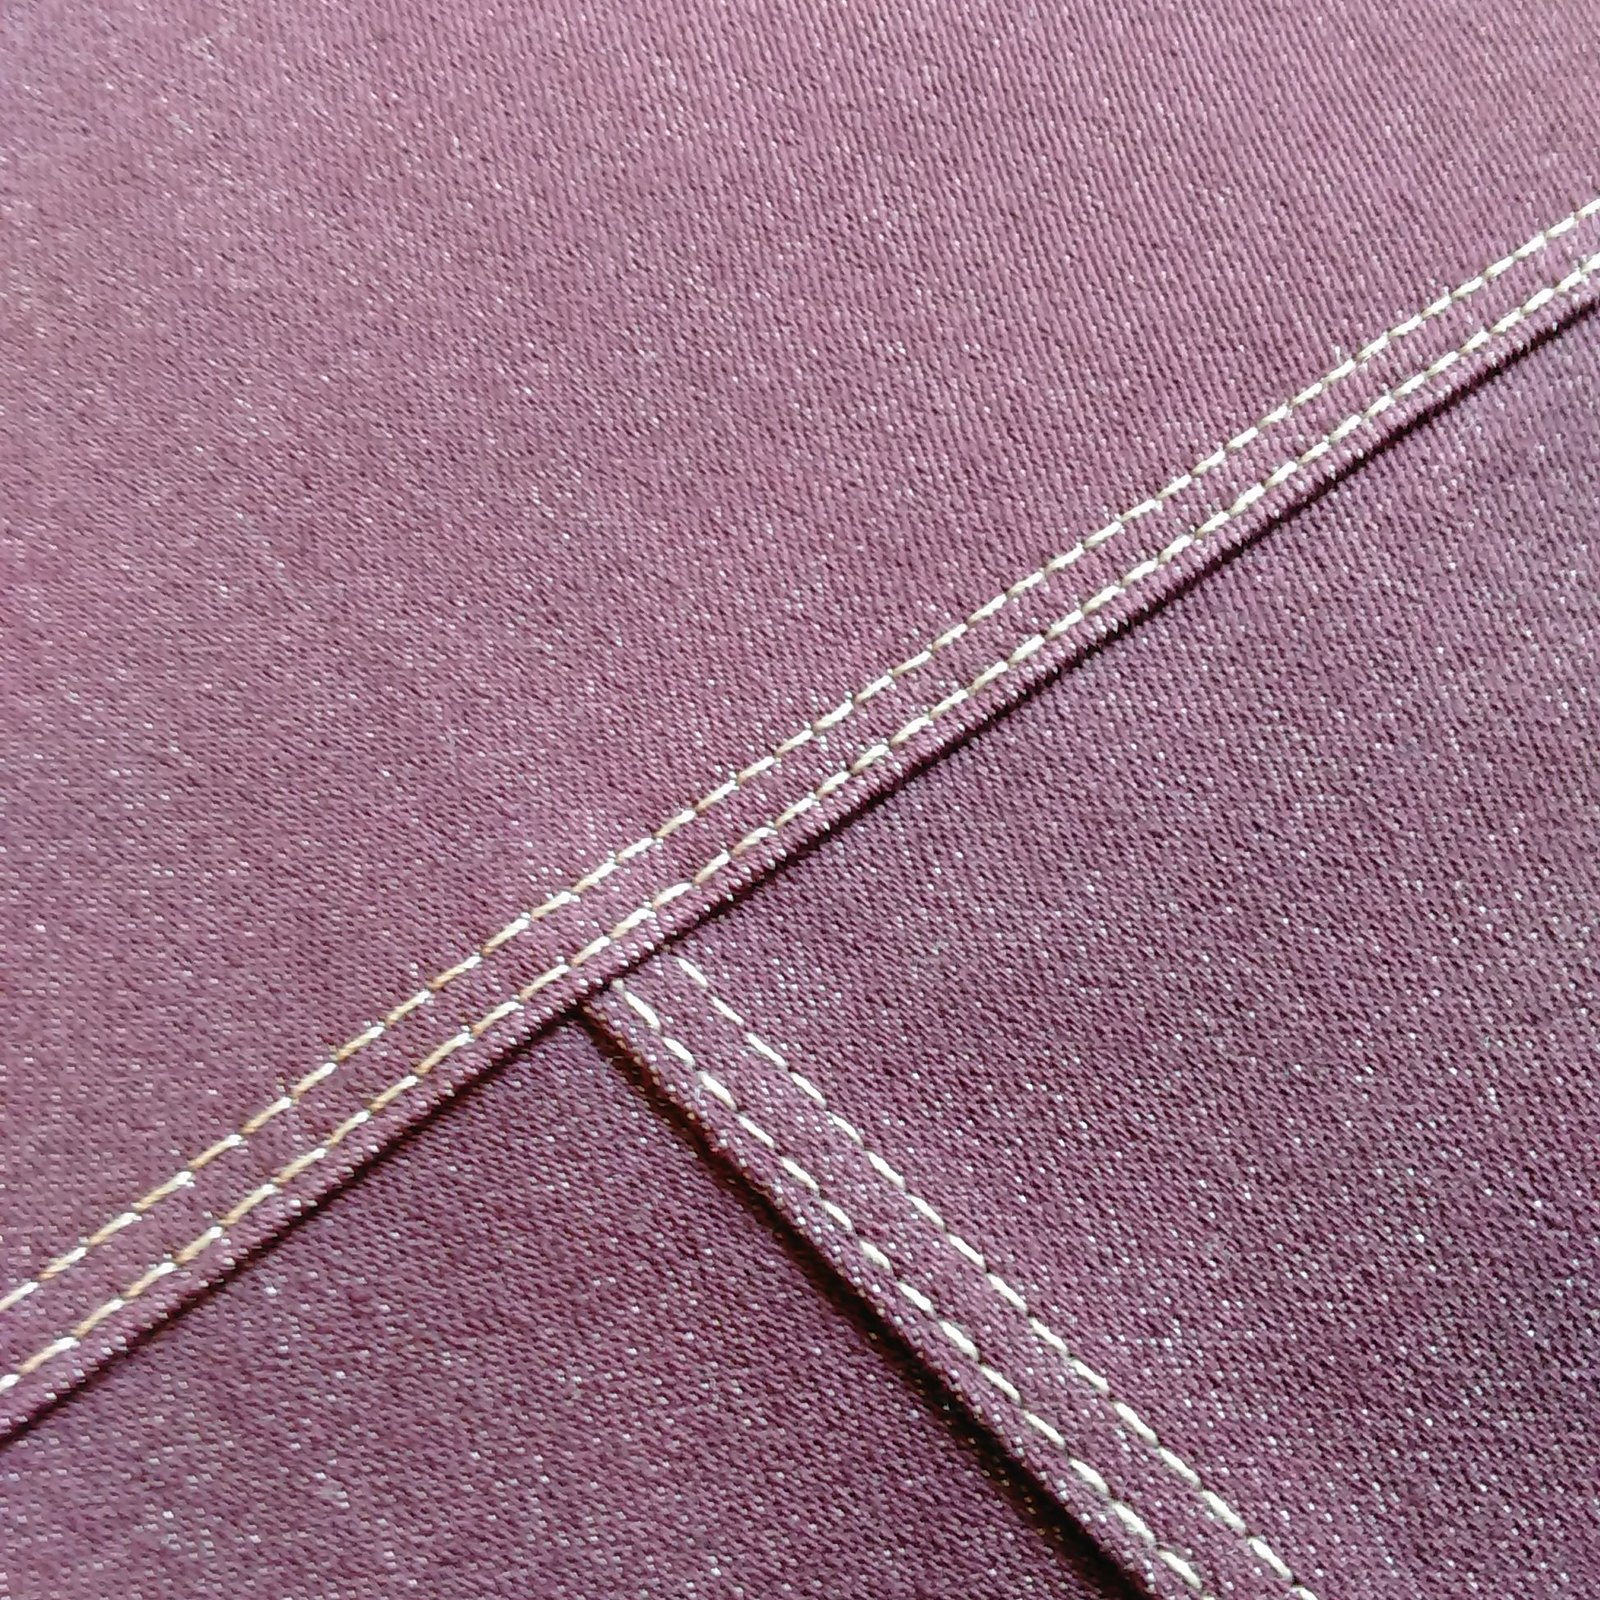
had used pink topstitching thread on her purple jean jacket, so I auditioned that color as well as shades of gray, white, and neutral.  The pink colors had strong support on IG, but I ultimately went with a color called "velvet fog" (from the 80 wt Wawak selection) that felt the most like "me" and also had a vaguely lavender appearance when sewn onto the eggplant colored fabric. It also has a high contrast with the fabric which makes it pop.  The 80 wt thread is also super thick and really stands out, and one spool of that topstitching thread has 750 yards on it, which is fabulous.

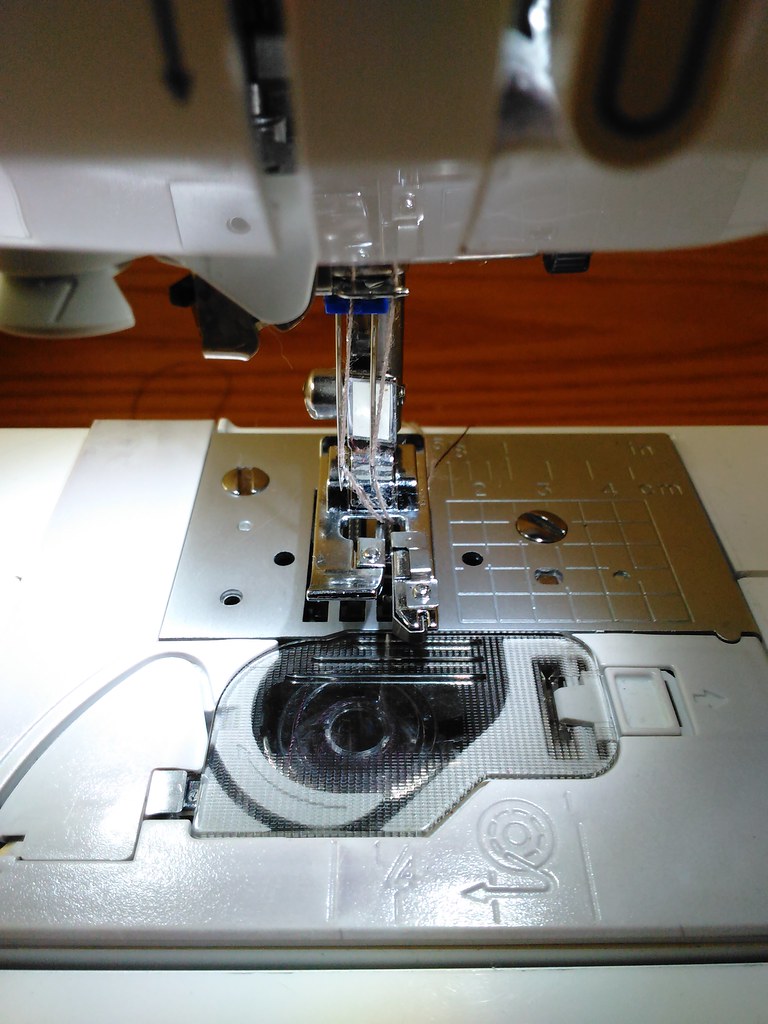
Using bobbins as "spools" for the topstitching thread
I had one wooden spool of the topstitching thread, but was going to stitch from two machines, so I wound multiple bobbins so that I could use the bobbins as "spools".  This thread is really thick, so the bobbins wind up really quick (and then also run out just as quickly).

IMG_20160911_085725
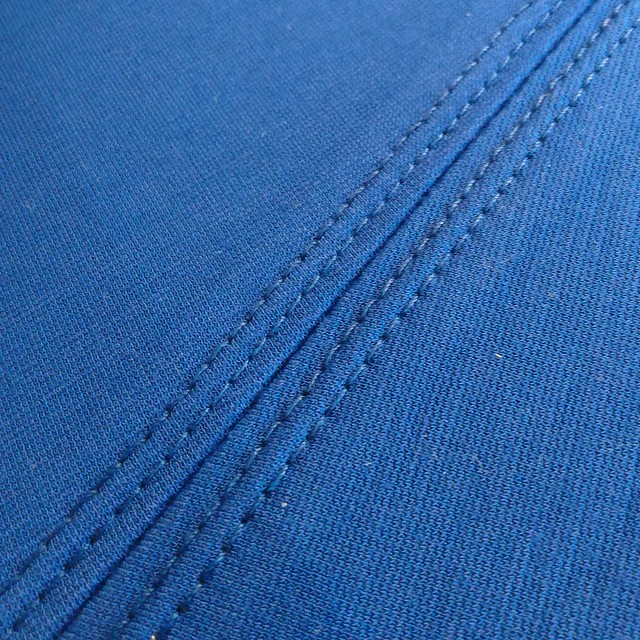
Two rows of topstitching:  twin needle or a single needle stitched twice?
Janet is totally anti-twin needle; the StyleArc directions said to use a twin needle as much as possible.  I wound up doing a combination of both twin needle and a single needle stitched twice, as below.

Hammer Time vs folded up fabric vs the Jean a Ma Jig
For some but not all thick intersections, I used a hammer to flatten the seam allowance (using a scrap between the fabric and the hammer) and a folded up scrap behind the presser foot to keep the foot level. For SUPER thick intersections, I hammered the seam allowance and used a Jean A Ma Jig (hump jumper) which worked like a charm!

Stretch Twin Needle Stitching
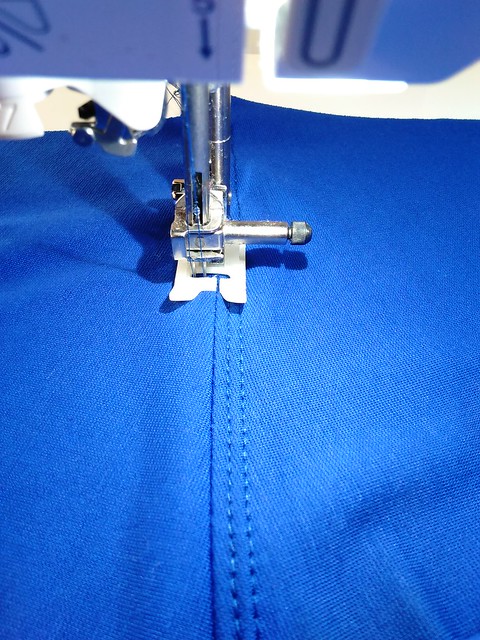
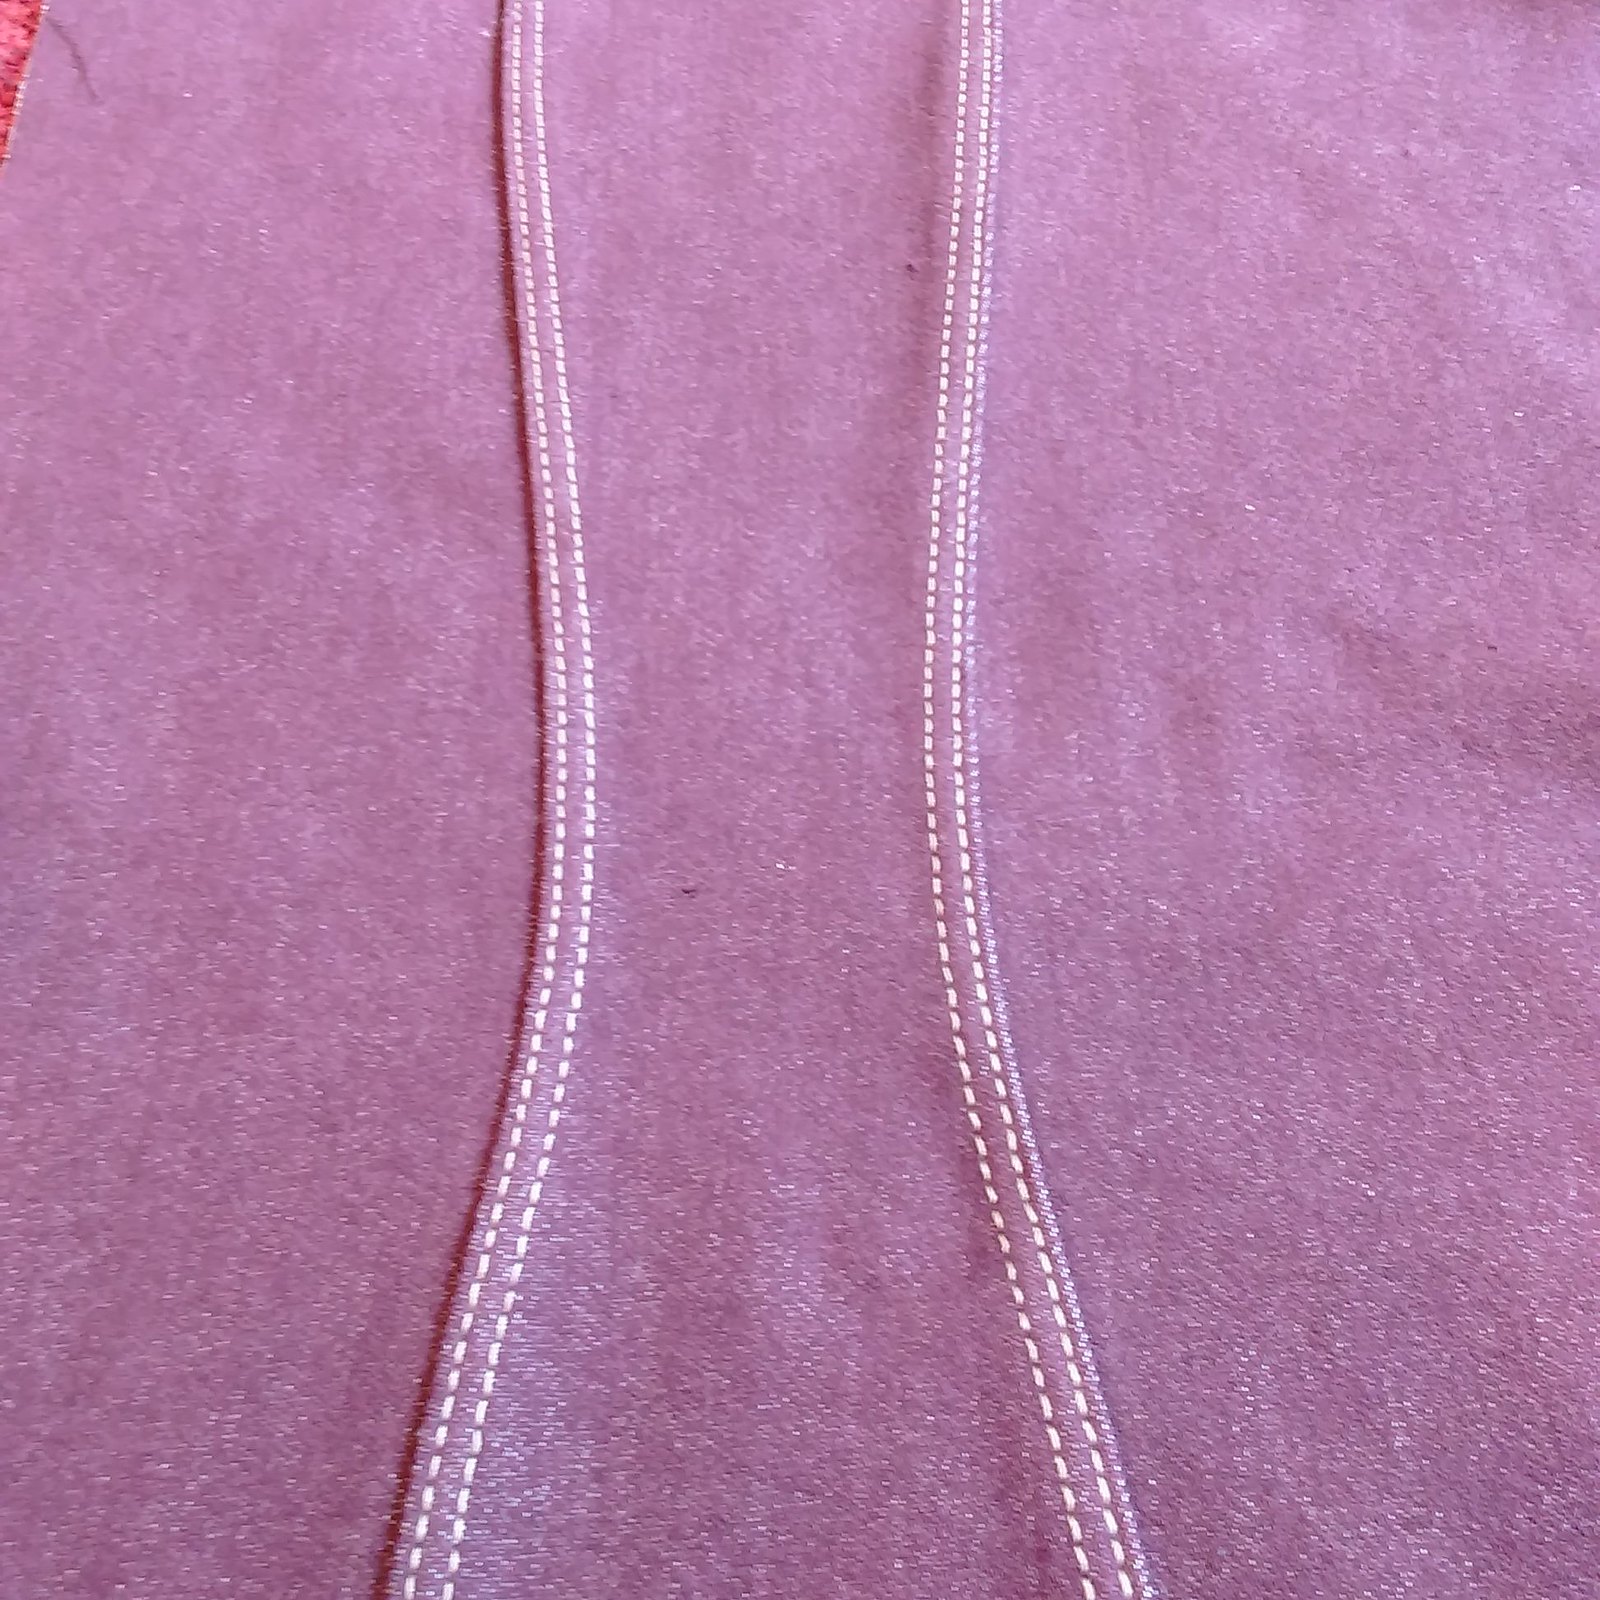
For any seam that was topstitched that was either straight or curvy, but did NOT have a corner ,I used a stretch twin needle (since I was using a stretch woven) on my Brother Project Runway sewing machine.  I really needed help to keep the stitching straight, so I used the overlock foot that came with my BabyLock Soprano.    The overlock foot has a wide and deep ridge on it that I could put the non-topstitched part under, and it fit under there really nicely, as the topstitched part is always on multiple layers (like the seam allowance is pressed under the topstitched part).
IMG_20160920_210821
By some small miracle, the stretch twin needle I used just barely fit into the opening of the overlocking foot, on the 1.5 4.5 setting, which also made it the perfect distance from the edge.

I used regular Coats and Clark poly thread in color 3190 in the bobbin for all stretch twin needle stitching.

I will say it was not easy to get the topstitching thread through the eyes of the twin needle.  This required a little bit of patience, as well as cutting the thread where it looked "the thinnest" and threading "the thinnest" part of the thread into the needle.
IMG_20160903_114153
Also I could not use the thread cutter on my Brother, as it would seem to get jammed up so I cut the threads by hand.  I actually put a sticker over the "cutter" button on my machine as a reminder to NOT press it.

When I started stitching, I held the long thread tails out of the way.

IMG_20160903_105235
Single Needle Stitching twice
When I sewed my Jalie Eleonores, I had written that you can't pivot with a twin needle, and a reader said that you can.  I really had trouble doing this, and definitely need to practice more.  So instead, for any topstitching that had a corner, I used a single needle on my BabyLock Soprano, twice.

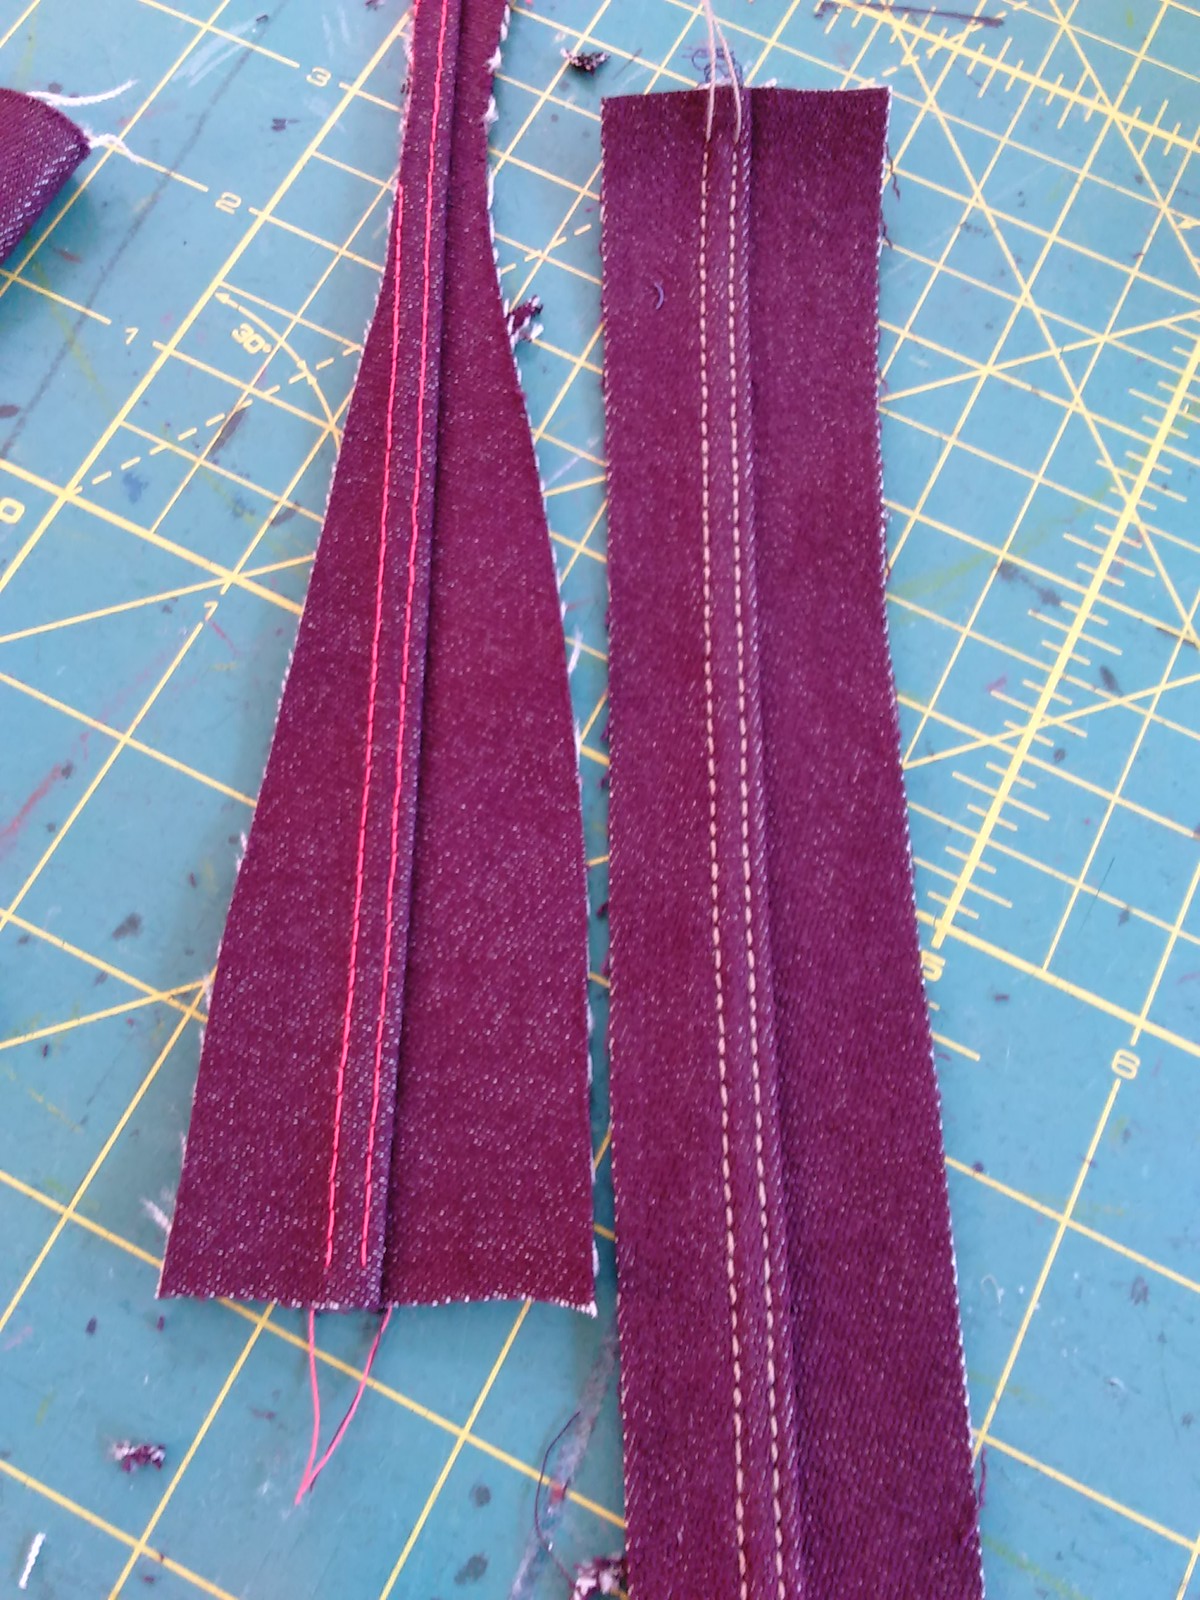
For the first pass, I used my "stitch in the ditch" foot which has a flange.  I put the edge of the fabric up against the flange, and stitched at 0.5, 3.5, 4.0
IMG_20160903_103131
Stitch in the ditch foot

For the second pass, I used the quarter inch quilting foot that came with the machine.  I put the edge of the fabric up against the flange, and stitched at 3.5, 3.5, 4.0
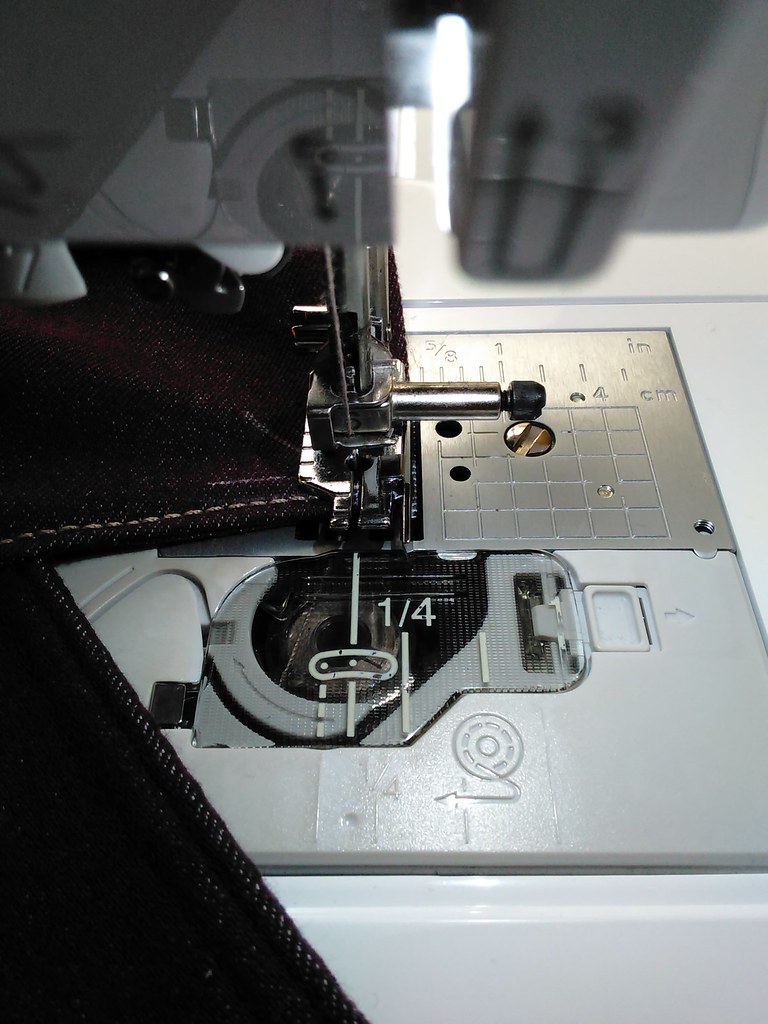
IMG_20160905_103806
1/4" quilting foot

As far as knowing where to pivot, I drew with my Chakoner and a quilter ruler 1/8 and 1/4 from each edge with a diagonal line to show exactly where the corner is.  Of course, when your stitch length is really long for topstitching, it is hard to "hit it" right on that spot.  Sometimes it's a little short; sometimes it's a little long; sometimes you nail it.
IMG_20160905_103510

IMG_20160904_144024
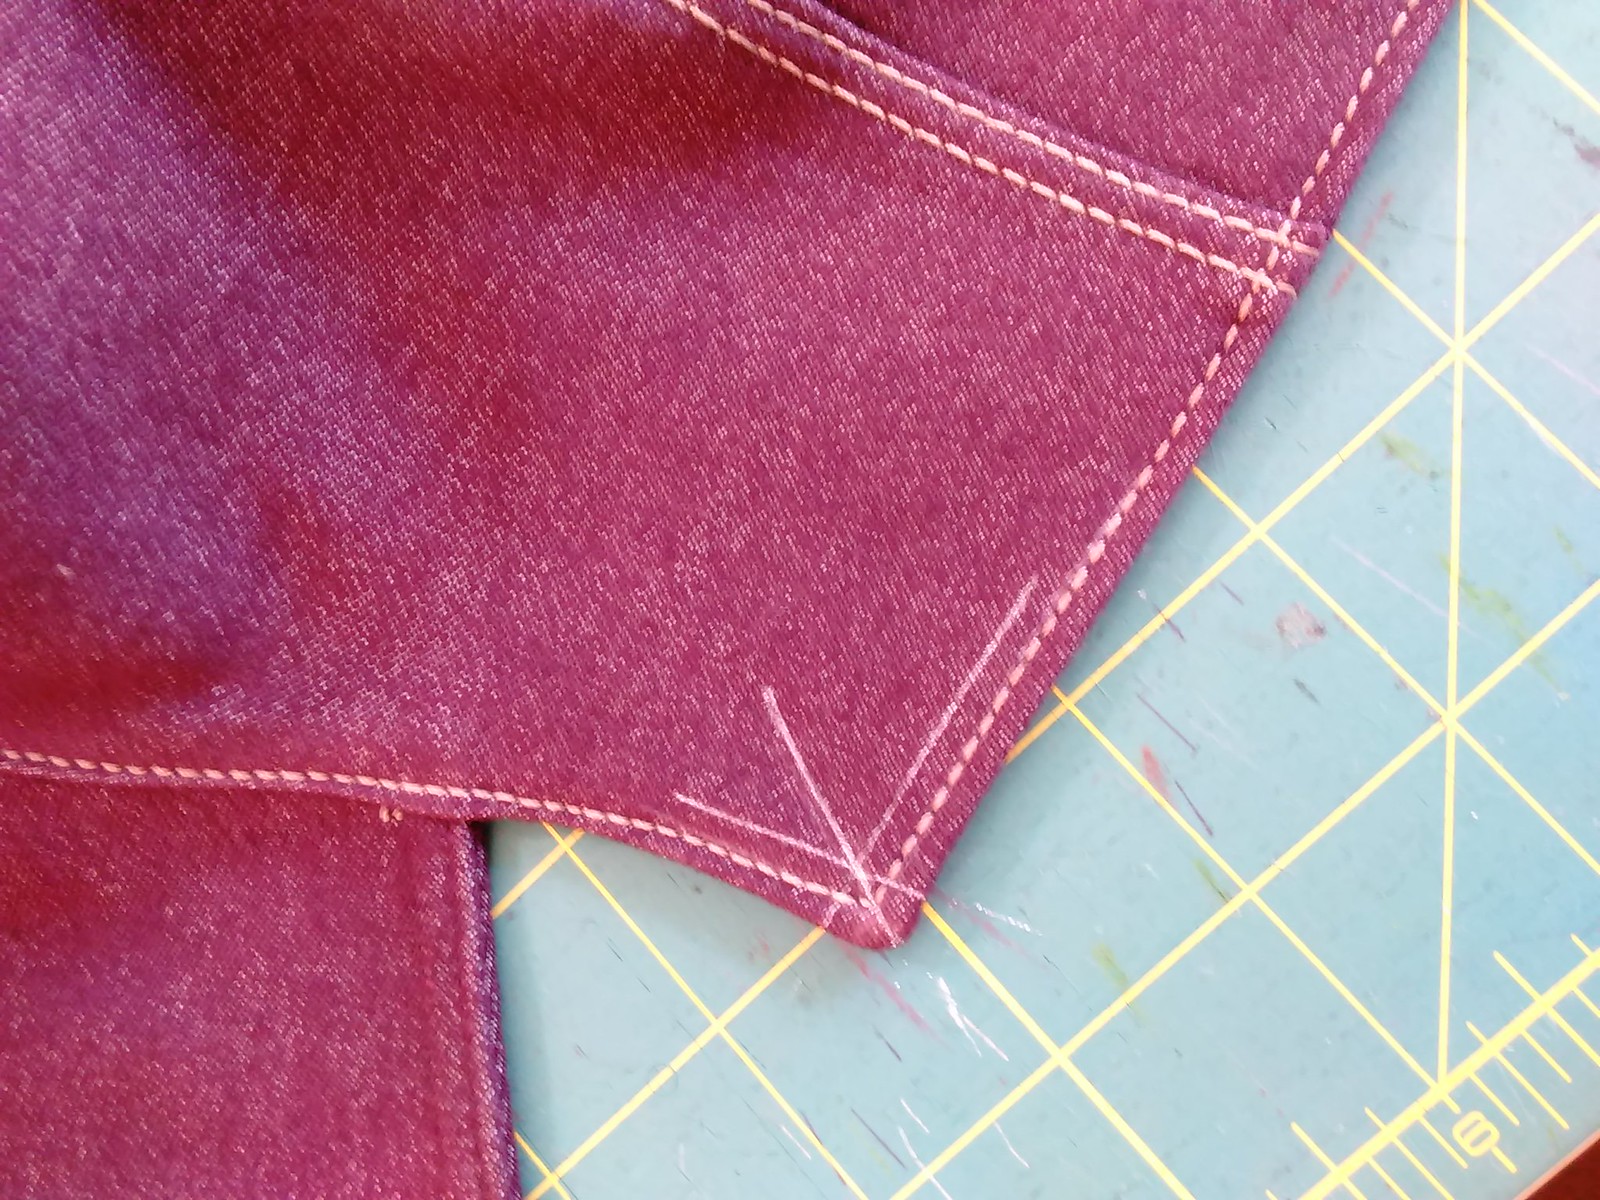
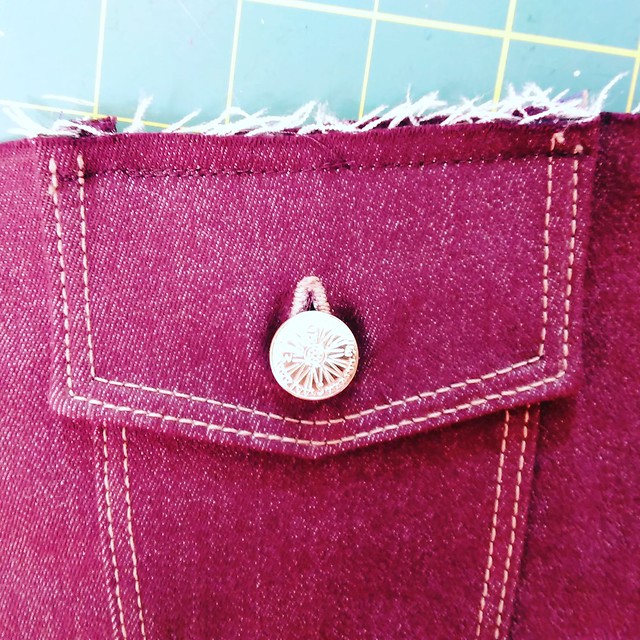
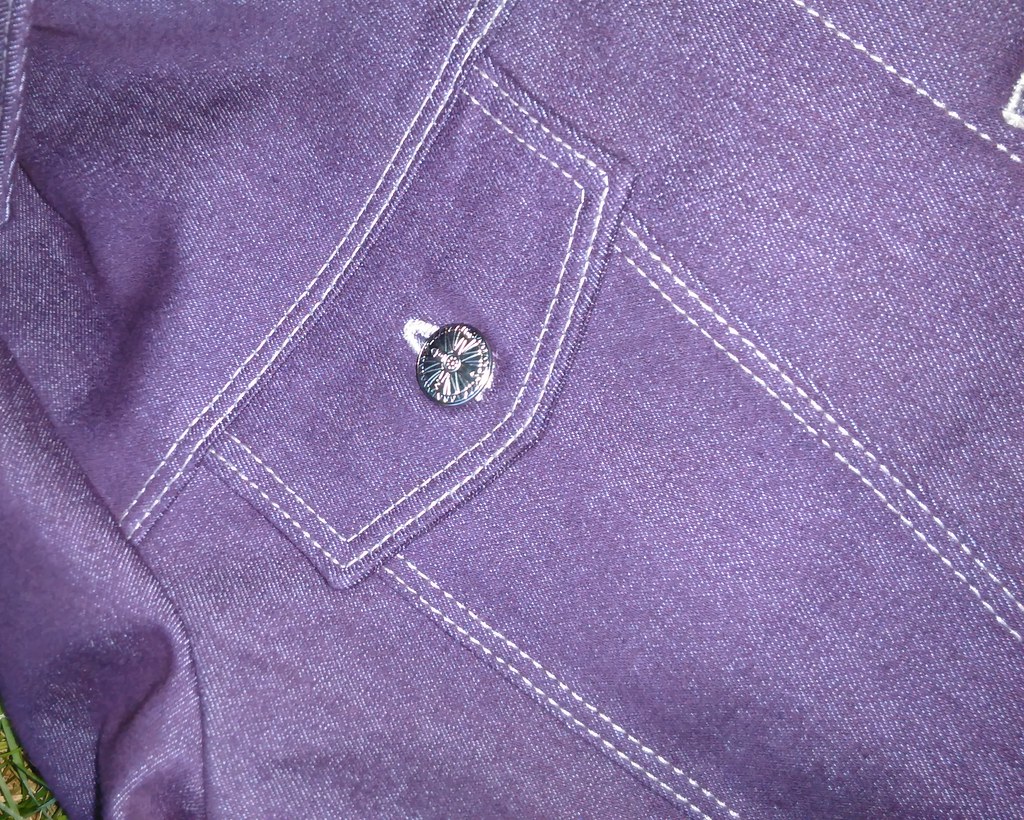
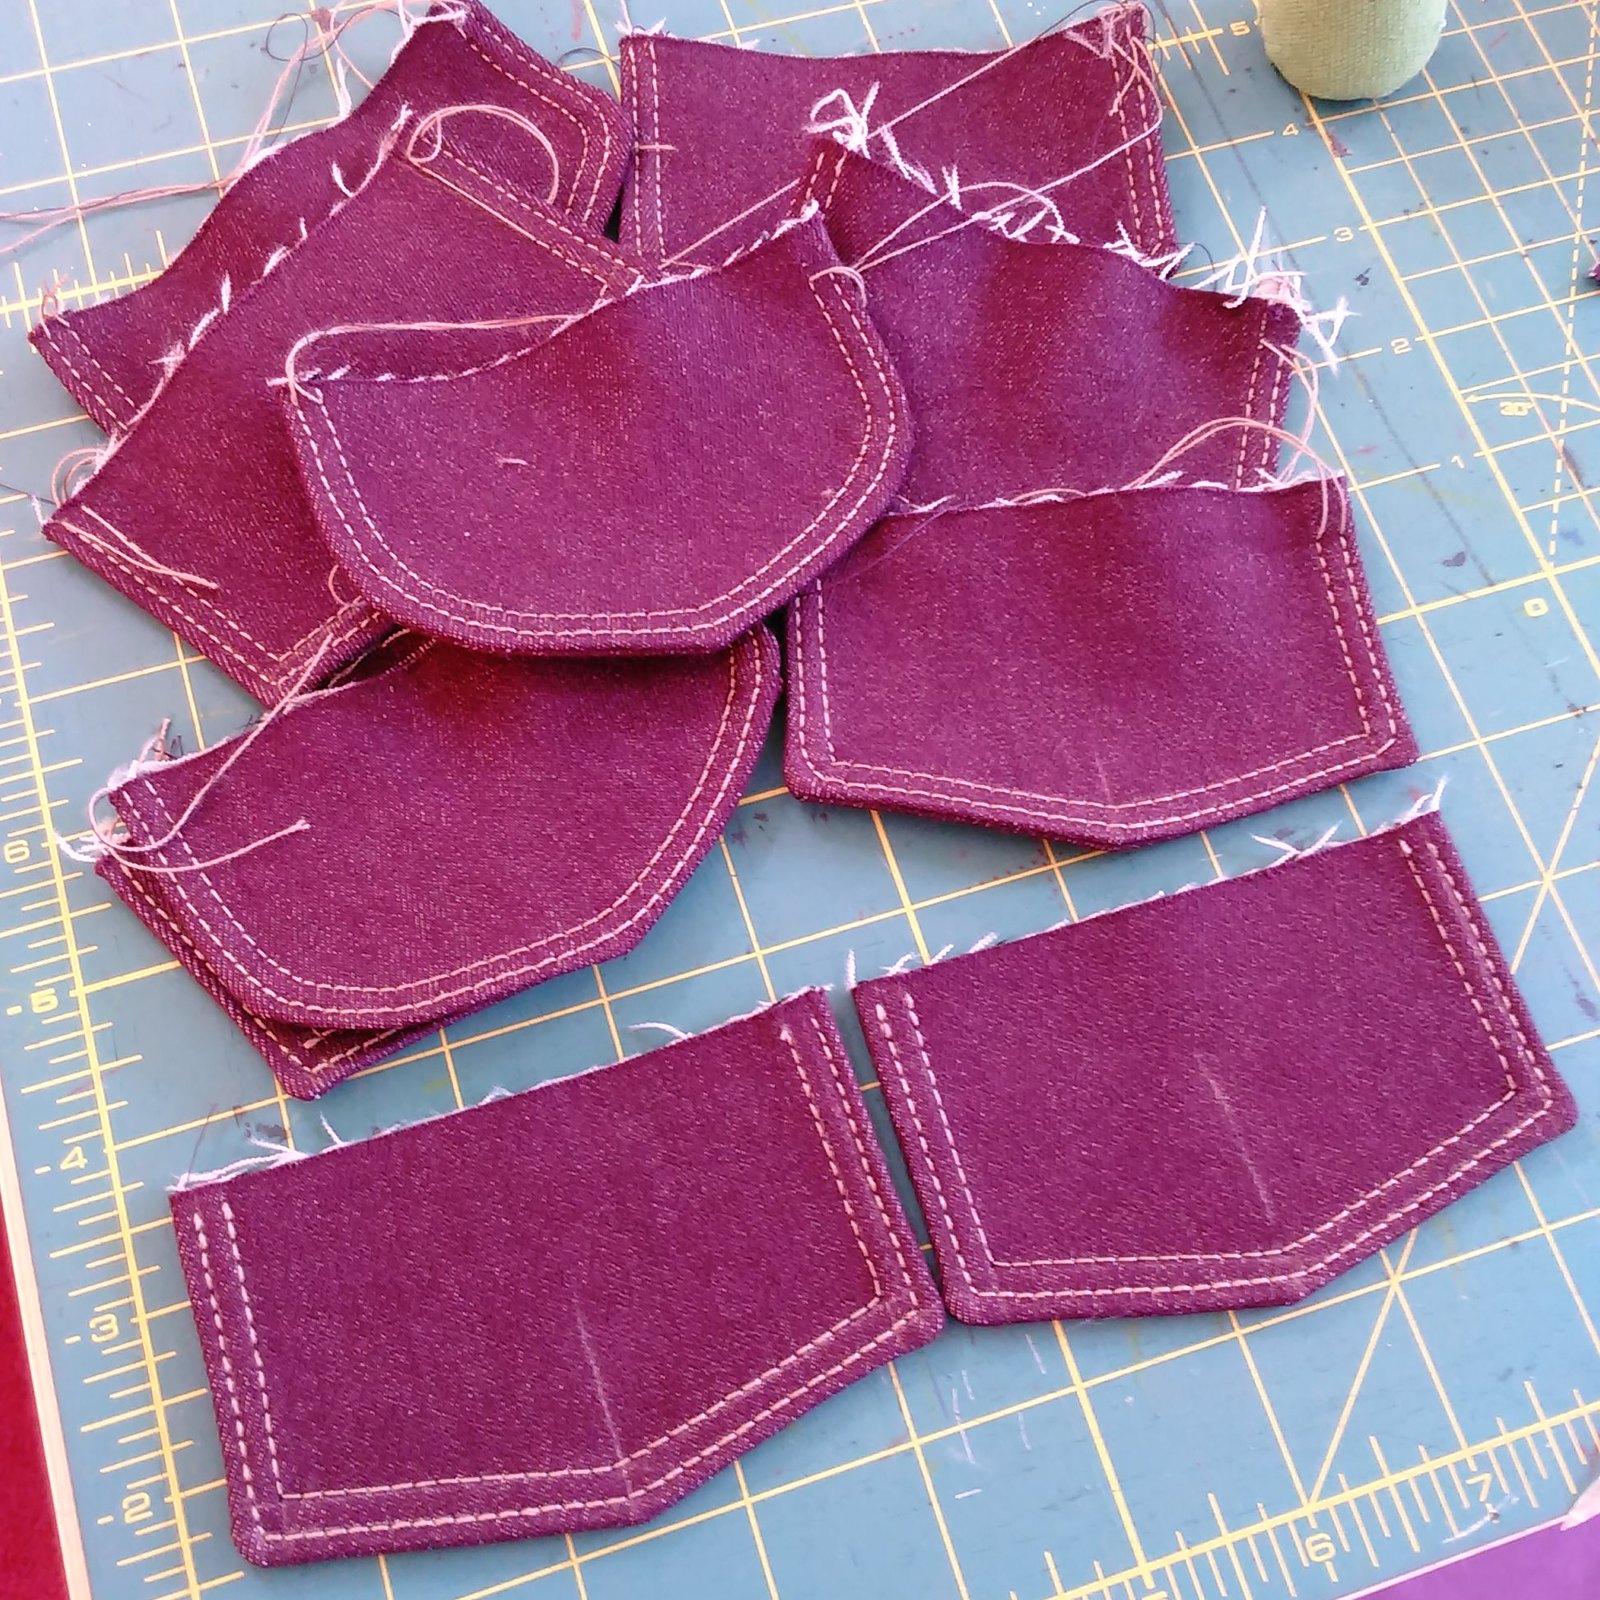
I tried a few different pocket shapes and also tried twin needle before using a single needle twice on the flaps, choosing the best ones, and calling it a day.
IMG_20160903_155627


Since I used a size 14 topstitching needle for this, I could use my automatic threader and it worked just fine.  However, I could not use the thread cutter (just like my Brother) as it didn't seem to want to cut the thread and so I cut the threads by hand.  I also put a sticker over the "cutter" button as a reminder to not press it on this machine either.
IMG_20160912_190625
Admittedly, totally wonky stitching here on the corners, but most people are never going to look that closely, and it was the best I could do.

Single Needle Stitching just one row and using the "reinforcement" stitch to secure the stitching
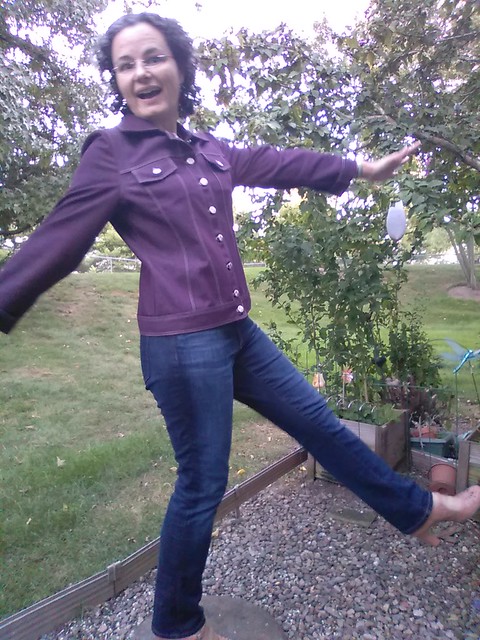
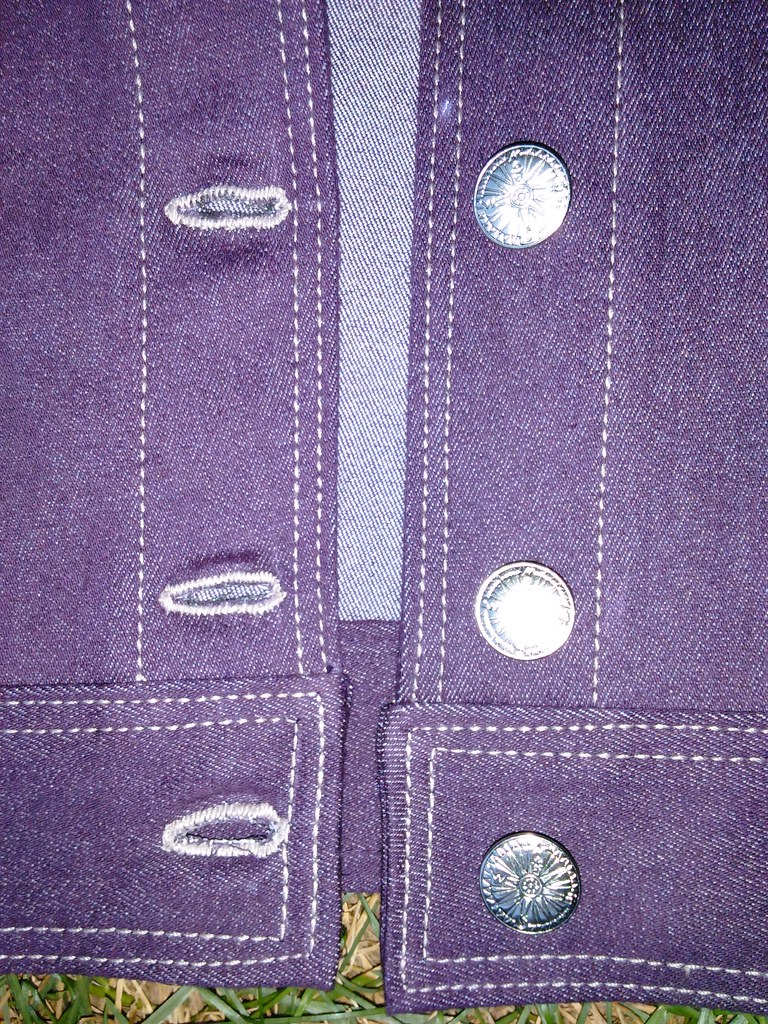
The "placket" of the jacket had just one row of stitching down the front, so that meant the top of the stitching would be out in the open for all to see and not covered by a seam allowance (as most of the topstitching was--like those front panels--where the topstitching starts and stops is hidden within the seam allowance as the jacket is sewn together.  For those places I did not reverse and go forward like I normally would--I just started stitching, holding the long thread tails while I stitched.)

So, for the single needle row of stitching down the sides of the placket, instead of starting going backwards and forwards, I used the "reinforcement stitch" on my BabyLock Soprano, which creates a really cute little knot.  I used Fray Check on this knot to help.
IMG_20160905_131351
I put a piece of painter's tape on the bed of my sewing machine 1 3/8" from my needle to stitch that topstitching row, 0.0, 3.5, 4.0

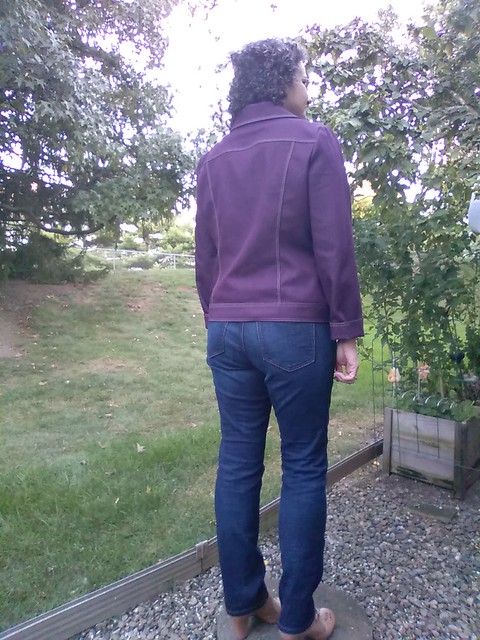
Single Needle Stitching just one row and using backwards/forwards to secure the stitching

When topstitching the band, the reinforcement stitch didn't look so hot, so there I stitched forwards and backwards, then used Fray Check on that area as insurance.  I also started and stopped the stitching on the side seam, which felt like the most inconspicuous place.

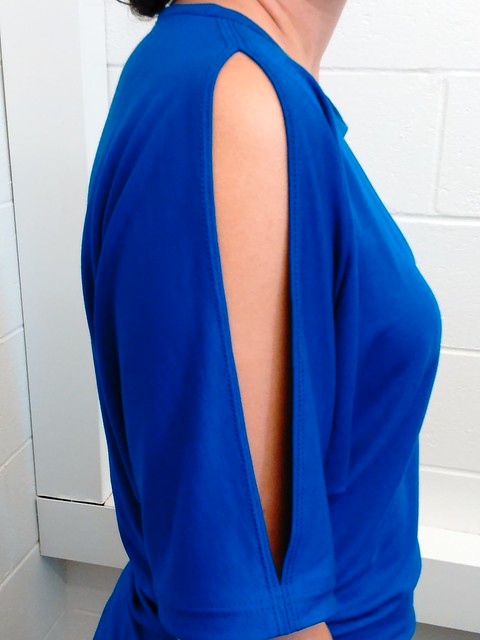
Single needle topstitching on places where the topstitching would show from BOTH sides
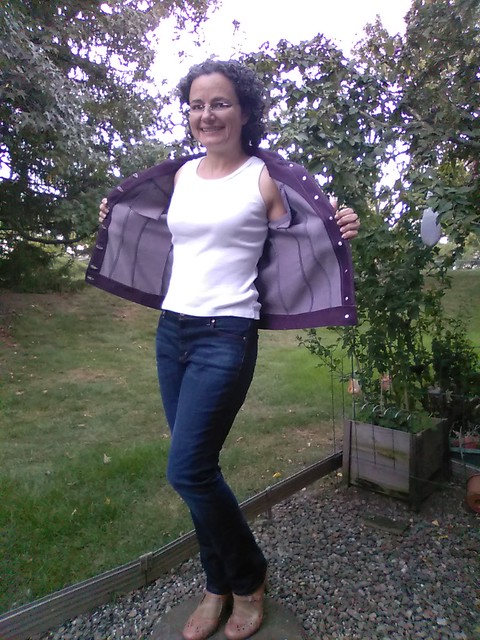
When the topstitching would show from both sides (like the placket) I used topstitching thread in both the bobbin and the needle.  Normally I would use matching regular thread in the bobbin but I had no regular thread that matched "velvet fog" and didn't want to drive an hour round trip to Joann's so I used the topstitching thread in the bobbin too and it worked!  Don't use the threadcutter!  Keep the tails long and hold them out of the way when stitching so it doesn't create a messy ball of thread on the back.
IMG_20160905_111011
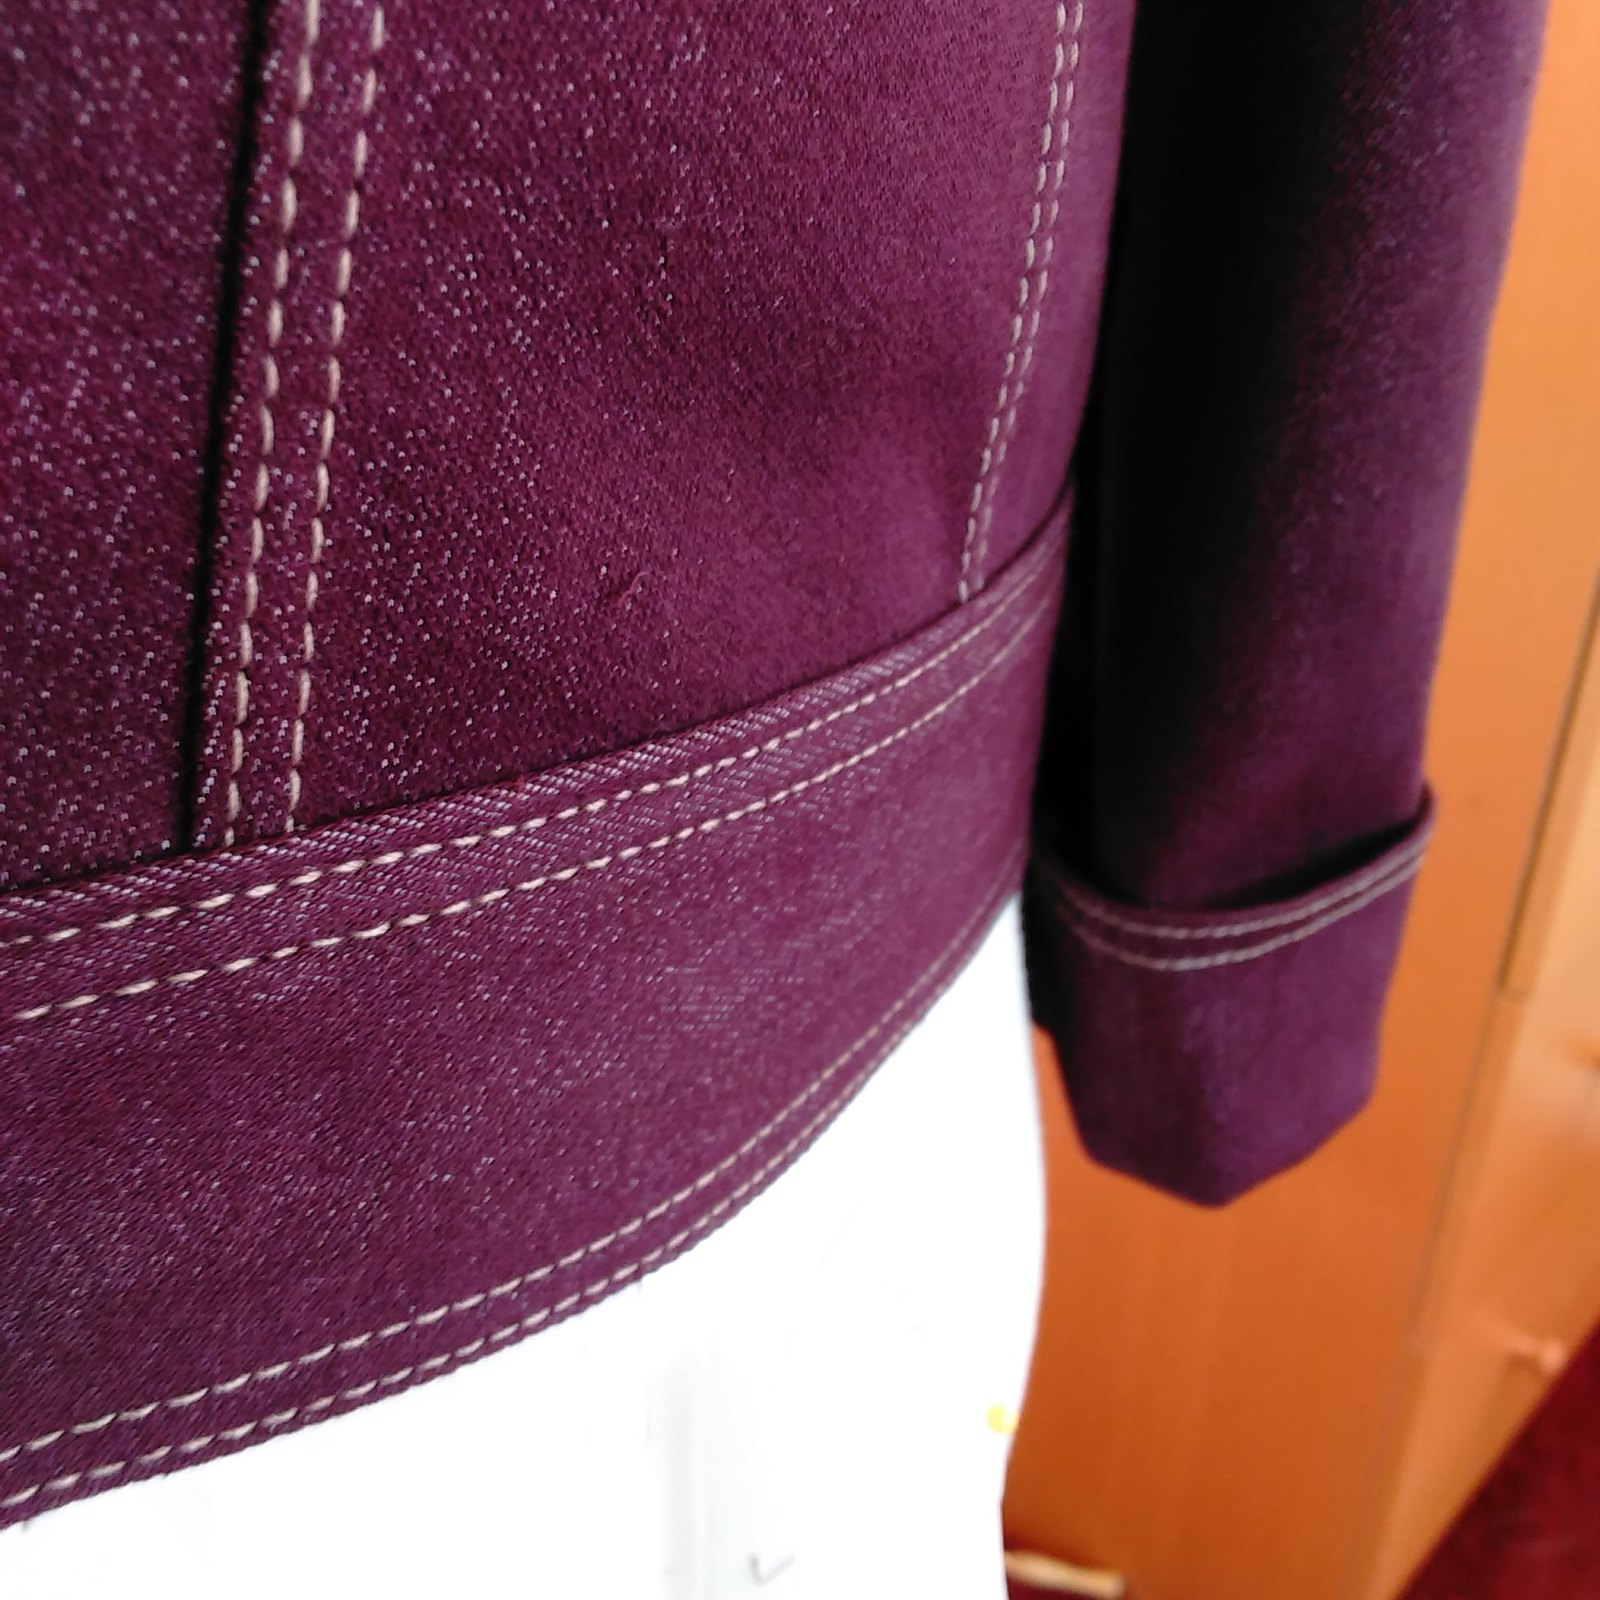
Topstitching on interfaced vs non-interfaced areas
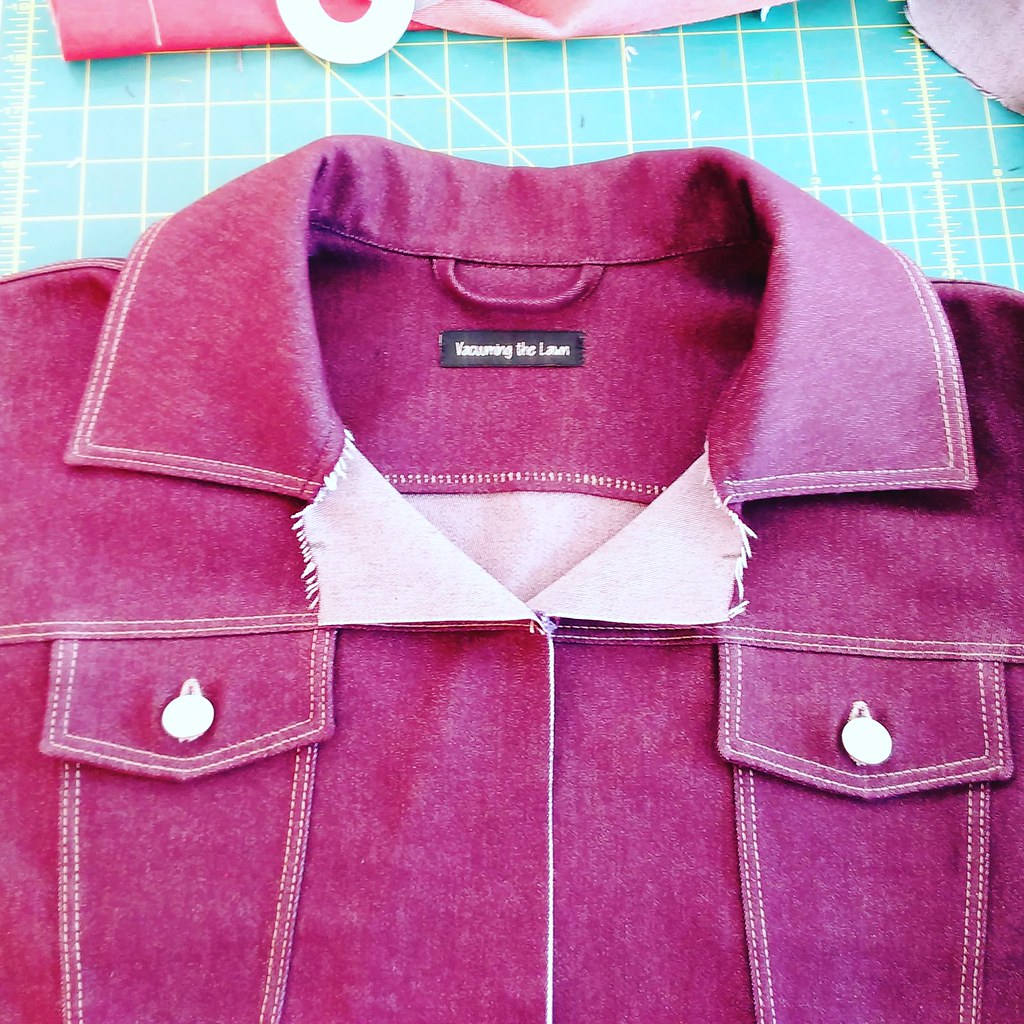
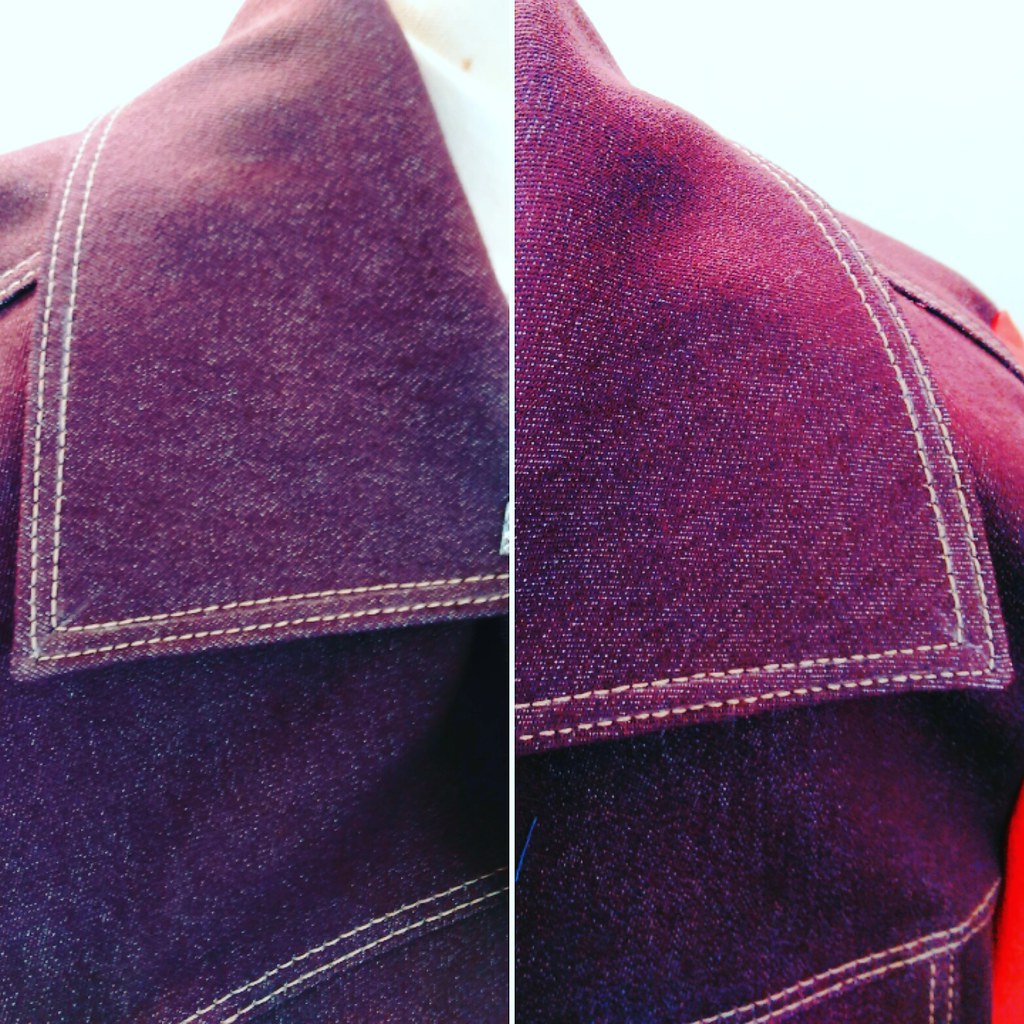
I had not interfaced the cuffs and honestly, the topstitching does not look as good there as it does everywhere else, which was either interfaced and/or stitched on top of the pressed seam allowance.  Next time I will interface the cuffs too.

(NOTE: The StyleArc pattern says NOTHING about using interfacing.  I interfaced the collar, placket and pocket flaps, and next time I will interface the cuffs too.)
IMG_20160911_104352
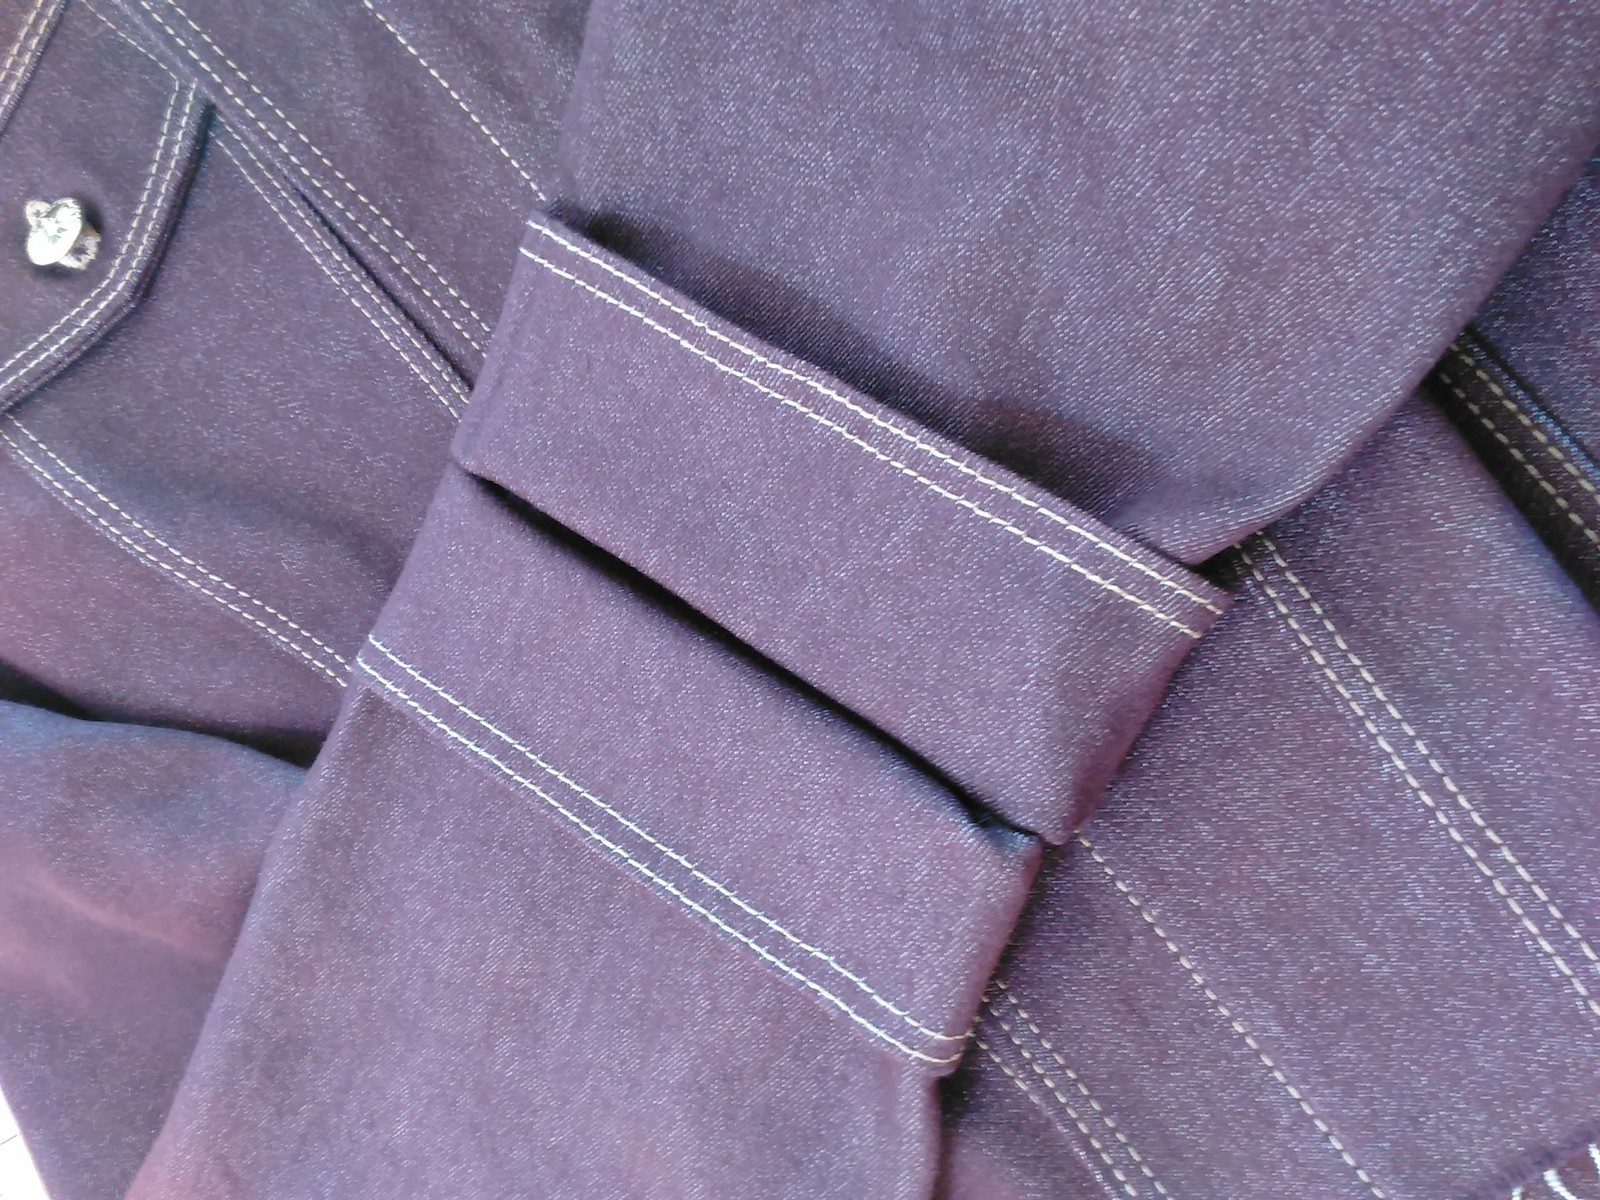
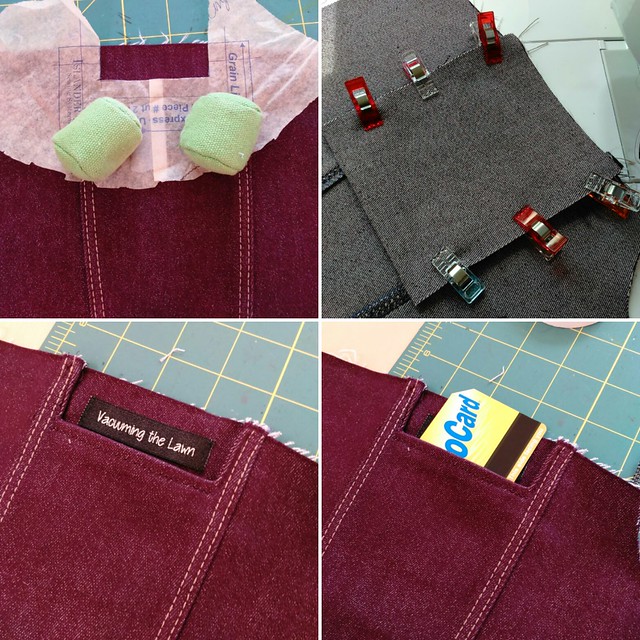
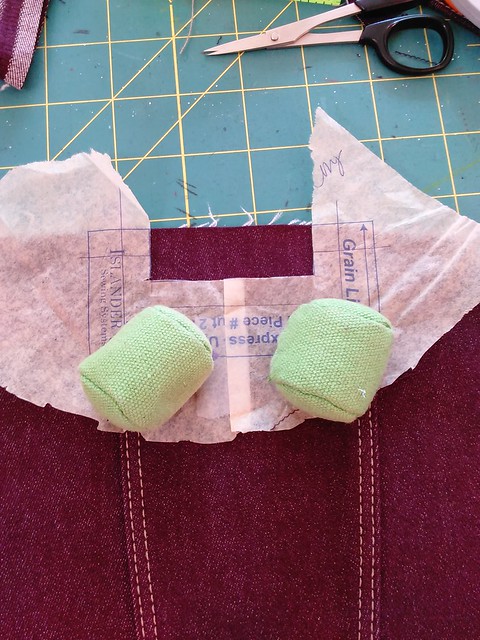
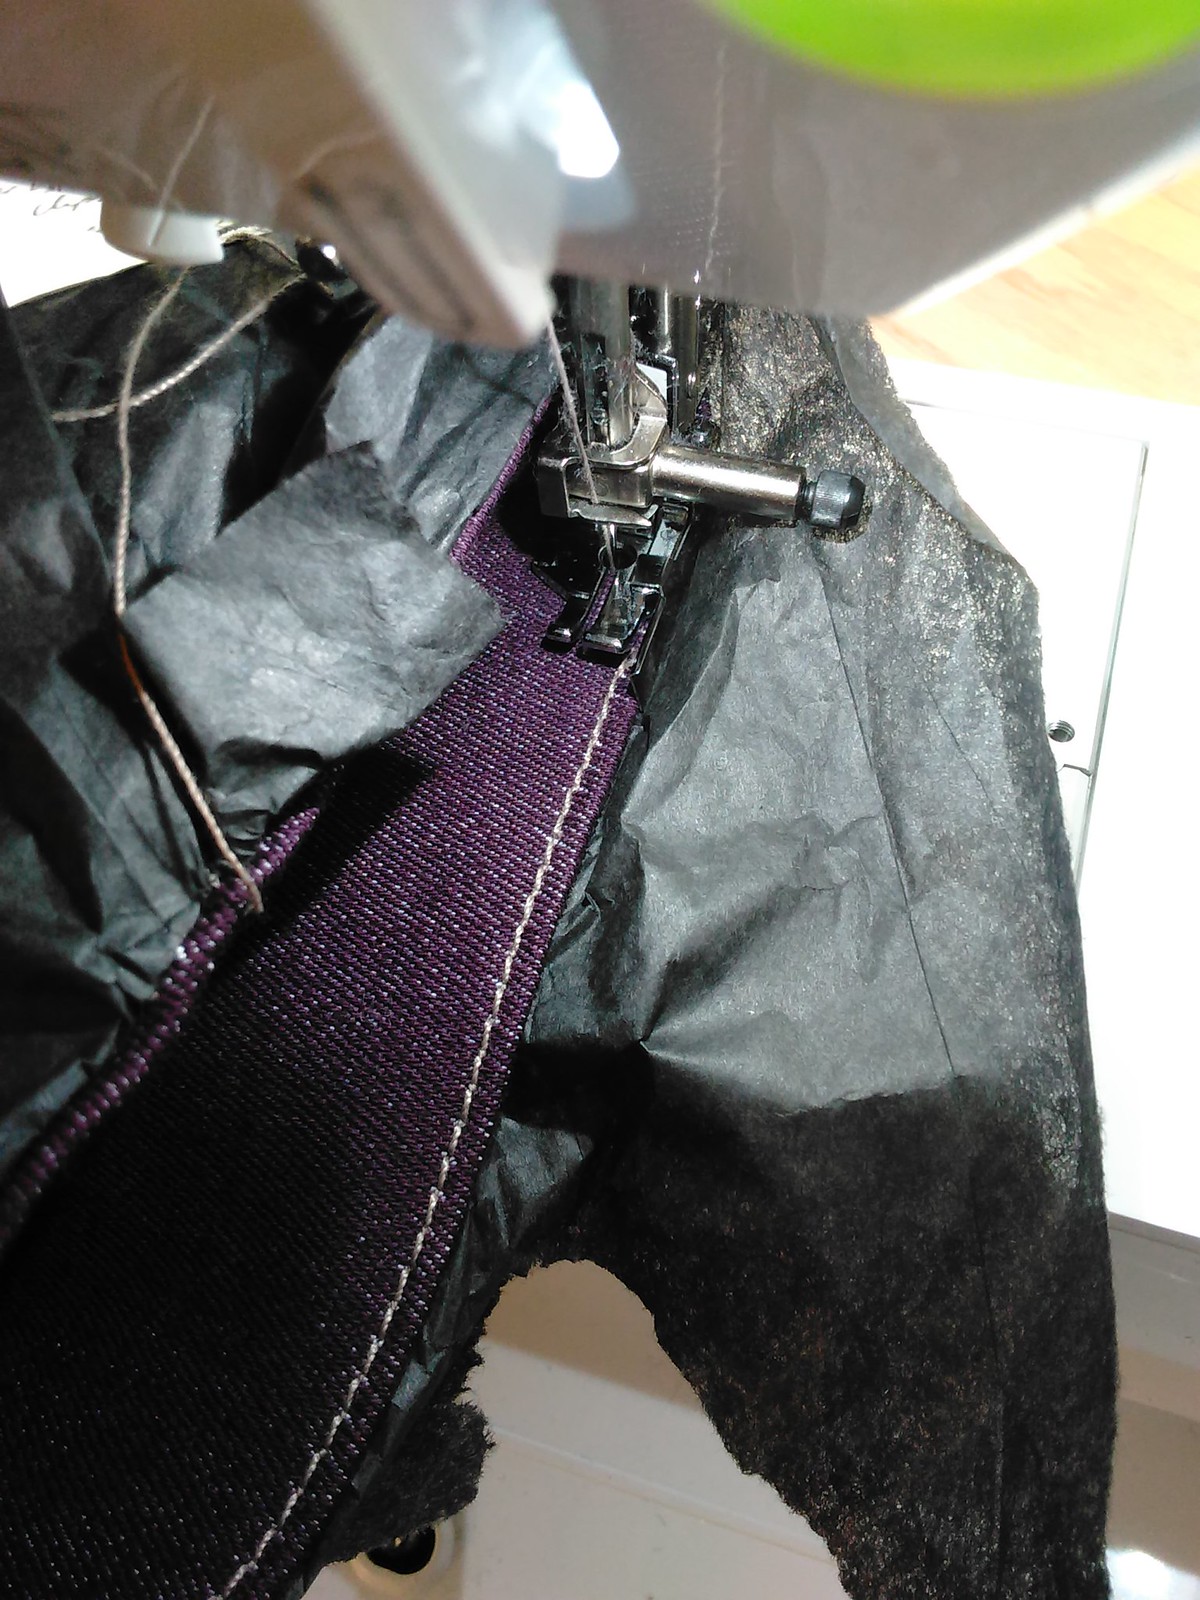
I totally forgot til seeing this picture, I used the "tissue paper" method to keep the cuffs from stretching as I stitched.  If I had interfaced them, I would not have had that problem!
IMG_20160911_090529
Undoing topstitching
I am a perfectionist so I got a lot of practice ripping out topstitching.  Basically, I took my tiny scissors and cut every other stitch, then pulled the fabric apart to release the stitching, and used the Seam Fix rubber thing to help pull out the stitching.  There are parts that are definitely NOT perfect, but I tried 2 or 3 times and felt this was the best I could do.  Looking at my 3 RTW jean jackets, they are not perfect either!

IMG_20160903_083524
Also I did a lot of samples first too, to make sure I got the length and needle positioning down first.  Mainly when I ripped out topstitching, it was because I didn't "hit" the corner right or the two rows of single needle stitching were obviously out of alignment with each other.


Next up...
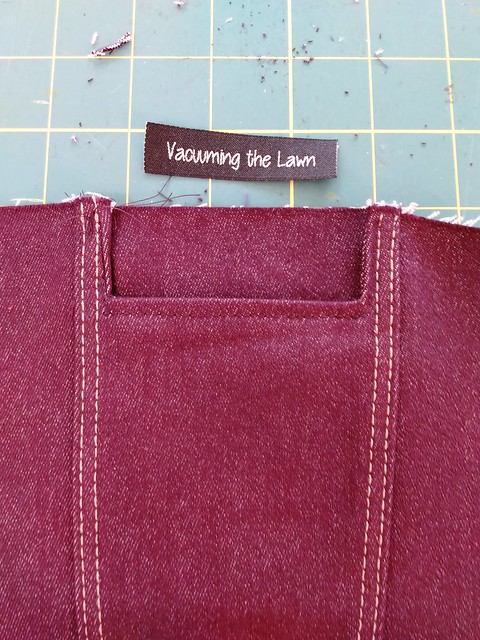
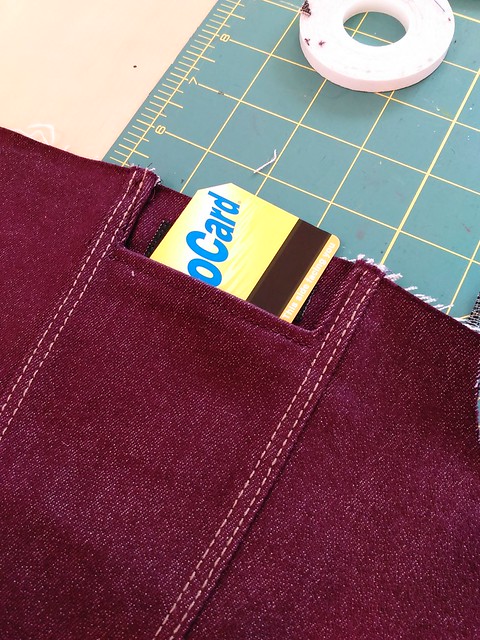
Next post, I'll talk about how I turned the faux pocket flaps into real pocket flaps by adding real pockets.

Be well!


Sunday, September 18, 2016

Epic Jean Jacket Post #1 StyleArc Stacie: Choosing the pattern, Cutting It Out, etc.

IMG_20160912_185302
This has been a dream THREE YEARS in the making, and it has finally happened!
IMG_20160912_185826
I sewed a jean jacket!!!
IMG_20160912_185858
If you follow me on IG, you saw the progress of this jacket--thanks for cheering me along!!
IMG_20160912_185225
Side
IMG_20160912_190148

Three years ago I watched Janet Pray's "Sew Better, Sew Faster: Garment Industry Secrets" class.
I watched the 3.5 hour class from start to finish TWICE.
I took copious video notes the second time.
Because of that class, I use an Elna Press, Chakoners, and clapper.
IMG_20160912_185425
The class comes with her Islander Jacket Express pattern, which is only for wovens and not supposed to be used with stretch.  She sews a red denim jean jacket and of course this made me want to make a red denim jean jacket.
IMG_20160912_185613
Cue the years of searching for the perfect red denim that doesn't stretch....no where to be found.  Janet's response to someone else's question about this was to use Google.  I emailed Craftsy asking them to sell the fabric--their response was that it is tricky to find.  Beth from SunnyGal made hers out of red denim tablecloth--I started trolling ebay for red denim tablecloths, none to be found.  Every visit to Kashi--do you have red denim?  No.  Every visit to Mood or any other fabric store--either they didn't have it or it wasn't quite right.  I ordered some red denim from the Mood site, it was way too thick/stiff.  Ordered some red denim from Nancy's Notions, it was too primary red.

In the meantime I bought the StyleArc Stacie jacket in size 12 in Feb of 2014--yes, the physical pattern, shipped all the way from Down Under.  I had previously made a knit shirt in size 12 and just felt like the jacket was going to fit.  The sample of fabric that came with the pattern stretches slightly so....
IMG_20160918_132722
I had a 4 day weekend for Labor Day weekend this year and decided NOW is the time to sew the jacket.  Meanwhile, Gertie recently released her cropped jean jacket pattern and I was left to decide which pattern to choose, like the Jean Jacket version of House Hunters....cue the HH decision music....


  • Pattern #1:  Jacket Express, which has full instructions (written and video) but is on the boxy side.
  • Pattern #2:  StyleArc Stacie:  minimal instructions, but fabulous style lines and  is more fitted than pattern #1.  I kept going back to Sew, Jean Margaret's post where she made this jacket and it looks fabulous.
  • Pattern #3: Gertie:  cropped styles look great on me, and I will probably make this sometime... but went with pattern #2, the StyleArc Stacie, since I had been wanting to make that one forever.  


So I visited my jean fabric stash.  Having recently done a reorg of VTL headquarters, I had all my stretch denim in one place and it was easy to go through.  I selected this dark eggplant/aubergine color in stretch denim.  It stretches ~15-20% on the crossgrain.  There was a short period of time where I labeled new fabric purchases, and this one was labeled as Pacific Denim from Haberman's, in Royal Oak, MI purchased in 2013.    It is the same denim I used for my red Jalie Eleonore jeans, just a different color.  Pacific Denim is still on the Fabric.com site, but not in this dark purple.  I had bought more of the red from Fabric.com after making the Eleonores, but somehow making the Eleonores made me not want a red denim jacket anymore!
IMG_20160912_220711
I love how the Style Arc pieces are all FULL pieces, so I don't need to trace patterns that are to be cut "on the fold" to make them full sized.    I washed and dried the fabric,  cut out all of the pieces and pinned the pattern pieces to my dress form as I cut them out.  This is so I don't lose any of the pieces and so that I don't cut out any smaller pieces from larger pieces somehow thinking they are scraps.

I also love how the StyleArc pieces have the seam allowances drawn on them--that makes it really easy to know the seam allowances for each piece.
IMG_20160918_132739
However the StyleArc directions are mega-minimalist (what you see above are ALL the instructions) so I mainly used Janet's class and the booklet that comes with her pattern to sew the jacket, as much as I could.  I watched some of her lessons for the third time for the parts I wasn't sure about.  For the bottom band, which Janet's jacket doesn't have, I used Gertie's instructions.

Also the StyleArc instructions say 8 buttons are needed but you really need 10 (their website seems to have been updated--it shows 10 but my pattern from 2014 said 8), the list of pattern pieces doesn't include the sleeve, and I think the amount of fabric the pattern calls for is too not enough.  I used almost 3 yards of almost 60" wide fabric, and did not have much left over.  That includes some samples I made, and I probably didn't maximize the layout, but still....

There were four modifications I made to this jacket:

  1.  Cut two of the back yoke to use the burrito method as per Janet Pray
  2.  Used the pocket facing piece from Janet's pattern to draft my own functional pockets
  3.  Drafted my own facing because my collar wound up being about an inch too short on either side somehow and I liked Janet's method better for this.
  4.  I took an inch out of the sleeve length, only to realize later that my understanding of how the "cuff" is constructed was wrong....and I probably should have added an inch!

IMG_20160918_132624
Also I got out my three RTW jean jackets and brought them to my sewing room so that I would have an easy reference.
IMG_20160912_190500

I have so much to say about the construction of this jacket, I'm going to break it up into a few posts which will have close-ups:


  • Topstitching
  • Making the faux pocket flaps into real pocket flaps with real pockets
  • Drafting a new facing
  • Fitting the sleeve/sleeve length
  • Buttonholes
  • Installing jean shank buttons

IMG_20160918_143200
This is piece #9 in my #summersewingdreams series.  Fall officially begins this Thursday, so the official tally is I sewed up 9 pieces from my list this summer, (all blogged except for one bag and one dress), decided I didn't want to sew one piece after all, and I sewed one item (the cold shoulder shirt) that wasn't on the list.  Hurray for dreams turning into reality!

IMG_20160912_185411
Be well!

Monday, September 12, 2016

The Angela Wolf Delila Cold Shoulder Top

IMG_20160827_185315
So....the Angela Wolf Delila Cold Shoulder top was not on my list of this summer's #summersewingdreams, but maybe for next year.  (At PR weekend in Austin in 2014, Deepika said that "When we like a pattern, we must buy it right now. We won't sew it for three years, but we have to have it now!" which really resonated with me!)   Recently, Clio made a trendy off-the-shoulder top, in-season at that, and that inspired me to sew up the Delila pronto!

IMG_20160901_091740


I used some royal blue lightweight ponte in my stash, purchased from Michael Levine's website in 2015.  It takes 2 yards of fabric, regardless of if you make it long or short sleeved.  I bought the pattern off the Pattern Review website earlier this summer.

This is a seriously easy shirt.  Because it is a dolman style top, it doesn't require much fitting. Based on the finished garment measurements in combination with the general body measurement chart, I cut out a small grading to a medium at the waist, and went with view I, which is short sleeved but with the cold shoulder detail.
IMG_20160912_193111


The pattern instructions are a spiral bound notebook, and really detailed.  Angela is very much pro-twin needle (yay! I am too as I don't have a coverstitch machine yet) and the only improvement I would have made to the instructions is to specify that it should be a stretch twin needle.
IMG_20160827_181658
The notches for the cold shoulder opening actually ended after the short sleeved line, so I went with the instructions which said to start the slit about 2" after the neckline and end it about 2" before the hem.
IMG_20160827_181918
I bound the neckline in a different way (used a strip of 1.75" wide fabric, which was serged on one long edge.  Sewed the band on to the neckline with .5" SA, RS together, raw edges together.  Then I wrapped the band to the WS and wonder clipped into place, then topstitched the band down.


IMG_20160911_183115
I made the hem 1" instead of .5" on the sleeves and the shirt (because it is easier for me to press a knit up by an inch instead of a half inch) .
IMG_20160901_091807
I pressed throughout with my Elna Press and my clapper (which happens to be the Angela Wolf clapper, felt like it all came full circle!)
IMG_20160911_183112

Next time I think I would shorten the sleeves by an inch or so, so that they end before my elbow.  As it is now, they end right in the crook of my elbow and get wrinkled there.

I have worn it twice now and it is a fun and cool shirt to wear, and totally different from the other shirts in my wardrobe.

Thanks for the inspiration, Clio!

IMG_20160906_054949

My first pumpkinette harvest of the season!  Woot!  There are a bunch more growing on the vine right now but I am always weary that something is going to eat them....hopeful for a second crop this year!

Next post, I will cover my #summersewingdream #9, the #epicjeanjacket.

Be well!