

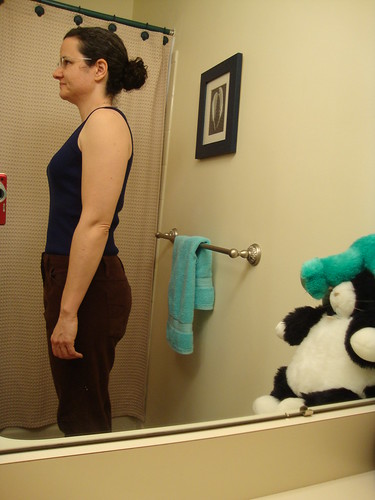
Side:
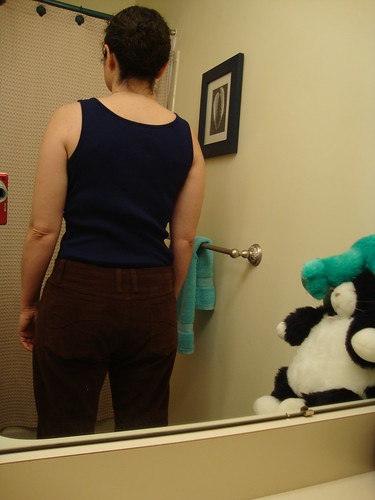
Back:
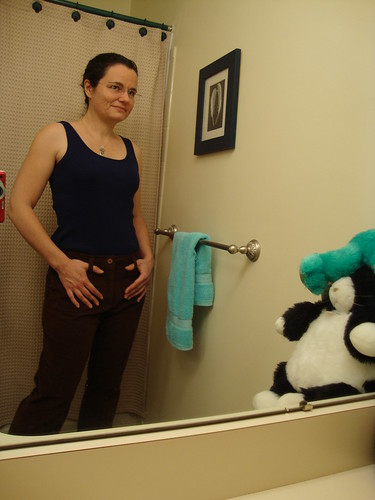
Sassy:
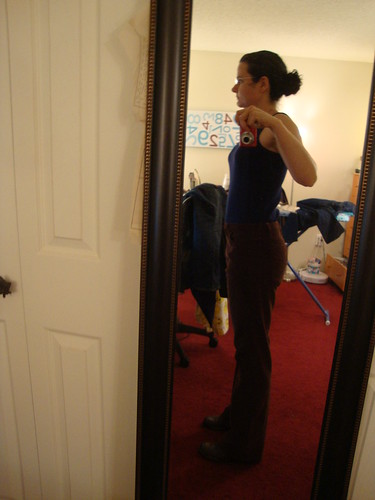
The full view back:

Side:
Front:

All buttoned up:

Back with two belt loops at CB:
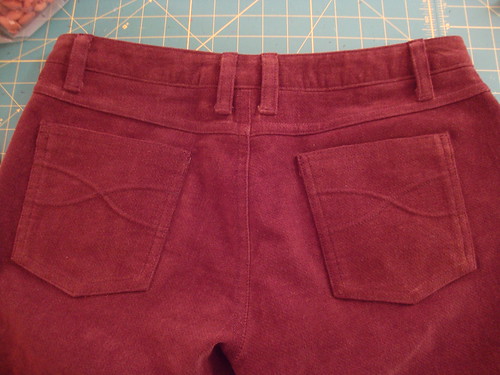
Closeup of pocket:

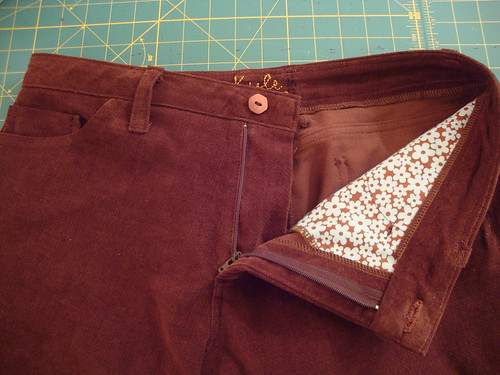
Inside. The button is from deep button stash, probably purchased at Cloth World's clearance bin when I was a teenager. The card said the button was made in Italy. It also says it's green. Hrm. It looks like a copper color to me!
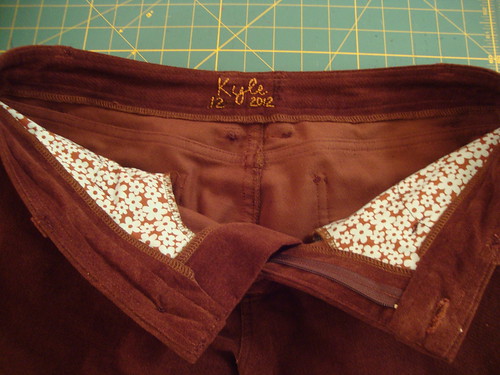
Inside with flat felled yoke seam, and my name hand embroidered in the back, with the date.:
This time I topstitched the inseam with my edgestitching foot:

The hem. I used this technique from the Seasoned Homemaker this time, it worked very well!

I heart tailor's chalk. Here is how I marked it for sewing on the beltloops. This time I cut six 3.5inch loops out of the strip instead of the suggested five 4" loops. That way I could sew two loops, one on each side of the CB seam. That was a lot easier than fighting my machine to stitch through who knows how many layers!
I also serged the cut ends of the belt loops and used fray check on them.

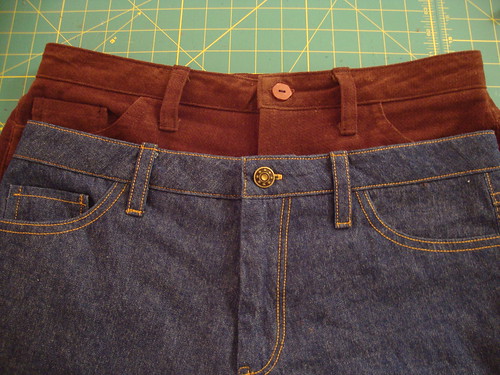
Improvements over my jeans:
- Sewed thighs with 1/4" SA, resulting in 1" additional space all around the thigh. This is much more comfortable for sitting!
- Before sewing on waistband, I sewed the very top of the jeans with a wider seam allowance. The result is it looks like I won't have to wear a belt with these! (Whereas I have to wear a belt with the jeans).
- Topstitched the inseam. Remember to do that before sewing the side seams!
- I made fake bar tacks on the fly front. My machine does not have an auto-bartack maker, so I used a narrow zigzag stitch with a very short stitch length to mimic a bartack.
- Embroidered the date with my name in the waistband facing. Maybe I will start doing that for all my clothes? Hrm.
I still can't get over the fact I have made two pairs of pants with fly fronts. Last year at this time, the idea was scaring me quite a lot!
Be well!!!
You are a pants-sewing wizard! Merry Christmas from North Carolina.
ReplyDeleteWith each pair you make, you'll improve technique. My most favorite and worn pairs of jeans are the 7th and 8th pairs made. I'll have to try corduroy, though I may have too much chub rub for them to last! Great job, K.
ReplyDeleteGreat looking pair of corduroy pants-everything looks amazing! Merry Christmas from another North Carolinian!
ReplyDeleteCynthia
Good Job! they look great -
ReplyDeletealso, it's so cool to embroider the month and year in the back
Look at you!!!! Just how far you have gone in just one year - love the pants, colour of corduroy looks beautiful.
ReplyDeleteMerry Christmas from Down Under...J
Those look totally professional. You should be very proud!
ReplyDeleteSee what happens when you face your fear? I'm happy for you to have made 2 fabulous pair of jeans. What next--velveteen, perhaps? Colored jeans? Happy a wonderful holiday.
ReplyDeleteWonderful job!!!
ReplyDeleteAbsolutely gorgeous!! You do fine work!
ReplyDeleteAbsolutely beautiful, you're on a roll! I just love the colour, so perfect for winter :)
ReplyDeleteYour sewing skills are taking off! The improvements you have made are fantastic!
ReplyDeleteThe corduroys look beautiful and are beautifully finished! Congratulations!
I am so staggeringly impressed!
ReplyDeleteGreat looking pair of cords!
ReplyDeleteSo proud of you! Good job!!!!
ReplyDeleteWow! They look fantastic! Fantastic job!
ReplyDeleteAWESOME!!! I know exactly what you mean about fly fronts!! When I made my son's pants it was my least favorite part. It looks like you did super well with yours. Both of those pair of pants are gorgeous, and I hope you are as proud that you made them as I am seeing them!!
ReplyDelete
ReplyDeleteHi nice Post written by you guys. It is amazing and
wonderful to visit your site. Thank a ton for such a nice post.