
After receiving the Elna Press as a present, I really wanted to make an item that is interfacing intensive to see how much time it would save: a pillow. That's because the last time I made one, I felt like it was taking forever to press on all that interfacing, and to press the interfacing not just once but twice because the instructions say it should be pressed both front and back.
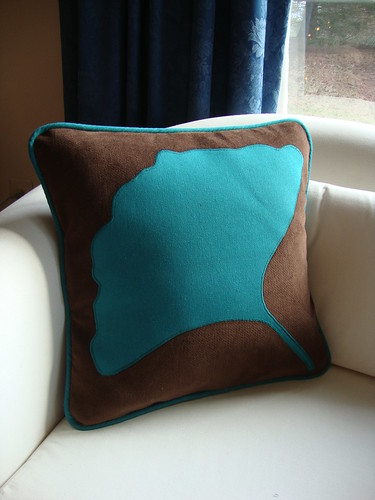
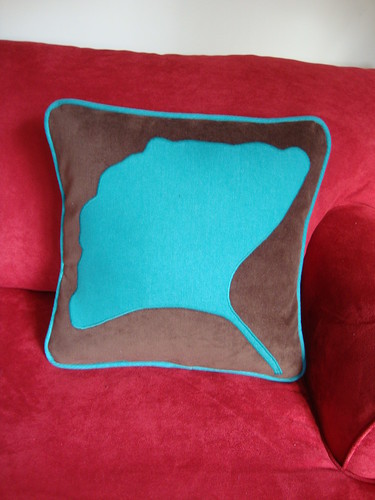
I had this idea for a ginkgo leaf pillow for a while now, so the time was right.
Leaf and piping fabric: aqua stretch denim from Haberman's, Sept 2013
Brown uncut (no wale) corduroy: Joann's, in stash
Interfacing (which make the pillow feel really luxurious): Fashion Sewing Supply, black medium fusible.
pillow form: Joann's.
Cording for piping: Joann's.
Pillow and piping tutorial: From this post on the Seasoned Homemaker blog. Also check out Dana's pillow tutorial; next time I will cut the pillow sham to be the same size as the pillow for a snugger fit as she recommends (in these pix, I "filled out" the corners with stuffing.)
Inspiration Leaf: From my favorite ginkgo tree on Princeton University's campus.
This gives you the idea of how I enlarged a real-life ginkgo leaf.
Trace the original on graph paper and then use the grid to enlarge it on grid interfacing from Joann's.
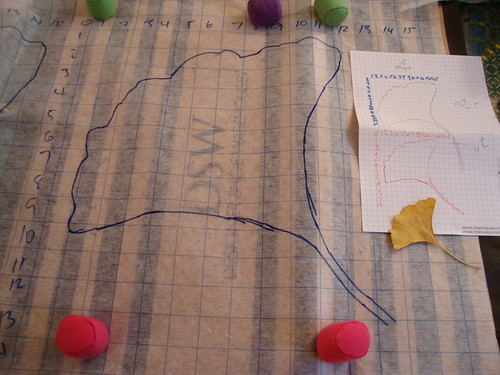
The first leaf I tried was too large for my 16x16 pillow so I tried a smaller one (the one in red at the bottom of my graph paper). Then I wound up free-sketching a bit onto the right side of the leaf so that it was more symmetrical. I wish I had made more of an uneven line at the top but....
Here is the cording I used, and a closer view of the color of the fabric. I'm SO happy to find this cable cord in a 10 yard package. It totally beats waiting at the cutting counter.
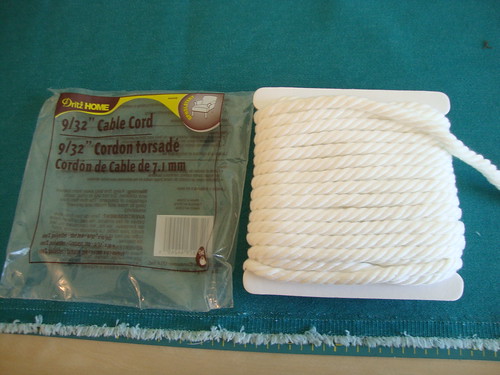
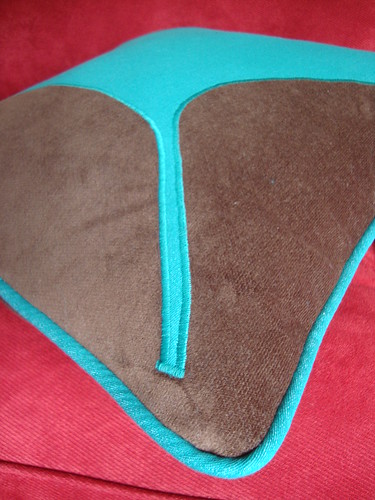
It is super easy to make your own piping. I think this is my third time making my own piping and it couldn't be easier. (Directions are in the Seasoned Homemaker tutorial linked above).

Coming together...
I used wonder clips for "pinning" the front to the back. Half of these are mine and half are a gift from Jacqui--thanks Jacqui!
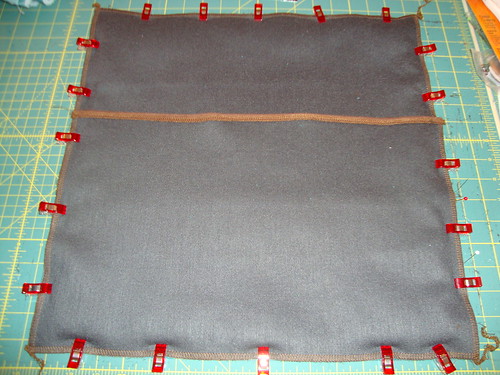
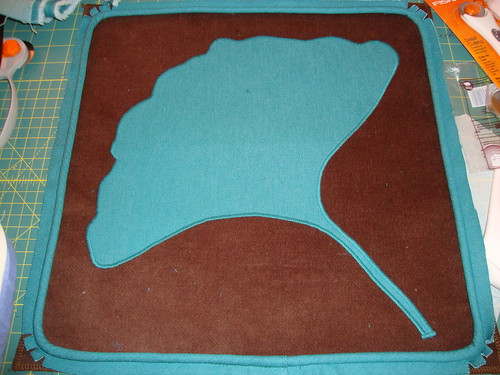
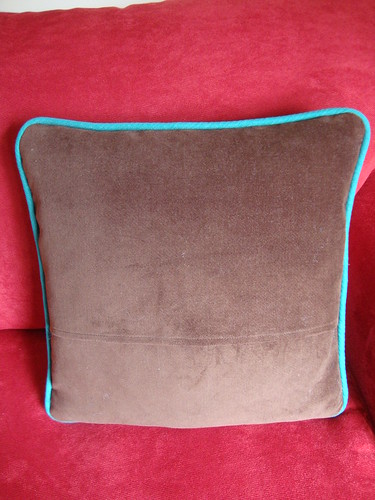
Oh and here's what it looked like on the back before adding the piping.
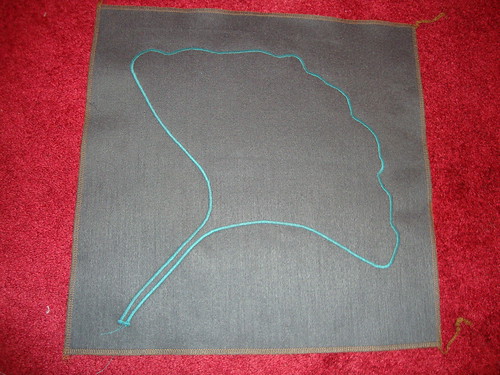
I used Wonder Under to fuse the leaf to the pillow, then used a zigzag stitch to seal the edges.
The back is an envelope style and this time I did it right--the overlap is enough that the pillow is not bursting out.
I try to limit my pillows and other home accessory items, mainly because I don't have anywhere to put them.
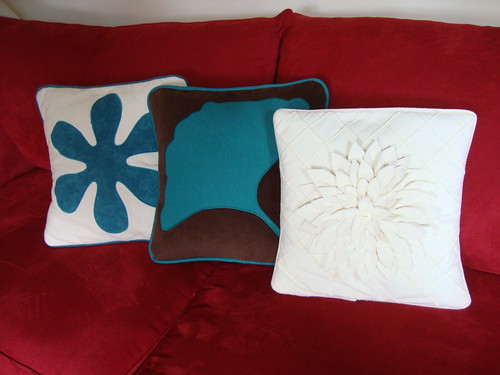
Asterisk pillow (2012), ginko pillow (2014), mum pillow (2009).
Here is their natural arrangement
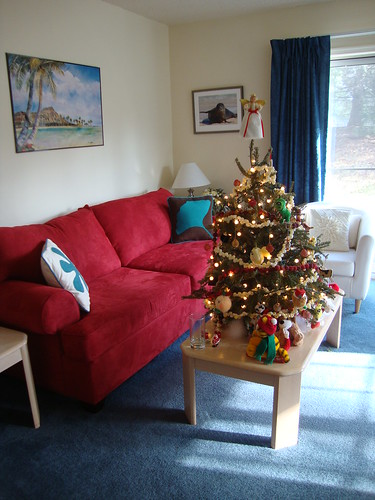
Yes, I took this pic this morning. Yes, it's still Christmas at my house.
I have ONE more pillow I want to make, and then that will be it for awhile. You can imagine its future location right now, can't you?
Verdict: How did I ever live without the Elna Press? It definitely speeds up the process AND it fuses the interfacing on better than I think my iron ever did. I feel the board could be larger but still, its surface area is SO much larger than the surface area of an iron.
Currently it lives here; I'm planning on buying a kitchen island or kitchen cart (both are at least 33" tall) from Ikea to replace the two end tables shown here.
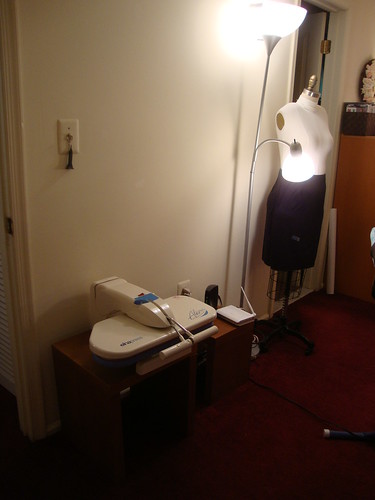
Guess what I'm working on! Hint: I gave up on it in March of last year!

Beth of SunnyGal Studio is helping me tremendously with it! More deets next post.
Be well!
My neighbor has a gingko tree.
ReplyDeleteThey have such a pretty leaf.
{I have been thinking about elna presses as I putz around my sewing room...}
Ooooh, I'm so jealous of your press! The pillow was the perfect first project for it. Scaling up an actual leaf was a brilliant plan. I would want a press for making coats/jackets. Fusing all the pieces is so. tedious.
ReplyDeleteGreat pillow, your zig zag stitching around the edge of the leaf is incredibly neat (as is your lounge room by the way!). I find my press useful for interfacing projects but don't bother with it for normal ironing because the bed isn't wide enough
ReplyDeleteThat pillow turned out to be fabulous!! I am glad you are enjoying your Elna press. Sadly, it is no longer Christmas at our house, but if I had my way, it would be (my hubby knows how I am so he took the tree down while I was out running errands). I am not sure what you may be working on next...pants? It will be neat to see.
ReplyDeleteThanks for the hints about the press. I'm going to give mine another try. I have to fuse some interfacing to lots of pieces for a jacket on which I am working. Do you use steam too?
ReplyDeleteI love the new pillow!
I love this pillow. I've always been an admirer of gingko leaves and this is such a great way to showcase their beautiful shape. I want to make one too! Unfortunately, I don't have a very cool Elna press -- so jealous! I just recycled the wreath on our door -- the holidays are over at our house!
ReplyDeleteGreat pillow--actually all three are lovely! Thanks for sharing your process. You've reminded me that I could make my own piping. Do you think it would be too hard to make pleather piping?
ReplyDeleteSpeaking of pillows, I *love* your ginko version! You did a beautiful job stylizing the ginko leaf, and it looks marvelous with your other two. (Also, great color choices!)
ReplyDeleteAnd in the realm of gratuitous comments, love the look with your hair down!
This is my first visit to your blog in 2014! Geez Louise!!!!!! Sorry about that! Your pillows look great together, like they're part of a collection. And I'm guessing you gave up growing out your hair last year! I'll keep reading and see if I am right!
ReplyDelete