
So, this post is for you Summer Flies!
I wrote "The Binder Clip Method of Fitting" in the title like it's an actual method of fitting, but I've only seen one other person use binder clips before, on a blog several years ago (unfortunately I don't remember which blog). I thought it was a great idea to use the clips instead of pins and generally have been doing so ever since. I have generally been making muslins but I have some difficulty translating sway back alterations to the flat pattern. Or sometimes I ignore things in the muslin that magically don't work themselves out in the real deal. So I make the muslin for basic sizing and then fit the back in the real deal, generally, using my binder clip system.
Why binder clips and not pins?
- Pins are, as my acupuncturist would say, "ouchy".
- Pins also have a tendency to fall out.
- Binder clips are relatively strong and stay in place when I take the garment off and on.
- Binder clips come in many sizes so you can change your seam allowances as you go (if you'd like), or use the same size clips but don't clip them in as far to create less seam allowance.

I have been using flickr for editing but it cuts off the words on the edge when it saves it...hence "vrinkles" instead of "wrinkles".
Anyway, it was kind of like those wrinkles wanted to make their own "pocket". :)
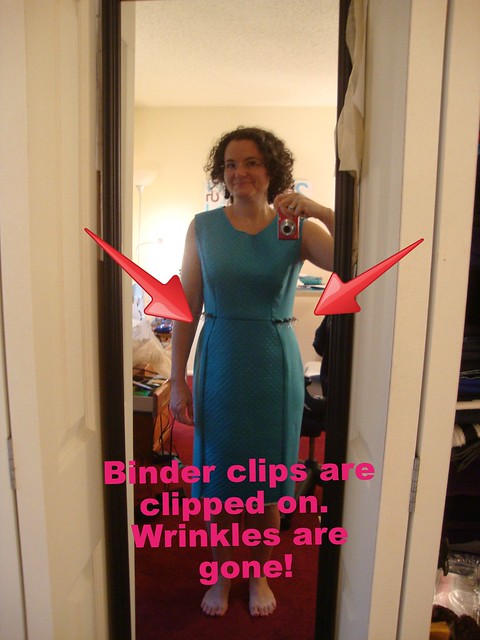
I got out my clips and start clipping. Look at that, the wrinkles went away! So the length there in that area is too long for me. Another guess as suggested by ASE friends could be the weight of that front panel, since it is quilted...but those wrinkles were in my non-quilted muslin and I thought they were because I didn't know how to sew the point.
This pattern only had a waist seam across that middle panel front and back, so to "fix" this I created a waist seam on the side front and side back panels, via the binder clips.
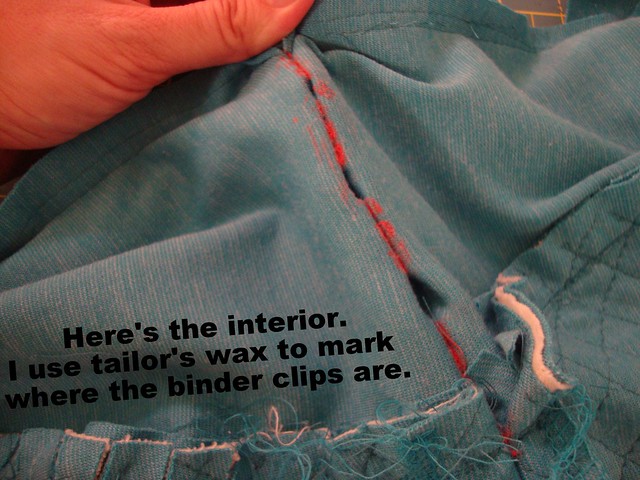
From this point on it's basically like fitting with pins....I turn it inside out with the binder clips still on the outside. I use tailor's wax to mark where the binder clips are. I prefer wax for interior marking because it doesn't brush off like chalk.

Then I remove the clips. This looked pretty wonky so I straightened/evened it out a bit (no picture of that)...but you can see I needed more taken out from the front panel than the back panel, so when I straightened/evened it out, I graded it down in the back.
I then basted it together and tried it on, did some more tweaking....and realized I had not serged the side seams/princess seams.
So I opened that horizontal seam just enough to serge the side and princess seams, then sewed the horizontal seam.
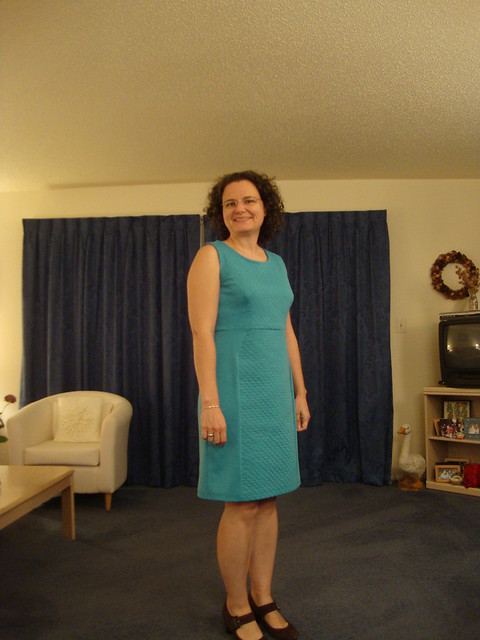
So look at that! No wrinkles in that area!
But maybe you're wondering how I clip to my back....that's where the bathroom mirror comes in handy.
The dinosaur!
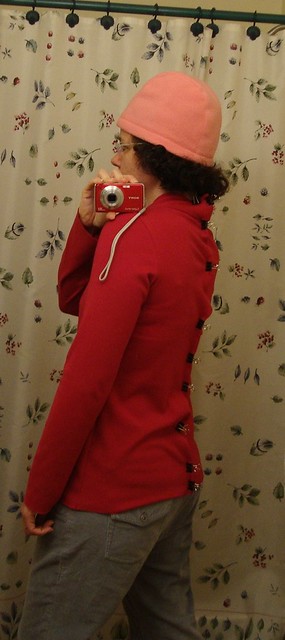
This one is Jalie 2921 that I sewed in 2010. I used the binder clips to create a CB seam for swayback. The problem was it went through their very clever collar! but I did it anyway to get a better fit.
I just reach around to the back and start clipping, then straighten it out when I take it off, then put it back on again.
The next time I fit for swayback on a dress by creating a horizontal waist seam I'll take more detailed photos but basically I clip two clips, one on each side of my lower back, with the approx location of the seam I want to create. I take it off and then binder clip out to almost nothing at the side seam. I try it back on with all those clips and look in the mirror. I then adjust as needed, mark it with wax on the inside, baste and try on again.
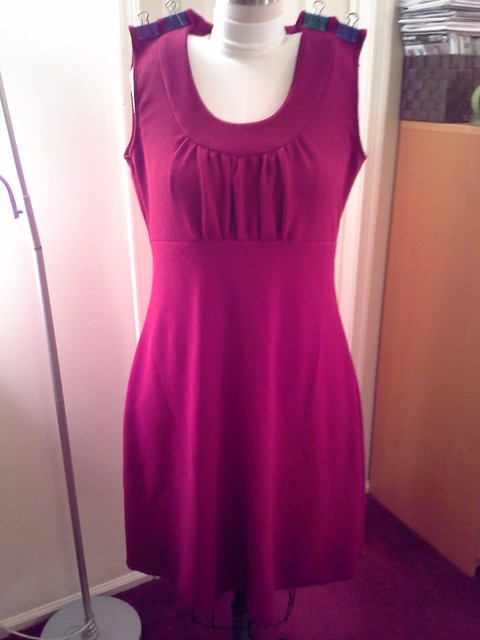
I have also used big binder clips for decreasing bodice length, like the Vogue dress above. In my muslin I had used the 14 with a 12 at the shoulder and it was too big all over, but especially too long in the bodice for me--without those clips the underbust seam was way too low. When I recut the bodice I used a size 8 in the shoulder which brought the whole top part up (I now know how to fix that officially after taking Joi's Fast Track Fitting class at the ASE).
Let me know if you're going to try this method the next time you sew, or if you have any questions.
Be well!
So smart the way you use wax to mark where the new seam should be! I also use office clips for fitting. I got the idea after I saw someone using clips with leather to avoid pin holes.
ReplyDeleteWhat a great idea!
ReplyDeleteGenius! I am definitely going to try this. Pins are ouchy and this is a much better method. The muslin/garment can be put on and off again without risk of distorting what's already been pinned. Thank you so much for sharing!
ReplyDeleteThis is so helpful! Can't wait to use it! Thank you for posting!
ReplyDeleteI love this method too, I'll have to give it a try. I'm curious about how the fitting class with Joi went. Can you post about your experience? Did you learn some awesome fitting tips that will help you?
ReplyDeleteYou must excel at all the yoga poses. Reaching around to one's back and then managing a binder clip - I'm in awe.
ReplyDeleteLove this! Definitely going to try. I love the idea of having several sizes laying about to use for different adjustments.
ReplyDeleteAbsolutely brilliant solution to the "how do I mark my own alterations?" problem.
ReplyDeleteThanks so much Kyle! Really clever idea. I will use that for sure. I normally try and pin (ouch) inside out but this is clever. I don't know what tailors wax is but may try to find some. Thanks again.. looks like it's going to help a lot of people.
ReplyDeleteThanks for sharing your binder clip method! Very clever!
ReplyDeleteSo clever! Love the dinosaur look!
ReplyDeleteWho would have thought of this! Well done number one!
ReplyDelete