
Thank you for your comments on the topstitching post for the #epicjeanjacket--I know that was a long one; congratulations if you read the whole post!!!
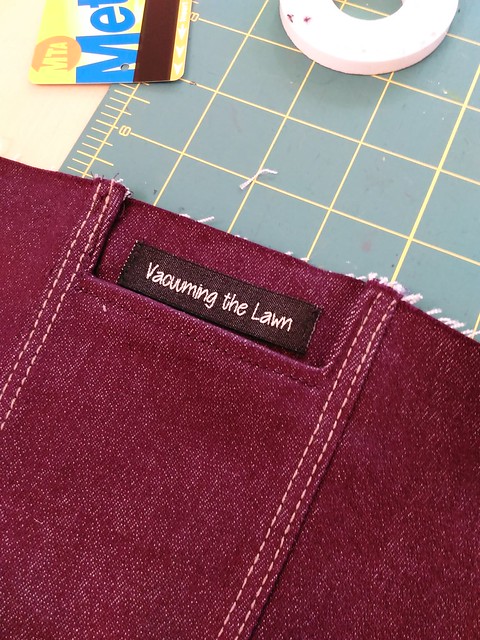
I was surprised that the StyleArc Stacie jean jacket pattern had faux pocket flaps instead of real ones, and since I like using jacket pockets I decided to add my own. Initially I wasn't sure how to do that, but I ultimately got the idea to take the pocket facing that comes with the Islander jean jacket pattern and extend it to create a pocket bag, much like how an interior zipper pocket is constructed.
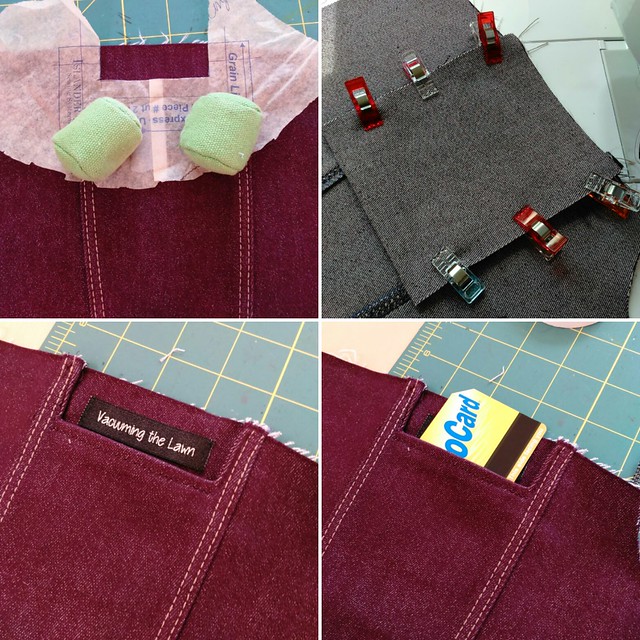
First, I folded out some of the facing width (as the Islander pattern pocket flap is larger than the Stacie pocket flap), and I wanted the pocket opening to fit between my existing topstitching.
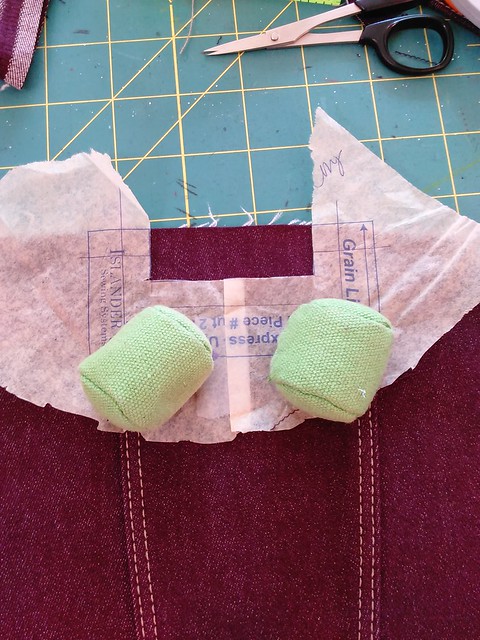
I then cut out that space above, and sewed on the extended facing, RS together. Turned RS out and then topstitched the facing in purple
Then I folded the pocket bag to create the pocket.
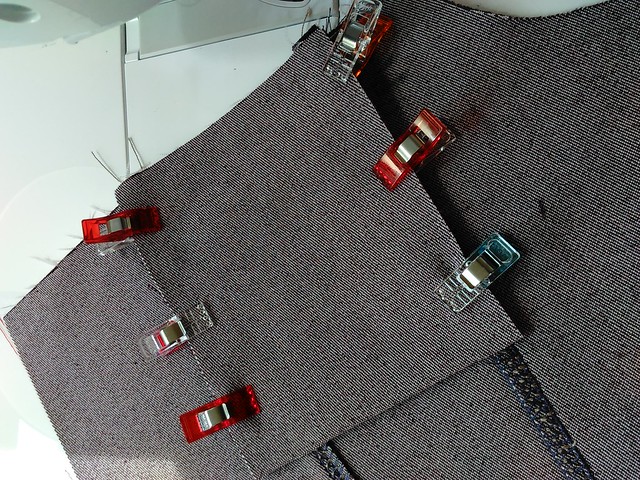
Then I serged the pocket together--without sewing it to anything else! :)
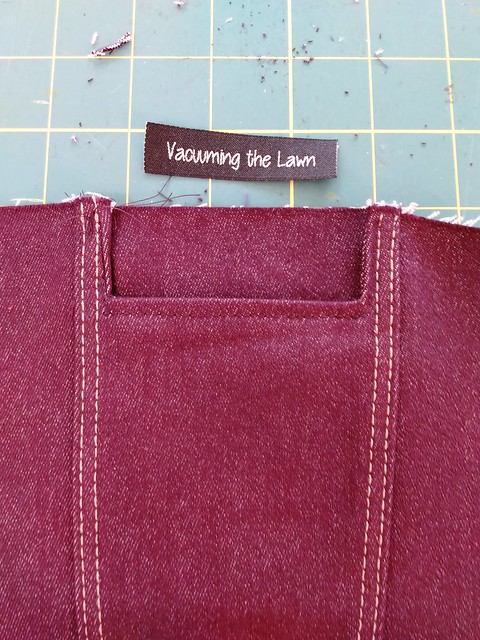
I added my label as a little joke to myself.
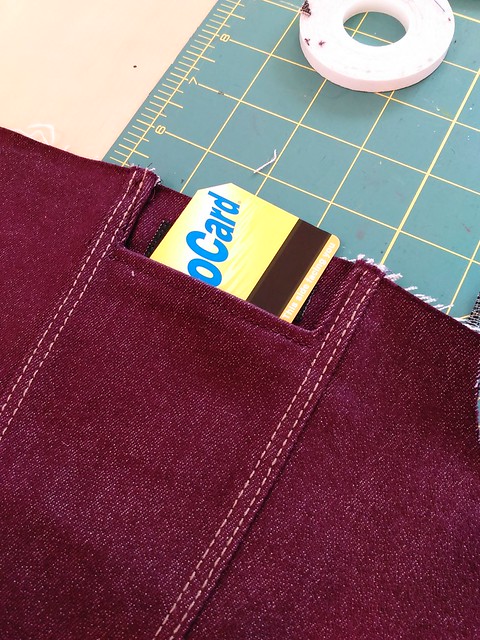
My MetroCard fits in there perfectly! I forgot it was in there and accidentally ironed it, but I used my MetroCard this past weekend and it still works!
At this point, I felt like it would be a good idea to add the buttonholes to the pocket flaps and add the jean shank button, and those who replied on IG agreed! It was waaaay easier to add the buttonholes to the flap while it wasn't attached to the jacket. Then I sewed the flap across the top.
I'm going to cover the buttonholes and jean shank buttons in a later post. For now, I'll say that these buttonholes use the real jean topstitching thread on top and regular purple Coats & Clark thread in the bobbin.
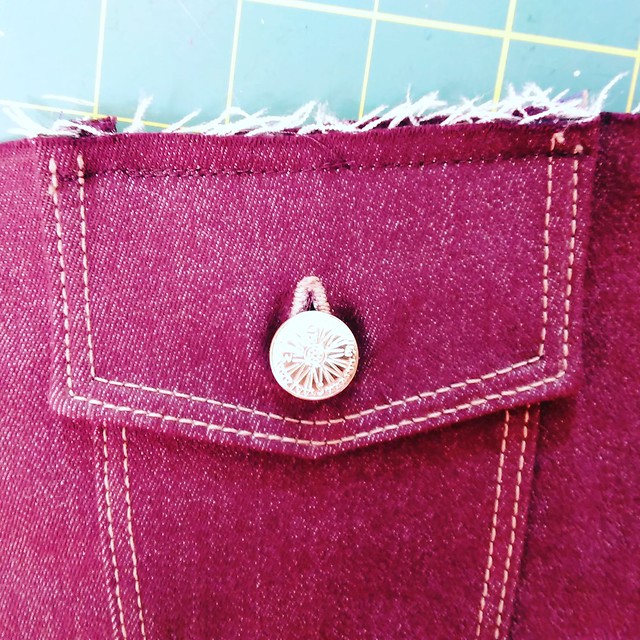
That's a little compass on each jean shank button--I made sure to have North pointing up on each one.
Next post: the sleeve and the construction of the "cuff".
Be well!
I am a big fan of functional pockets too! Glad your Metrocard survived. Great job with those pockets!
ReplyDeleteThank you! Functional pockets for the win!
DeleteWay to go on turning the pocket from faux to functional! I also like the compass buttons you used.
ReplyDeleteThanks! I wish they had more of those compass shank buttons--they are totally sold out at Pacific Trimming, at least the last time I was there they were sold out!
DeleteThe more pockets the better!
ReplyDeleteTotally agree!
DeleteI'm still so amazed at your skills & this jacket !!!
ReplyDeleteThanks! I'm amazed at myself too!
DeleteI can't tell how you did the seams for the jean jacket. These are flat-felled seams, correct? I have a mccall's pattern for a jean jacket and they don't give instructions on this and I'm trying to figure out how to do them, hopefully using a pattern I already own.
ReplyDeleteYou did a brilliant job btw.
Thanks! They are not "Real" flat felled seams. They are just sewn together, serged, pressed, and then topstitched.
DeleteI thought you might have done that but I wasn't sure. The topstitching is so well done that the effect looks very much like flat felled seams.
DeleteThanks for your reply, I've got your posts bookmarked and will definitely use them for reference when I do my jacket. (I gave up one attempt - wrong pattern and wrong weight of denim! You live, you learn.)
This comment has been removed by the author.
ReplyDelete