
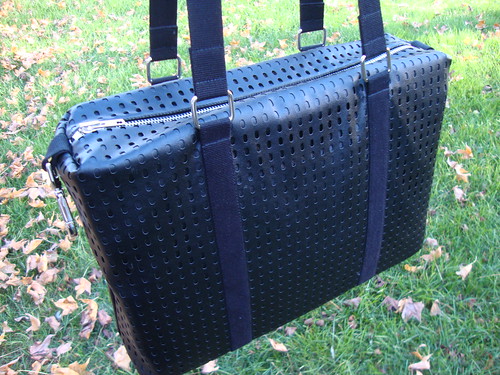
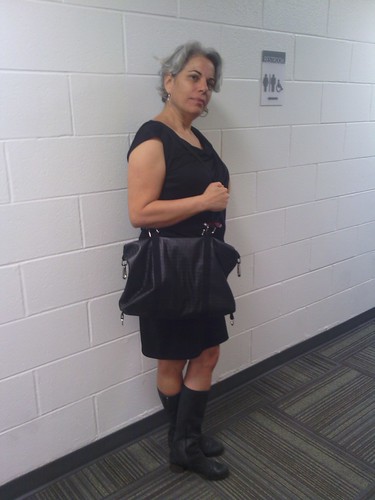
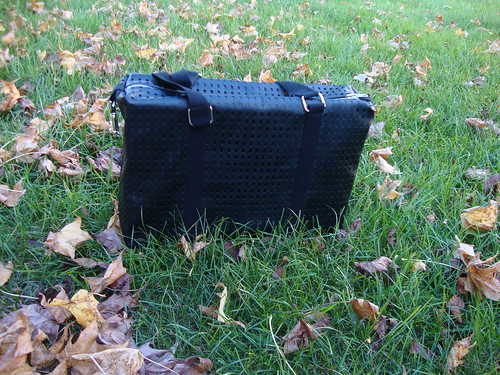
Final version?
Thank you so much for your reassurance on my last post, "Is this bag terrible?"
My outcry was due to two things:
1. The fabric was suddenly looking very plasticy and cheap. I wanted this bag to look, as they say on PR a lot this season, "luxe".
2. The bag wasn't as structured as I'd like. The instructions said to use fleece and interfacing. I didn't use the fleece because I thought it would be a lot to sew through. I just used interfacing.
Let's rewind a bit.
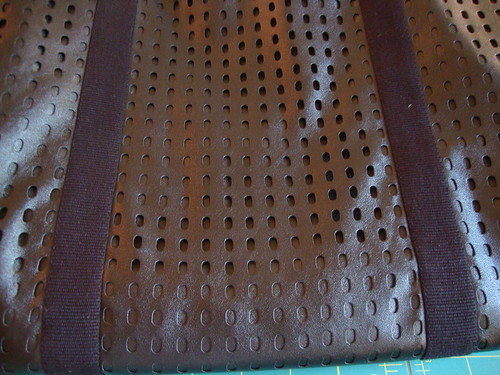
I bought this fabric from Kashi at Metro Textiles in NYC during velosewer's visit in June.
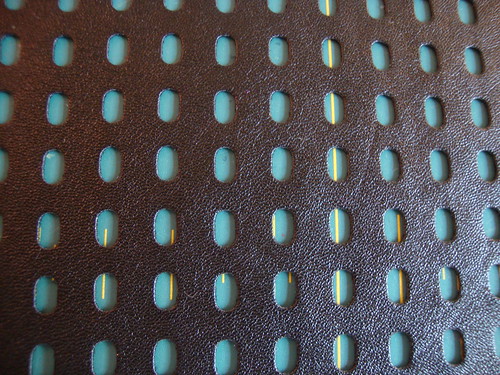
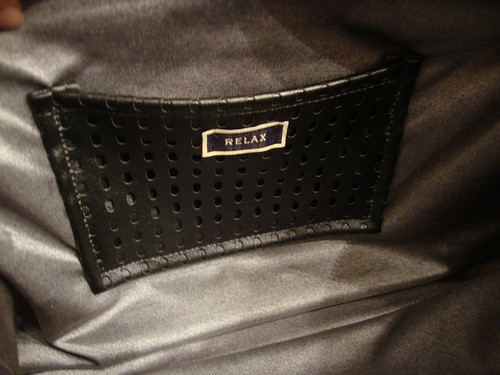
I think it's some kind of vinyl. It was $10 a yard. He had it in a few colors. He also had another bolt of black vinyl with different shaped holes in it. I waffled for a bit, but I decided on this one.
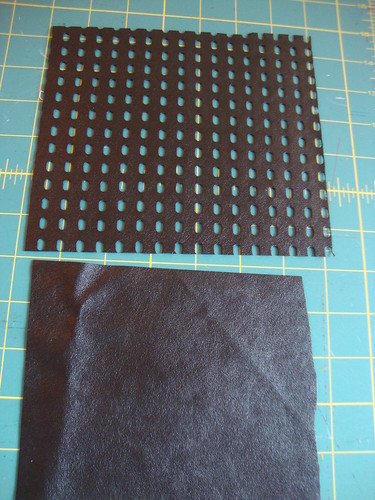
While I was there I then decided to pair it with this black vinyl, also $10 a yard.
I knew it was going to be a bag. But at that point I didn't know what kind of bag.
Earlier this year I discovered the blog Girls in the Garden. Lori was a contestant this summer with the Super Online Sewing Match and I really loved the bag she made for the U-Handbag "It's a Cinch" tote challenge.
So then I knew, I would use the Kashi fabric to make the SOSM bag.
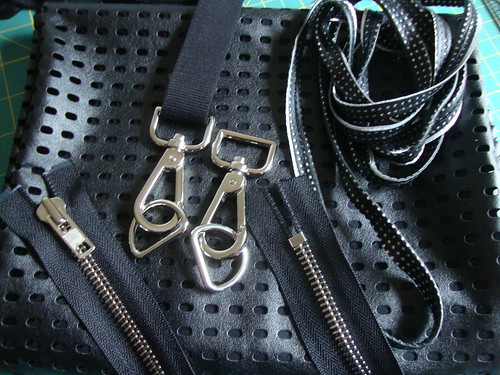
At that point I had not purchased the pattern but rather looked at the online sewing supply list for the bag. Then during MPB Day, I bought all the hardware with Mary at Pacific Trimming. I even had the zipper cut to 15" as the instructions said your zipper should be at least 15".
On the ride home I'm thinking that it doesn't look like enough hardware.
I realize that the rectangle rings are missing from the shopping list they printed online!
I buy them off of ebay instead.
I buy the pattern--it's a PDF.
I start reading the pattern instructions.
It says to cut your zipper to 14.5" . But I had already had it custom cut to 15" at Pacific Trimming. I decide not to sweat it. A half inch isn't that much, and she has you cut the zip tabs extra long as insurance if you cut it too small. But really, the shopping list should have everything on it, and it should have the minimum size the zip should be. Also the instructions were really tough for me to get through and confusing. She refers to the end of the zipper with the zipper stop as the "open end" and the end with the zipper pull zipped up as the "closed end". If I were writing instructions I'd refer to the end with the zipper stop as the end with the zipper stop, not "open" as that end will never be open. Also the text and pictures don't match up throughout the instructions. For example, step 19 says to see fig 12 and fig 13, and it has fig 16 right next to it. I had printed the instructions 2 pages per side, double sided, so there was a lot of flipping back and forth. Next time I would print the instructions single sided and cut the photos apart from the text and then arrange the text so it's next to the appropriate photo. There are also a few mistakes in the instructions, particularly step 26 when it says to stitch along the curved top edge (there are no curves in this bag) with a 3/16" (0.5cm seam). A half centimeter is 3/8", not 3/16".
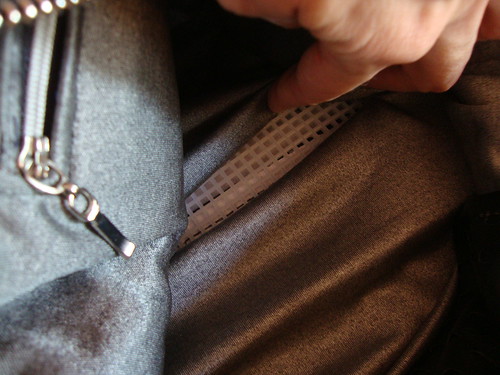
I wound up using this tutorial for the interior zipper pouch.
I decided that the lining will be the silvery, liquidy gray knit I bought at Mood during MPB Day. I interfaced it with Pam's interafacing to stop it from stretching. I thought that would be pretty luxe.
Monday
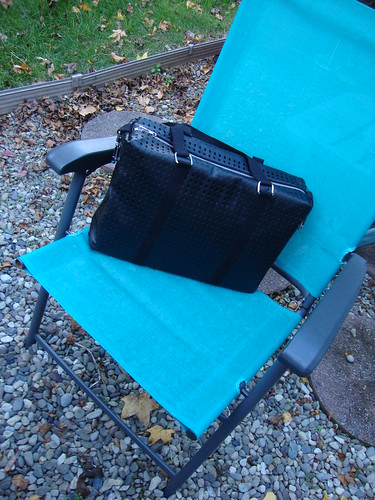
Monday I brought the bag to work for some analysis. Ellen felt there is something proportionally wrong with the bag, but regardless it went well with her outfit!
On Monday night I decided to put 2 layers of plastic canvas into the bottom of the bag. I had not sewn up the lining yet so that was easy. I had done the same thing with the cat bag this summer.
It nicely gave it some structure.
The bottom of the bag was flat and straight, the rest of the bag was slouchy.

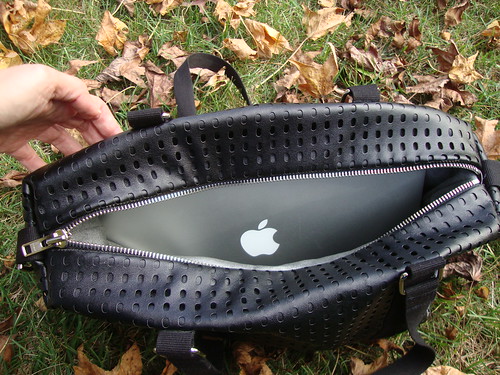
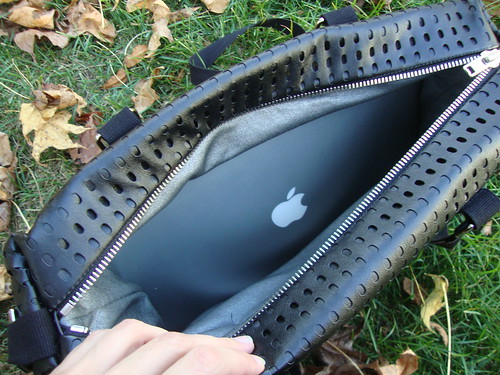
The big bonus was my new work laptop fits inside perfectly. I had not planned on making the bag specifically for this purpose, but it worked out very well.
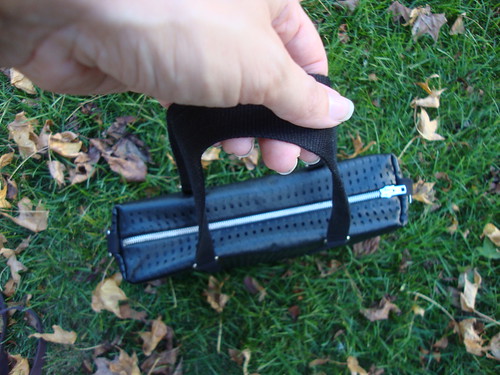
And here it is cinched up with my Serious Hardware.


Wednesday
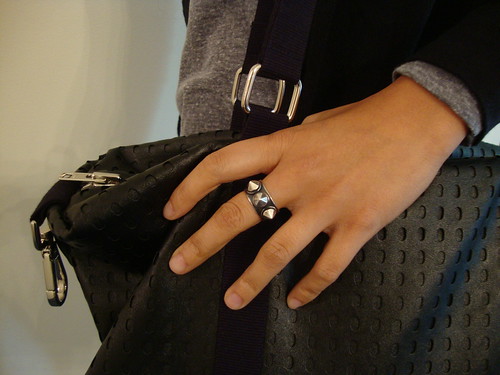
Antoinette was here on Wednesday. Such a joy to have her here. Her stud ring fits very nicely with the style of this bag
Thursday
Thursday I brought the bag to the gym locker room. Without any prompting from me, one of my classmates said, "It looks like a $300 bag. Is it leather?" Another classmate wanted to know if I cut the holes myself.
Saturday
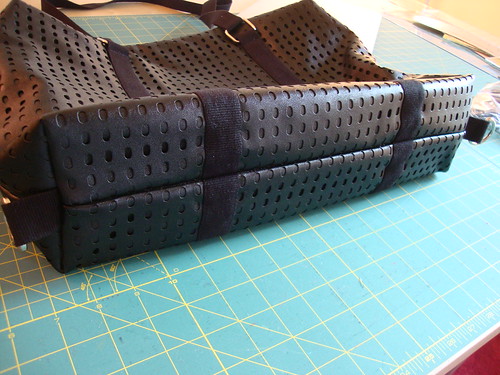
Coincidentally Kathy had left a comment on Monday night, after I had already added the plastic canvas to the bottom, to try using Peltex on the sides. I didn't know what Peltex was exactly but I knew Lori mentioned it in her SOSM bag post. Today I braved Joann's to get some Peltex. (That was going against SunnyGal's advice to stay out of the fabric stores this weekend with all the costume creators out there. She was right--it was a zoo). Thanks Kathy for taking the time to write out all your suggestions!
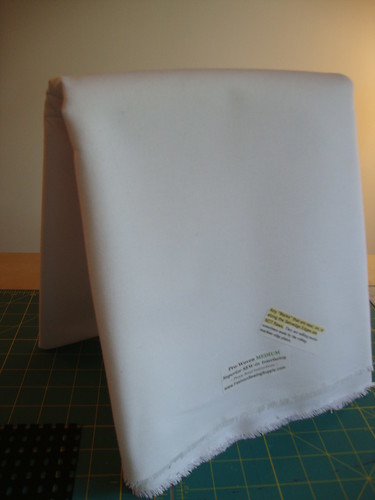
Here is what I used to interface the bag initially. It's Pam's medium weight interfacing and it stands up on its own.
And here is the Peltex. It comes in 3 kinds from what I could tell: fusible both sides ($10/yard), fusible one side($9/yard) and sew-in (now we're talking at $6/yard).
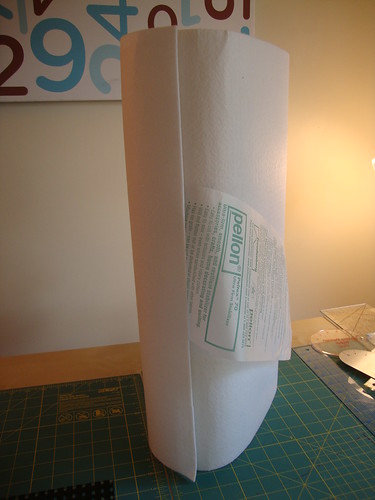
WOW! It is quite thick and also stands up on its own easily.
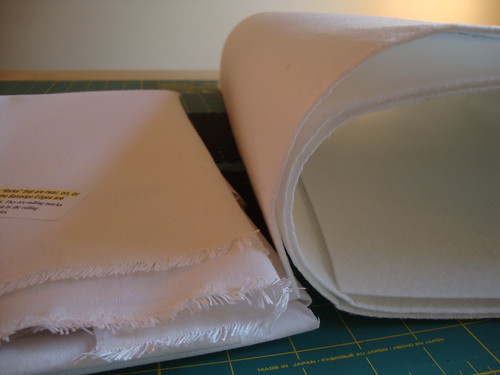
Here is a side-by-side comparison:
So I cut two fronts and two sides and
And now it looks like this:
Definitly more structure.

Hrm. Guess I should have checked the position of the ring there.

And here it is with the laptop inside
Overall I am liking it better.

I think it looks good with my new "I love Swatch" shirt (courtesy of Antoinette--it couldn't be more perfect!).
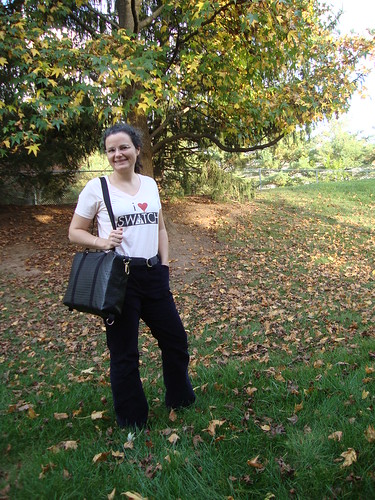
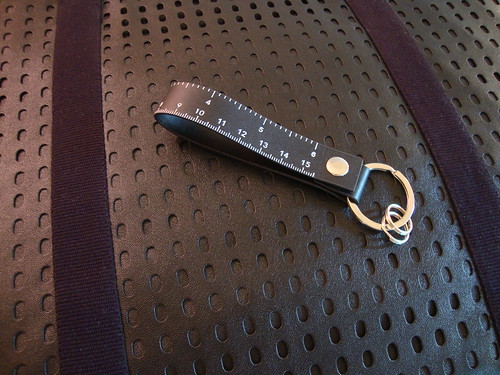
It also goes well with my new keyring from Connie--thanks Connie! Such a fun present!
I think the bag might look more luxe if I had used different straps that weren't as sporty.
Here are the straps currently on the bag (before putting the Peltex in the sides):
Here is some different webbing just lying on top. It's from Pacific Trimming but I don't have enough of it and I don't have wide enough rectangle rings anyway.

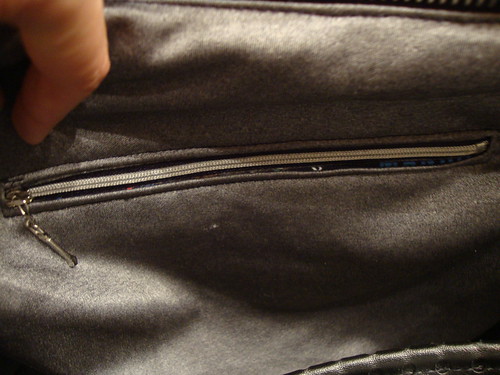
Oh, and here's the pockets again, just so everything's all in one post.
Zipper pocket (zipper from a store in SF where zips were 25 cents each--love the zipper pull!)
I swear to you I only bought 2 yards of this NYC subway fabric from The City Quilter, it must be multiplying all on its own in my sewing room.
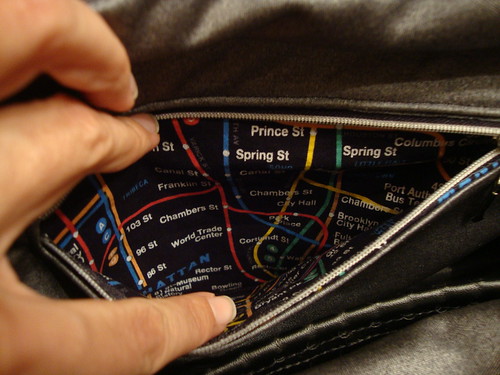
Non zip pocket.
This week, dahlias from the Princeton Farmers Market. Such a delicate color!

Fabulous Kyle! Your bag does indeed look luxe and worth all the effort you put into to getting it just so :)
ReplyDeleteI love it!!!!
ReplyDeleteOh - I loved it with Ellen's outfit!
ReplyDeleteI have been looking at this bag pattern - I think hardware makes it look more, dare I say, store-bought ($300!),
Next time I'm at my favorite fabric store, I'm going to look for fabric similar to your 'holy' black.
I was recently on a two year bag-making kick and I think you gain something with each pattern you tackle (not to mention all the broken needles).
And, I believe in the magic closet.
Super luxe! Love it.
ReplyDeleteBeautiful tote bag.
ReplyDeleteIt really is a great bag, Kyle! The second trimming does take the sportiness off of it, though the one you have now is just fine. I have to make a tote bag one of these days. =)
ReplyDeleteLooks perfect!
ReplyDeleteGreat bag. I do think its better with the peltex. Looks like leather to me. A lot of work but now you have a perfect laptop bag. And watch out next weekend. The fabric stores might be even more scary!
ReplyDeleteKyle, your bag looks fabulous. Way to keep working at it for solutions to get the bag like you want it. Thanks for the shout-out!
ReplyDeleteMUCH better with the Peltex; before, it just looked too "schlumpy"!
ReplyDeleteI've done that to store-bought bags: added some 'floor" (yes, I've used sticky-back dollar-store floor tiles cut to size! Plastic canvas starts to break apart after a while) and some buckram to stiffen up the sides, and added a a nice lining, and wow: suddenly a cheapo-depot bag looks LUXE!
Lovely1
ReplyDeleteI like it both slouchy and structured. The Peltex gives it a completely different look. One thing I will warn you about, though, and this is the voice of experience speaking. That plastic canvas mesh gets brittle and breaks after about a year, less if you have consistent stress on it at certain points. Sorry to be the bad-news-bearer, but better to be forewarned.
ReplyDeleteI love the bag! Very "Luxe!"
ReplyDeleteI am so digging that bag! Great choices all around. I could swear I'd commented on this post, pointing out that it is very sporty luxe, a la Alexander Wang. When did you become an Alexander Wang girl? ;)
ReplyDeleteLovely bag. I couldn't seem to purchase the PDF it wanted to sell me a hard copy .. I refuse to pay postage to Canada .. I have the Bagmaking Bible and really dislike the layout, issues with understanding the terminology she uses .. I can see this would be too much of a challenge for me (as I hate challenges) so I have elected to just look and admire everyone else's and forge ahead with something easier! :)
ReplyDelete