
Thank you for your comments from post 1 (the wool), post 2 (the rayon bemberg lining), and post 3 (sewing the lining to the kickpleat).
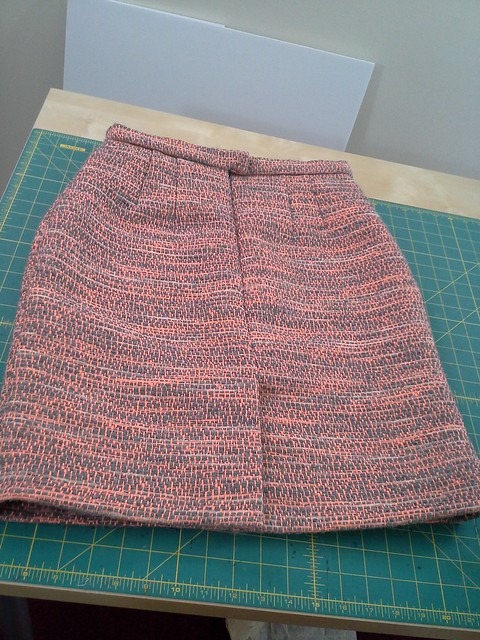
Today's Epic Skirt installment centers around the zipper, waistband, square snaps, and thread chain.
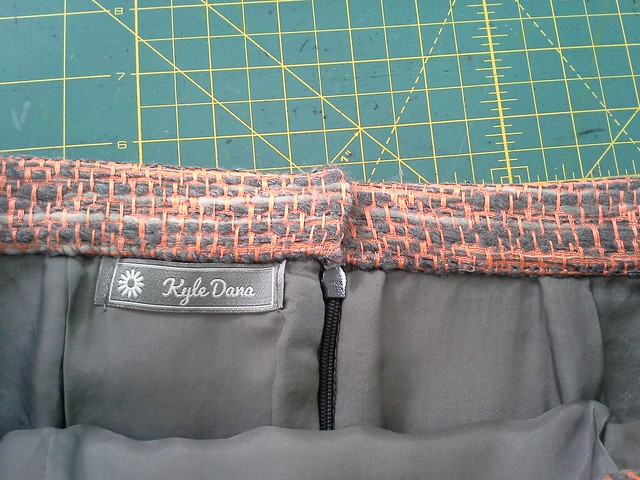
The zipper
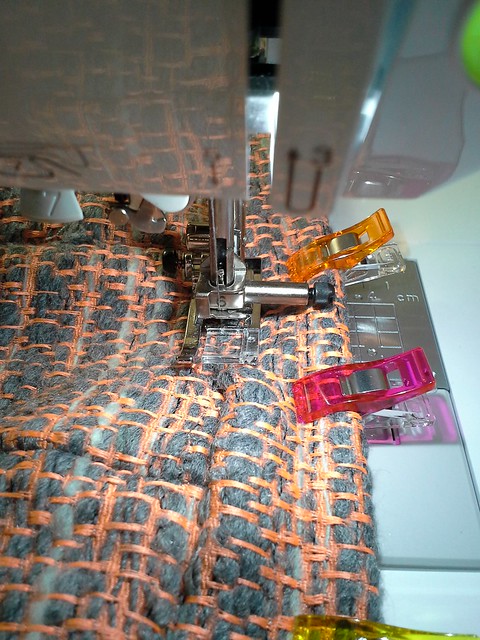
Instead of sewing the zipper at the side seam as per the pattern, I sewed it at CB.
I followed Sunny Gal studio's tutorial on how to sew an invisible zipper without an invisible zipper foot. I really enjoy this tutorial and have used it for a few years now.

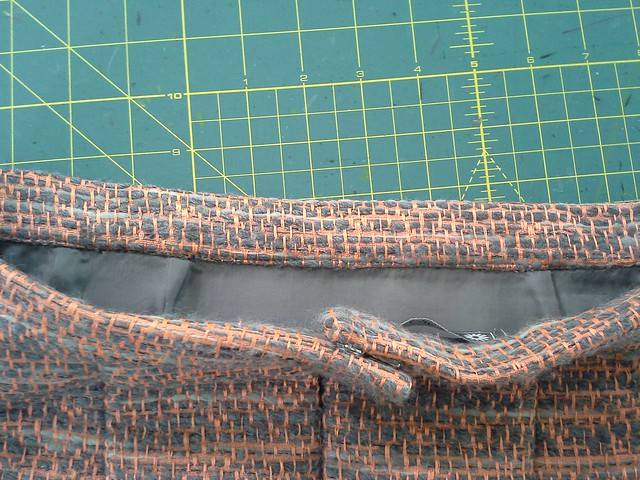
In my last post I wrote about my study garment, a brand new Talbot's skirt I bought at a thrift shop for $6. I looked to see how the lining was sewn to the zipper and it was machine stitched on, so I did the same thing. I had previously pressed back the opening of the lining where the zipper would be , so there was a nice press line there. I had already basted the lining to the top of the skirt so I had to undo some of the basting so that I could flip the lining and skirt inside out in that area, then used my zipper foot to sew the lining to the zipper tape. I then basted the lining back to the top of the skirt in that area.
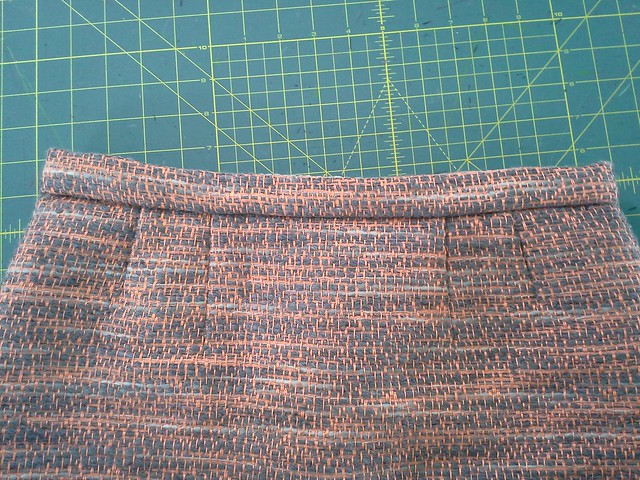
The waistband
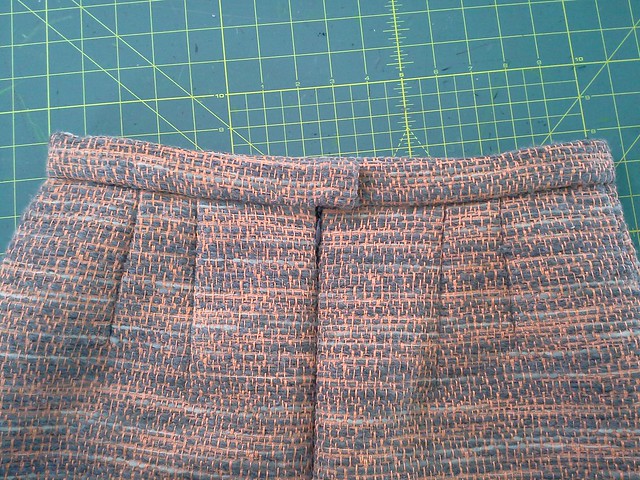
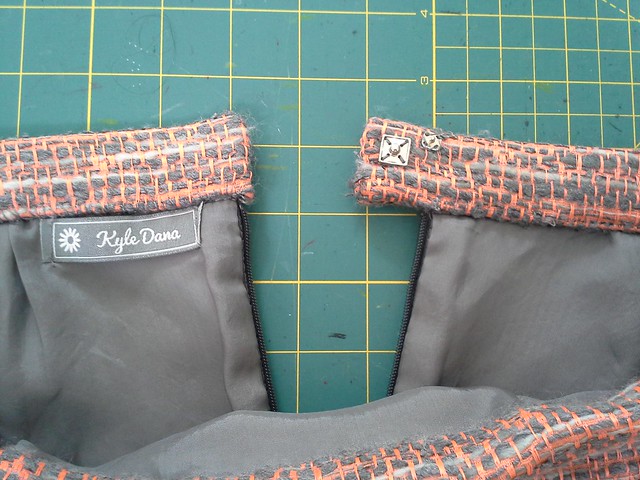
I always cut my waistbands longer than they need to be, sew them on, then cut off the excess. That way I won't wind up with a waistband that's just a little too short. Since the kickpleat, from the outside, is overlapped left over right, I did the same thing with the waistband and lapped it left over right.
When I first basted the waistband on and sat down in the skirt, suddenly the whole thing was too small! I undid the waistband and let out the side seams near the top of the skirt and skirt lining (I had taken out some of the hip curve previously, and that was still fine, it was just the top of the skirt that was the problem. I will say at this point I was SO GLAD I had not serged the raw edges of the lining together-that instead I had serged the edges separately and then sewn them. That meant I could still alter the skirt in this way--phew!!!
I then stitched in the ditch from the outside to sew the waistband down.
Square snaps
Square snaps were then sewn on, as I prefer snaps to a hook and eye. The large square snap is from Botani and the small one is from Daytona Trim.
Thread chain
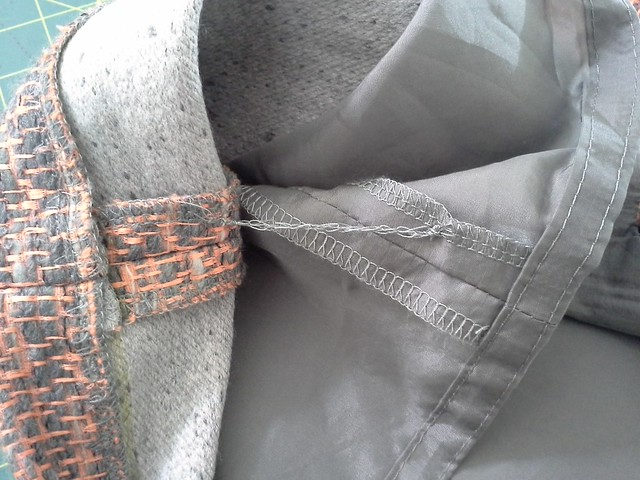
The Talbots skirt had a thread chain (I don't know what else to call it) near the hem of the skirt to attach the bottom of the lining to the bottom of the skirt. I made some serger tails and then hand stitched them on.
What's Next??
The big reveal: me wearing the #epicskirt!
Be well!
The skirt looks great Kyle, can't wait to see it on. Thanks for the tip about Beth's tutorial... I have a plastic invisible zip foot but only used it twice and realised the 2nd time I had done it wrong the first time. So lucky about the overlocking of the lining ... sometimes the universe is way ahead of us!
ReplyDeleteThanks Summer Flies! I was thinking that I would serge the raw edges and then sew (instead of sewing and then serging the raw edges together) so that I could alter it in the future....I didn't realize I'd have to alter it before it was even finished!
DeleteCan't wait to see your skirt too.
ReplyDeleteThe fabric is thicker than I remember so I cut my skirt out a size bigger #phew.
I have to back an reread your kick pleat post - it's so good.
Good job on cutting it out a bit larger!
DeleteThanks for your kind words about my kick pleat post. :) I really should supplement it with pix of the "study skirt" and the samples I made....
The zipper is beautiful both inside the skirt and out - nice and neat! Love those snaps :)
ReplyDeleteThank you!
DeleteAs you know, I love square snaps! :)
I love how neat the whole thing looks inside and out. It took me about 7 years to get to this point!
I love how you broke down the details, and am excited to see you in the skirt! I'm sure you will look great!
ReplyDelete