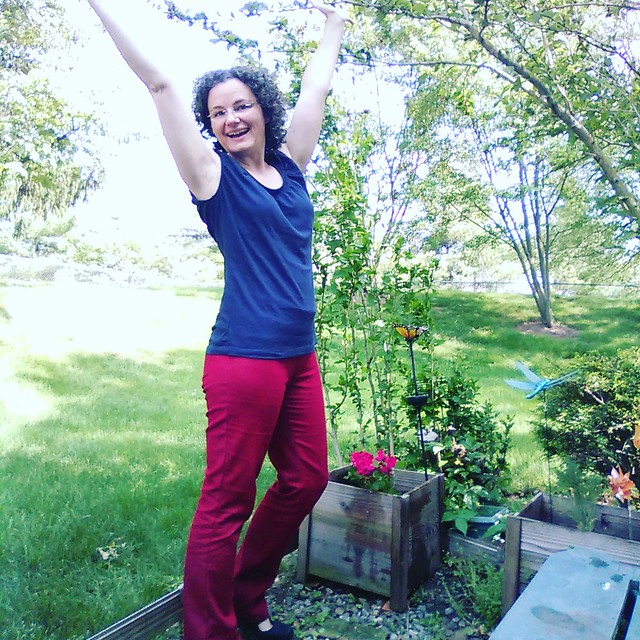
After wearing all day.
Let's talk about the Jalie Eleonores. They are pull-on stretch jeans with a faux front fly and faux front pockets. Over the last few months they have become uber-popular among sewing bloggers.
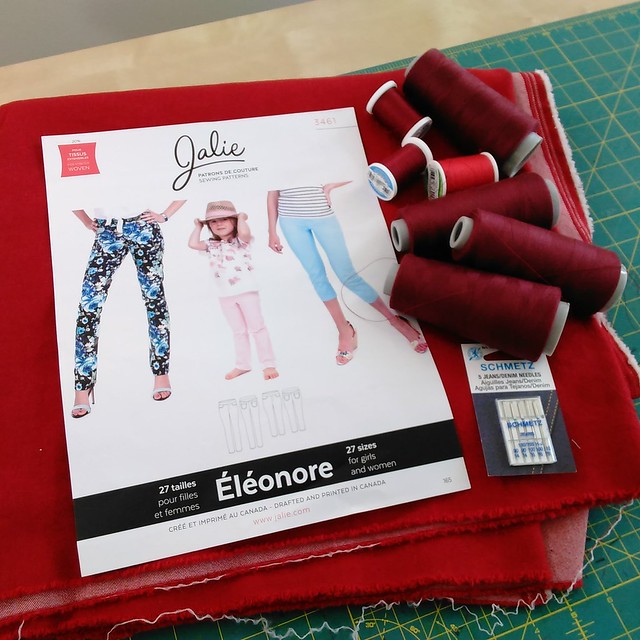
I was a bit skeptical as the cover model seems to be more of a rectangle shape. I am a pear with a 10" difference between my waist and hips.
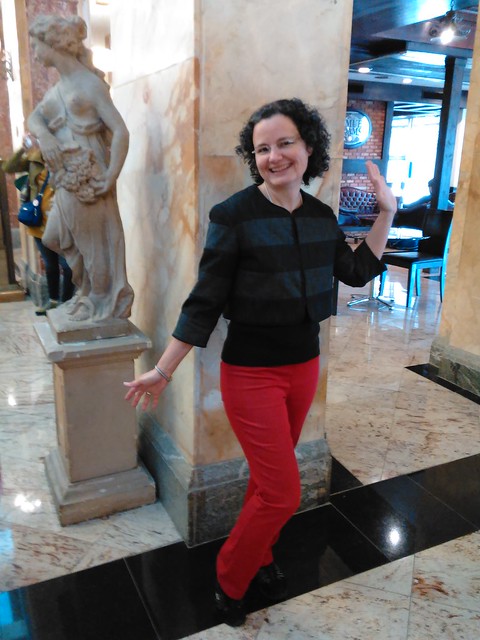
It was suggested that PR weekend attendees wear red jeans for the shopping day. The recommended pattern? The Jalie Eleonores.
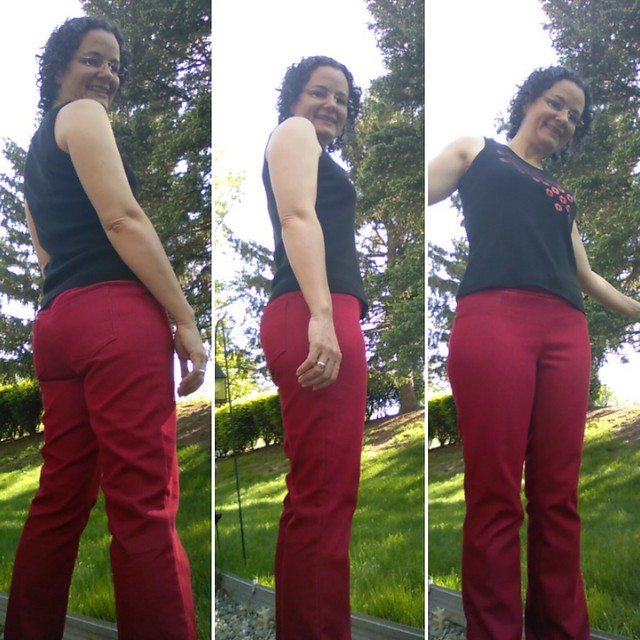
Morning photo shoot, wrinkles and all!
- Then Clio (of Five Muses) blogged about how, by essentially using ponte knit with 50% stretch and by taking a wedge out of the CB yoke, she was able to get the Eleonores to work for her pear shaped body.
- Dawn (of Two On Two Off), an hourglass, also blogged about these and included a tip about cutting the back elastic shorter to get a snugger fit.
So, on May 7 I decided I would start making these jeans to be worn on May 14 (and to fly with me on May 12).
I am an incredibly slow seamster compared to many other sewing bloggers. I'm also a perfectionist, so I knew with this short time frame I'd have to speed my sewing up AND allow "good enough" to be, well, good enough.
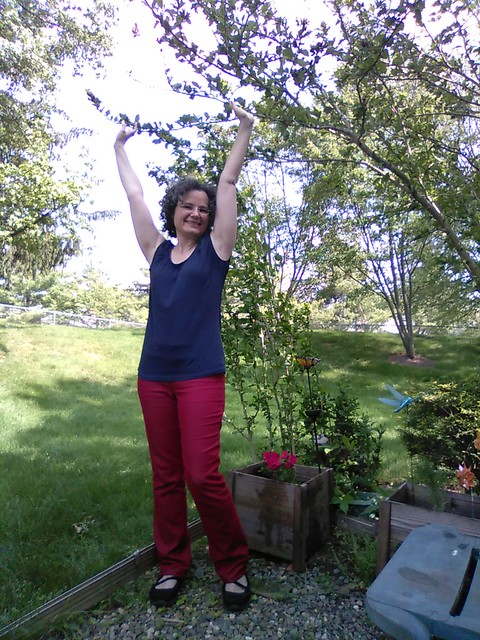
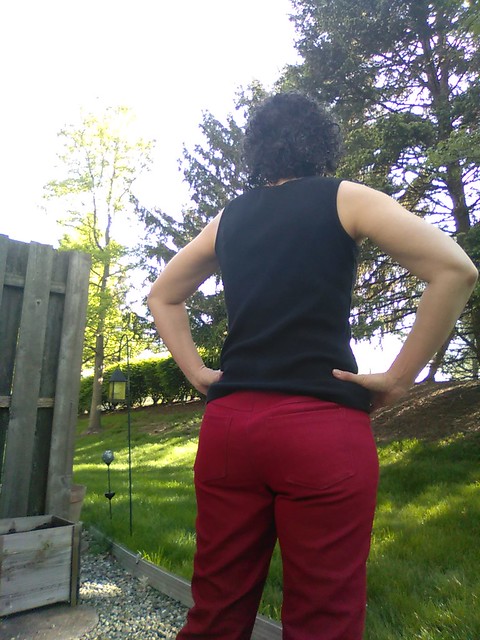
After wearing all day
SPEED IT UP TIPS BEFORE I STARTED SEWING:
- Located 4 matching spools of dark red thread in my stash
- Located 4 serger cones of burgundy thread in my stash
- Wound 2 bobbins at the start.
- Threaded my BL Soprano with single denim needle
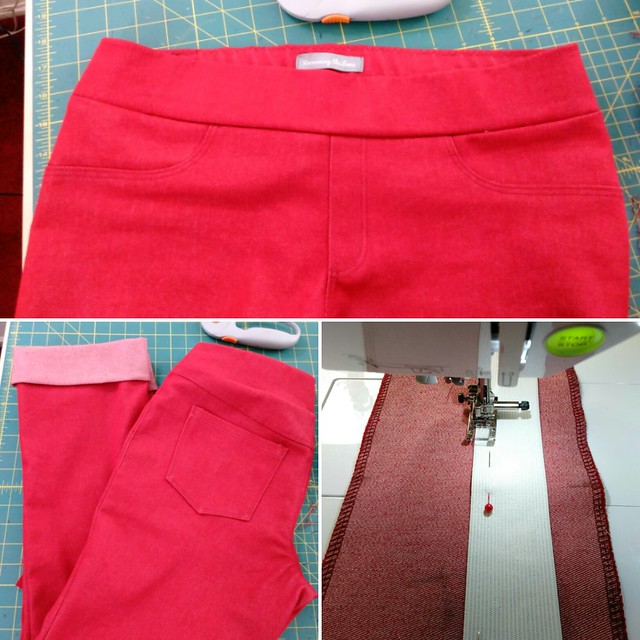
- Threaded my Brother PC-420 with a twin stretch needle for topstitching (this brilliant idea of using a twin needle for topstitching I stole from Clio--it's a great idea because the jeans are supposed to stretch all over)
- Threaded my BL Enlighten serger with the burgundy thread and determined setting the DF to N setting worked for my fabric.
WHY SPEED IT UP TIPS WORK:
- Regular stitching was done on the Soprano and all the top stitching was done on the Brother. I didn't have to stop to unthread and rethread the machine.
- Each machine had their own bobbin, and by the time the Soprano ran out of bobbin thread, I was done topstitching on the Brother, so I could load the Soprano with the Brother's bobbin.
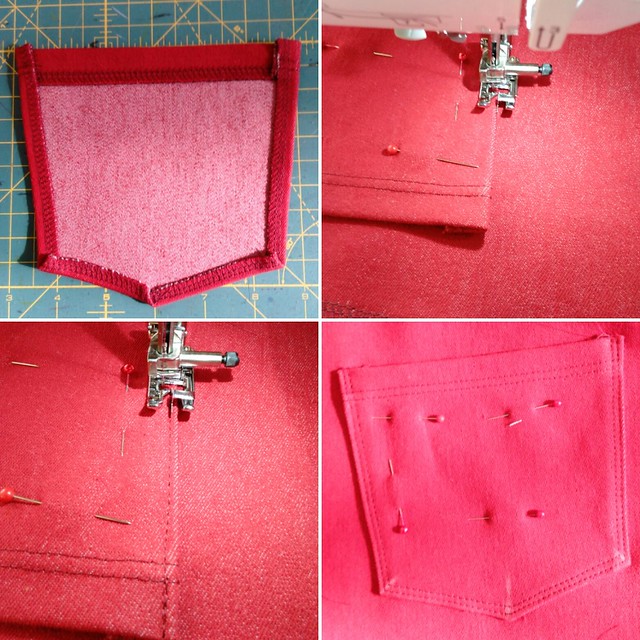
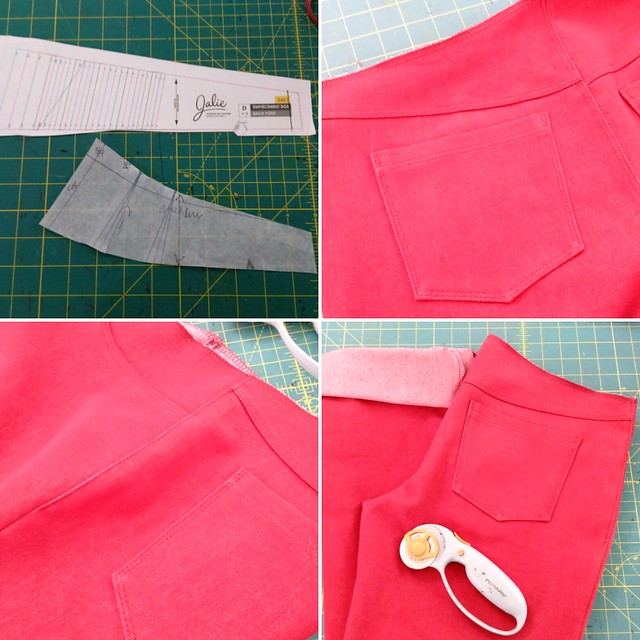
Pocket pix...I could not use the twin needle to stitch them on (because no way to pivot!). I used a single needle to stitch them on, and marked in chalk where I would need to pivot. I used the flange on my new "edge joining stitch-in-the-ditch" foot as a straight stitching guide.
MUSLIN #1 (after prewashing/drying fabric 2x)
- I had 3 yards of red stretch Pacific Denim (originally purchased at Haberman's booth at the ASE in probably 2013
- The Eleonore takes 1.5 yards
- I figured on one muslin (out of the red denim--I had no other denim in my stash like this one) and then the real deal.
- Cut the size V as per my 40" hip measurement (as per the directions).
- Basted them together (no topstitching)
- Tried them on
- The front was pretty decent. Some crotch wrinkles, but as per Michael Kors, the crotch was not insane.
- But the back....oh, I looked like a stuffed red sausage in the back. Waaaay too tight in the booty. Like exercise pant tight and then some. Noooo way I could wear them out of the house.
- Back gaposis due to swayback
- I have hyperextended calves (or gorgeous gams, however you want to look at it) and my calves were jammed in there. Lolz on the "how to make your jeans into skinny jeans" instructions. Just have hyperextended calves and they are already skinny jeans and then some.
- Back leg wrinkles.
- Side seam pulling toward the back in the booty and the calves.
- Used Lynda Maynard's technique to determine I would need at least another 2" of room in the booty.
MUSLIN #2
- Since the front was good enough, I undid the basting and kept the front as-is.
- Cut just the back in size BB which is 1" wider than the V (times 2 for left and right sides is the 2" I needed)
- Basted together
- Overall this was better in the booty. I scooped the back crotch which made it a bit better.
- Still not enough room in the calves though.
- Too much room in the thighs though.
- Back gaposis even worse (not surprisingly).
- Back leg wrinkles
MUSLIN #3
- I honestly didn't have enough fabric to cut the backs completely again. I thought I would, but you can't cut 4 back pieces from 1.5 yards of fabric (but you can cut 2 back and 2 front pieces from 1.5 yards). So I pieced a scrap at the back crotch point. I figured no one is going to see this piecing!!
- This back piece was a hodgepodge of sizes, basically BB in the booty grading to V in the thigh grading out to the largest size for the calves.
- Added 1.5" to top of CB yoke grading to 0 at side seam
- Basted together. I scooped the back again.
- Finally this looked good enough. Enough room in the booty, finally enough room in the calves. Thighs weren't too large. Back wrinkling, but I didn't care. Time was running out.
- I serged the raw edges of all pieces, then to the yoke.
- Gaposis was still present. I took a wedge out as Clio did, but it was way too much (1" wedge is 2" total) and created like a point or a bubble or something. Not a smooth look. By this point I had already topstitched the yoke etc I felt this wasn't good enough so....
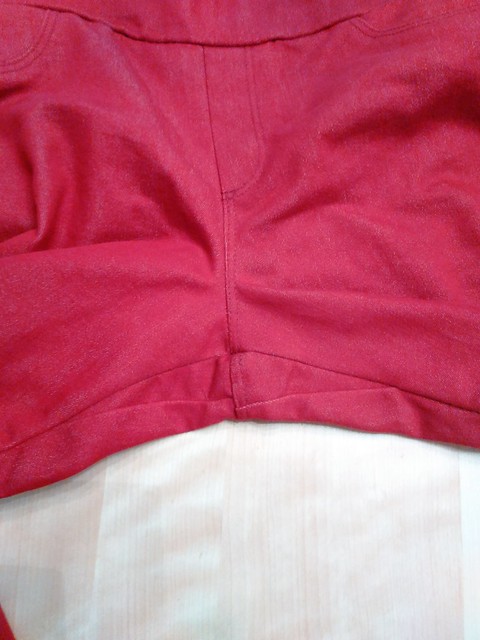
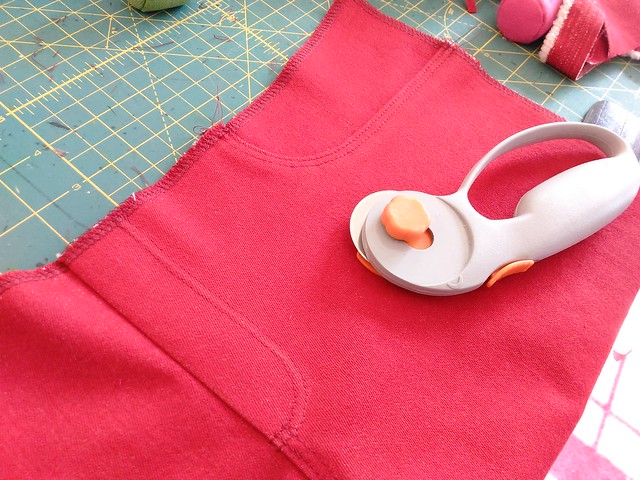
Pieced together section no one will ever see. Except you.
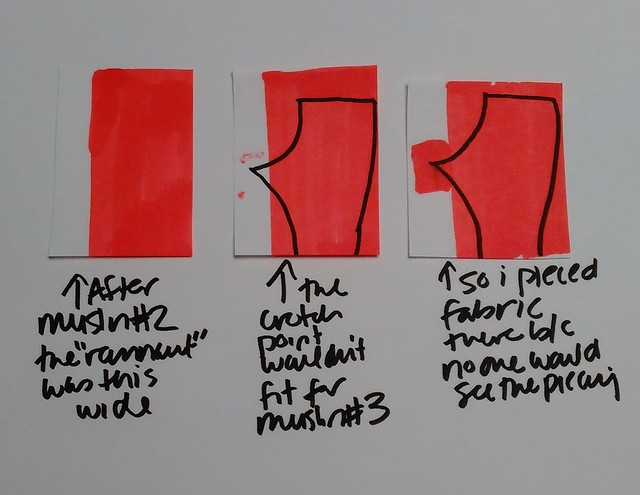
To answer Joyce's question in the comments, here is why I pieced.
MUSLIN 3.5/REAL DEAL
- Undid the yoke from muslin 3. Unpicked all the topstitching, etc.
- Used Jennifer Stern's method (from lesson 2c of her online PR class From Blue Prints to Blue Jeans) to create a curved back yoke that fits the top of the size BB back of the jeans and transitions to the V sized waistband.
- Wound up reducing the 1.5" I had added to the top of the CB yoke to .75" (but it probably needs to really be 1.5")
- Finally was on to the waistband. Dawn recommended reducing the back elastic by .5" for a snug fit. I had to reduce by .75"
- I cut 1" off the bottom and hemmed them the morning of May 11, in time for my May 12 flight!
- I was comfortable enough to wear them, even though they have back leg wrinkling.
- They are not perfect, but they are "good enough"
- Even though I worried about the wrinkling, the fabric does wrinkle naturally from wear and to a non-sewist, they are not going to notice at all.
- They do slide down a bit when I sit down. I probably really need 1.5" at the CB seam and not just .75" to keep them from sliding.
- Because of my adjustment, the back leg is so much wider than the front leg which skews the side seam from the bottom of the calf to the ankle.
- Sewing that intensively before PR Weekend (the sparkle dress, the backpack, then the jeans) really wore me out. I haven't sewn for 3.5 weeks, though I might sew today!
SOURCING MORE STRETCH DENIM
- The pattern recommends 20% stretch denim.
- I want to make them again, in solids and also a dark small-scale stretch floral with 20% stretch. I am having a hard time finding small-scale florals that I like though. I may need to make a trip to Mood to see if I can find them.
- For some crazy reason I remembered that the name of the denim I bought is Pacific Denim
- Fabric.com has Pacific Denim in a few colors (though they say it's 15%, I think it's more like 20%). I ordered a swatch and it is the same denim. So I ordered some more to make a denim jacket which has been on my sewing bucket list forever. It turns out the Style Arc Stacie denim jacket is made with stretch fabric (whereas the Jacket Express is made with non-stretch).
- This denim has AMAZING recovery. It does not grow throughout the day like some denim. Huge props to this denim!
So please let me know, was this explanation helpful and if you think it will help or has helped you!

This is very helpful Kyle!
ReplyDeleteI was just starting on a pair of Elenores, but have been wary because of an 11" difference waist to hip. I'll need to add some back length too, just trying to figure out how much 😄
Thanks Dale! Clio's difference is 14" and mine is 10"...you can definitely make it work!
DeleteThank you for this post. I do think it was helpful. Kudos to you for making all of those muslins. I think the jeans fit you quite nicely and now all you need to do is tweak it for your next pair. I am tempted to get this pattern. I am a rectangle so maybe I wouldn't need that many adjustments. Thanks for recommending Pacific Denim. It's good to know where to go for the correct amount of stretch needed for the pattern. Great job!
ReplyDeleteGreat job on your pants. I love how you fit in the back pieces. I also get the back wrinkling on my Eleonore pants. They form "diamond" shapes! I welcome any advice to smooth those out!
DeleteHi Tomasa! As a rectangle you wouldn't need to worry about gaposis nor curving the yoke. I say go for it!!
DeleteHi Pencil Girl! Goodbye Valentino wrote a post about how she got rid of her back leg wrinkles in two steps.
DeleteWell done!! I think the worse thing in sewing is to get the fit of a pant just right.... Can you explain why you needed to add the little bits to the back please? I understand you didn't have enough to cut it again, but why did you need to add extra there???
ReplyDeleteHi Joyce, Thanks for your question. I just added a drawing to the post that explains why the piecing was done there (since I had not take photos of that . The only other place to do the piecing would have been the hip but then everyone would have seen it.
DeletePencil Girl is a friend of mine - I still need to post photos of her Eleonores. She had some of the same fit issues behind the knee and her calves.
ReplyDeleteI'm not a perfectionist but if I ever sew jeans, this pattern would be my pick.
Hi Kathy! I am interested to see how long it takes to sew these again since I think the fit is good enough. Of course every fabric is its own universe. :)
DeleteKyle, you CAN pivot with a twin needle. Try it, it is magical. It looks like you will sew in a tuck, but you don't. Magic. :)
ReplyDeleteWOAH! Mind blown! I will have to try that with my next pair. Thanks BeckyMc!
DeleteDEDICATED! That's what I call you. You worked it all out and your jeans look FAB!
ReplyDeleteAwww thanks Faye!!
DeleteYou have so much patience! I'd have given up at the second muslin I think. They've come out well, well done!
ReplyDeleteThanks Catherine! I was determined to make it work to a "good enough" point.
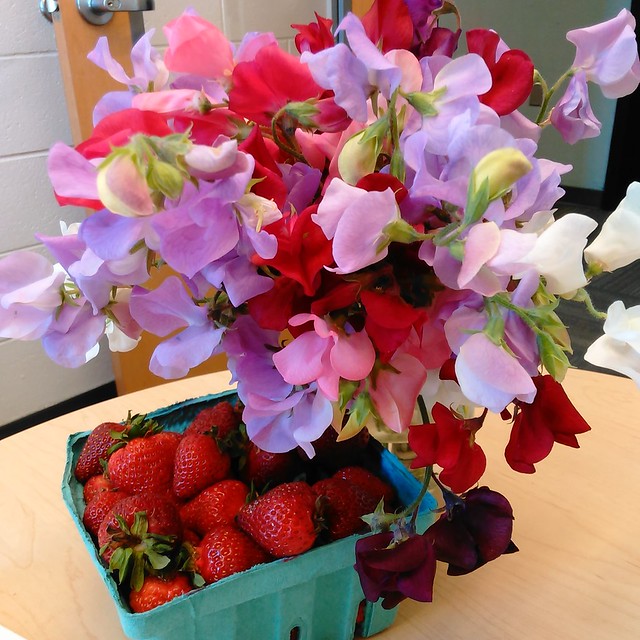
DeleteWow - great jeans! I am so impressed with how you persevered. Well done! I do have a question, though ... PFM? I thought that meant "Please forgive me" (or, to my football fan friends, Peyton F...g Manning!) The sweet peas and strawberries are gorgeous!
ReplyDeleteAh! PFM is Princeton Farmers Market. I just edited the post to clarify that. I've been going to the PFM each summer since 2009. :)
DeleteGreat post with lots of good tips & info . You are inspiring me to dip my big toe into pants sewing . Love your red jeans - saw red jeans all over Ireland -you're fashion forward !!!!
ReplyDeleteOnce I started making the red pants I started noticing others out in public wearing red pants, leggings, jeggings or jeans too, like 1-2 people per day. But it sounds like they were all the rage in Ireland!
DeleteThey look fantastic. Thanks for sharing your journey in detail. Very interesting read. I've bought some amazing stretch denim at Parons in the garment district. Best stretch denim and non stretch denim I've ever seen in lots of different colors and different amounts of Lycra. Once I got a black Banana Republic 4way stretch denim that was DA BOMB. I made Jalie 2908 and wore them for years until they died. Good luck shopping!
ReplyDeleteHi Mary! Oooh I love Paron! But I haven't looked at their denim selection too closely. I will next time.
DeleteI just bought this pattern a few weeks ago, and I was concerned about the wrinkling at the back of the legs. If you read Goodbye Valentino's April 20 blog post, you'll see that Sarah sewed two pairs of Eleanore stretch jeans and that she dealt with the the wrinkling by reducing the length of the back leg and stretching the back leg to fit the front piece. Hope this helps.
ReplyDeleteThanks Helene--I might try this next time.
DeleteYour pants are fabulous! Being pear shaped, I understand the fitting challenges. You handled yours beautifully!
ReplyDeleteThanks Vanessa! It would be awesome if the Jalies came in "curvy" for us pears!
DeleteYour fitting instructions are very helpful. Thank you for the explanation with such clear pictures. I am also a pear and often shy away from new patterns rather than do all the work involved in fitting them.
ReplyDeleteThanks BeccaA! It is a lot of work to fit, especially when all I want to do is sew. And pants fitting can be a total emotional vortex too. In this case, striving for "good enough" is what works better for me, otherwise I get too depressed.
DeleteFabulous! I'll have to incorporate some of your changes if I sew this again. And yeah, how does it make sense to topstitch a stretch fabric with a no stretch stitch? I just didn't get it.
ReplyDeleteThanks Clio! Your post was another step in encouraging me to sew this pattern.
DeleteThis was most helpful. I am more of a rectangle and have made one attempt at these. Results are okay, but have too much fabric under the bum that needs tackling and length was way too long even after shortening the pattern. I like how persistent you were to get a good fit and I am planning on my next version.
ReplyDeleteGreat Linda! Go for it!!
DeleteWOW! They look fabulous. And that colour is a show-stopper!!
ReplyDeleteFantastic post. Photo and written content superb. Thank you for an exceptionally informative post.
ReplyDeleteI love red jeans and yours look terrific. I can't believe in 7 days you did all that!!! I'm impressed! I can't wait to see the next pair.
ReplyDeleteHi! I'm pear-shaped, too, and just completed a muslin of the Eleonores ... to my amazement, they almost fit! I was googling around looking for help with adjustments and found your blog. Thank you for sharing!
ReplyDelete