Showing posts with label pillow. Show all posts

Monday, December 30, 2013

Pressing Matters: The Elna Press

You know how they say, if you write out what you want it's x number of times more likely to come true?

I wrote about wanting an Elna Press in this post, and my dreams have come true.
Elna press Alize
The ElnaPress Alize.

My parents read my blog post and then hopped over to ebay where they snagged this one for Christmas.

I saw the Elna Press in action in Janet Pray's "Sew Better, Sew Faster" Craftsy class and was AMAZED.  You might even say I was impressed (ha ha ha ha ha).  Plus velosewer, who is the fastest seamstress I know, owns one, so it has to be one of the secrets of her speediness.

Elna press Alize
I tried it out yesterday when I made another NYC subway zipper pouch.  Here I'm ironing  pressing on the interfacing:
Elna Press Alize
Perfectly pressed!
another zipper pouch!
It makes ironing  pressing on the interfacing a breeze because it takes all of 10 seconds to fuse the interfacing to the fabric!!! And it times it for you and beeps to let you know when it's ready.

So it's speedy + times it for you + really fuses the interfacing to the fabric. Yay!  I wish the surface was a bit larger, but I think this will speed up part of the sewing process.

It does not have a light, the sleeve board, or the "vap o jet" (it's a dry press, so I use a spray bottle to spritz) but it is still pretty awesome.

Here I'm ironing pressing some corduroy. I know, I know, crushing the nap. But this is for pillows. And I suspect those who disapprove of my dodgy sewing techniques long ago stopped reading this blog.
Elna press Alize
This is the pillow I'm working on.
Fabric pressed.
Interfaced pressed (you can see the interfacing on the bottom left piece)
Fabric raw edges serged.
My inspiration leaves....
pillow I'm working on

And my zipper pouch:
another zipper pouch!
the zipper
another zipper pouch!
The inside
another zipper pouch!
If you own the Elna Press, do you have a stand for it? If yes, which one? I'm thinking of either buying a pressing stand or buying another tall Ikea table for it. It will live where the pile of fabric used to be against the wall.

Be well!

Sunday, October 14, 2012

The Asterisk Pillow in All Its Glory

hello asterisk pillow!
The Asterisk Pillow, Casa Kyle

I met Leslie last year at PR Day Austin 2011.  When she introduced herself to folks, she would say, "I'm Leslie--the Other Leslie in Austin".  The Other Leslie in Austin has a delightful blog called The Seasoned Homemaker.    It turns out Leslie teaches sewing in Austin as well as living there.  This summer she posted a series of tutorials on pillows that were really a broad education in the basics of sewing.  I have been sewing since age 12 and learned things in the tutorials I only recently learned or started doing in the past few years or never even tried at that point (like French seams).    She is serious about her tutes, and they are spot-on.  Detailed instructions, with pix, no stone goes unturned in her tutorials. 

I saw her ampersand pillow tutorial and had to have it.  (Wouldn't it be cute for an engagement photo? Couple sits on couch holding the pillow between them?)
By the time I got around to making it, I changed it to an asterisk. 
I used Leslie's piping tutorial to make piping for the second time in my life.  The first time is here.  It really is easy to make your own piping.

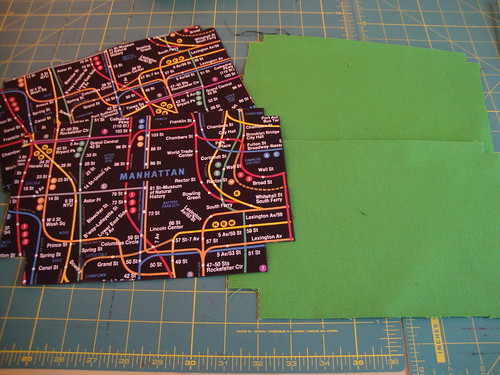
Then came time for the asterisk.  I had saved some asterisk templates from my reverse applique phase (one attempt is here).   But none of them were large enough for the pillow.  I had planned on going to Staples and getting one of them enlarged but I didn't.  So I had to enlarge it the old fashioned way, using a technique I learned in high school art class.

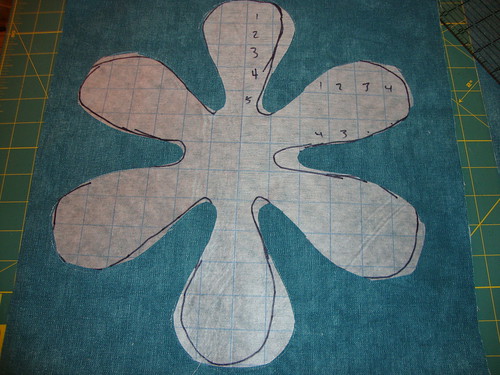
I got out some graph paper (a notepad left over from my old job)....and traced around the two templates I had. 

How I enlarged an asterisk template
Why I felt the need to autograph this "piece of work", I don't know.

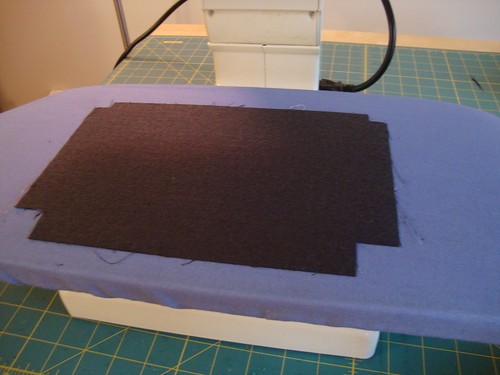
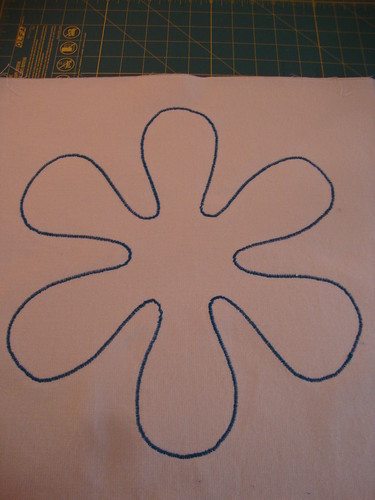
And then I traced it on the "grid interfacing-type-stuff" which is used for tracing patterns. The grid there is 1x1 inch. So the larger of my asterisk templates would produce a 14x14" asterisk--perfect for a 16x16" pillow.  But I wound up folding it into quarters and cutting....which is why it doesn't really follow the lines I drew...
asterisk template
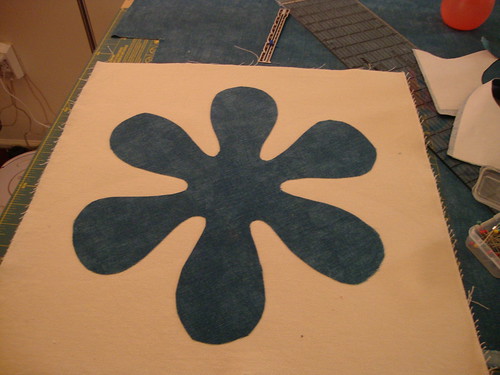
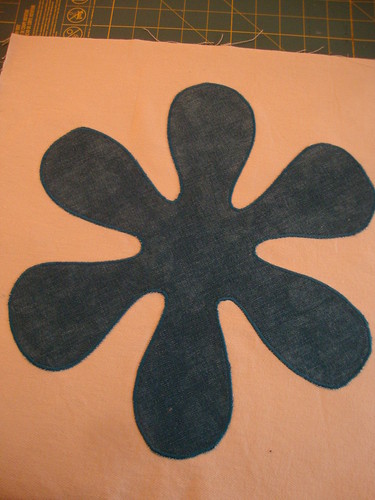
The turquoise fabric I used is uplostery fabric remnant that has been in my stash for ages.
I used heat and bond on the turquoise fabric.
Then I cut out the asterisk using my rotary cutter.
Then I fused it onto the pillow front.
asterisk heat and bonded on
Then I stitched it onto pillow. I used a zig zag stitch set at stitch width 3 and stitch length, er, it was probably 1? I can't remember, it was last weekend. But I played with some samples first to get the stitching to be what I wanted. I guess my note to myself for next time is to stitch OVER the raw edge and onto the base fabric a little bit, so that the raw edge gets completely covered.  You can see I didn't always get the entire raw edge covered so it's fraying a little.
using a zig zag stitch with small stitch length
And then it looked like this:
asterisk now sewn on (front)
and on the back it looked like this:
asterisk now sewn on (back)
So I got to use my Kai needle craft scissors, with double curved blades. I bought these at the ASE and OMG how did I live without them? They are AMAZING. Look at how easily you can snip off threads when the blade is curved doubly?  You can get really close to the fabric without contorting your hand or the fabric....you need these scissors in your life!
demonstrating the Kai needlecraft scissors N5130 double curved blades
Also you can see this is one of my samples where I was trying to figure out stitch length for the applique; and also practicing that tight curve.  And I threw some piping on top so you can see the piping I made.

At that point I finished up the pillow as per her tutorials (a combo of the envelope pillow and the piping tutorials).

Asterisk pillow
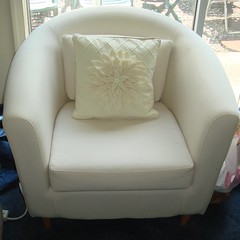
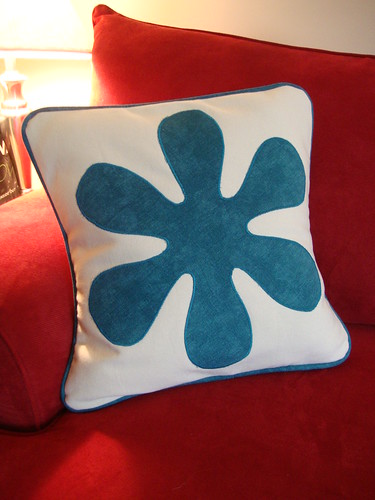
Here it is on my living room couch
asterisk pillow on my couch
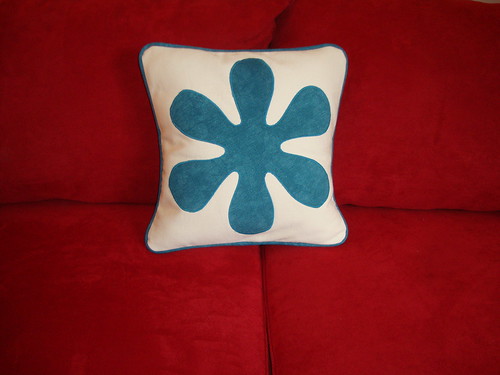
My living room decor is Hawaiian-style.  I feel like the asterisk could also be vaguely flower-esque.
my living room
Aloha!
If I make this pillow again, I will enlarge both back pieces so there is more of an overlap.  My pillow is kind of bursting out the back, but I think that's probably due to operator error or deviations (using larger seam allowances, and larger widths for finishing the exposed edges of the back of the pillow (the "envelope" part where the pillow is inserted).  I might sew in snaps back there or buttons/buttonholes.

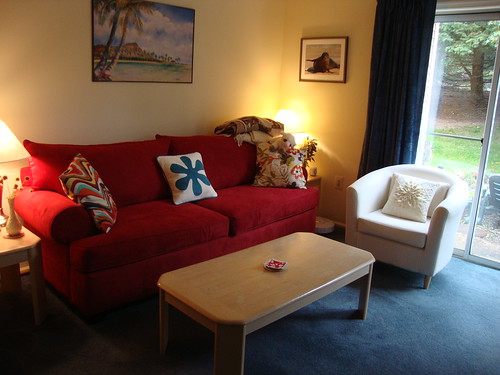
The other pillows on the red couch are from Pier One, but the pillow on the ivory chair is one I made in 2009. It's the Amy Butler Mum Pillow, which I blogged about in several posts, the last of which is here. The free pattern for it is here on Amy's site.

It always looked a little flaccid in the corners so I used some stuffing to fill it out last weekend--MUCH better.
Amy Butler Mum pillow, restuffed
I have always adored the pillow--it makes me smile.
Amy Butler Mum pillow, restuffed
So here is a teaser for what I'm working on now:
Burda Style 7253 in progress
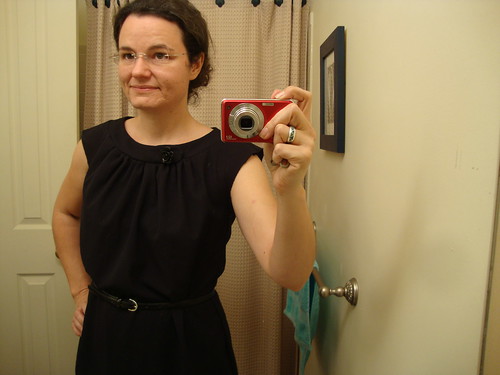
It's Burda Style 7253.
That rose button is just pinned on for the photos.
Burda Style 7253 in progress
Look at how nice and even the gathers are on one side but not the other. Hmmm...I will have to play with that. I used my serger for gathering, but I was paying more attention to getting the band width right, and not as much about the gathers, when sewing the band to the dress front.  I'm still tweaking the fit, and have to bind armholes and sew the back kickpleat and hem.


Here are the Princeton Farmers Market flowers from 3 weeks ago. I have bought pretty much the same bunches the last two weeks too, they are very similar! I think this might have been the last week for the flowers as it hit 32F on Friday night. (then today it was 75F....)
Princeton Farmer's Market Flowers
I love their vibrant colors! These are zinnias and have become my go-to flower after the end of the black eyed susans. I especially love the green ones (just one in this photo).

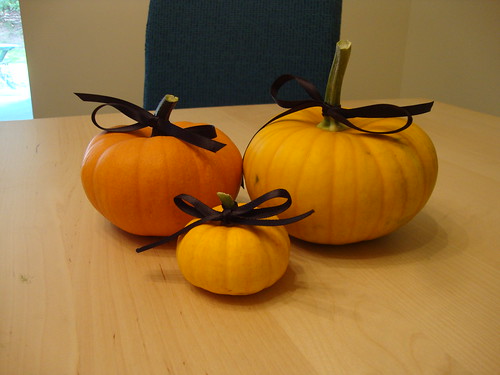
Last weekend I harvested the remaining 3 mini-pumpkins (gourds). So I harvested 7 total and gave 3 away.
Pumpkin Family Portrait picture day:  pumpkins A (2 months), M (21 days), and J (1 month)
And finally, I decided to start cooking again. Here's my dinner tonight:
chicken noodle soup
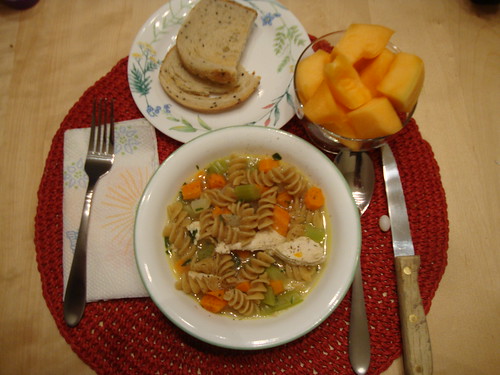
Chicken noodle soup, made with parsley from my garden.  I felt proud of my "knife skills" tonight.  Chopping used to take ages and now it's relatively fast.  Improvement, progress, yes!

So thank you to the Other Leslie in Austin for posting such great tutorials, and for encouraging general sewing improvement all around!   By the way, right now she is doing a 31 day series of tutorials on embroidery machines, if you're interested.

By the way, if you're on Blogger, could you please check your stats and see if they have disappeared?  All my stats for page views/sources/etc seem to have been reset today back to 0????    Why?  How?  I don't know???  I don't know who to write to about it?  I liked my stats!  At least my blog still exists, and the comments are still there....  OK, I just googled "blogger stats reset" and it happened to everyone with a blogger blog...I'm not the only one...phew!

Be well!!

Saturday, May 30, 2009

MRI is done!

doesn't it look so nice??
Amy Butler pillow on my cheapy Ikea chair.
Doesn't it look great??

Kitty cat?
New cloud pix! Is this a cat??

winky face?
Winky face?
Profile?  cloud trio?
Er, another profile?

A big thank you to everyone who provided their MRI stories--it really helped me in understanding what the process would be like!

I had the MRI this morning. The whole process was extremely easy--I was at the center for about an hour total, and in the machine for 20 minutes or so. I had heard that the machine would be loud, but it was louder than I thought it would be! When the new scan starts, it sounds a lot like the buzzer at the baggage carousel at the airport--if I actually put my head against the buzzer! They asked if I wanted to hear music, but I could only hear it between scans (Girls Just Want to Have Fun" was the initial song played). Pretty much the entire time, the machine is making this loud noise. They had put headphones on me, but they were on my cheeks instead of my ears, and I wish I had adjusted them to the proper position after she put them on me.

When I was first positioned in the tube, I kept my eyes closed--but eventually I opened them. While the tube was close to my face, it wasn't as close to my face as I thought it could be. Also, my head was propped in such a way as that I could see down my body to the "light at the end of the tunnel" and I could see the technician's booth, with the tech sitting behind smoky glass. Looks like I had a boring scan since she was yawning a lot and playing with her hair, poofing it, etc. The "tunnel" itself had this strip of lighting on each side, and I thought it looked rather Star Trekkian. While I don't consider myself to be claustrophobic, it was a lot easier being able to see the end of the tube. Also, I wasn't entirely in the tube--my knees downward were sticking out the end.

They checked in with me twice through the intercom thing (just like on Grey's Anatomy!), and they had given me a ball that I could squeeze in case I needed to talk with them.

Near the end my hands felt like they were getting kind of numb. I clenched the one hand not holding the ball-thing and that seemed to help.

I left with a CD of my images! And they said in 2-3 business days, a radiologist will send the report to the doctor's office. So I think I'll know pretty soon what the results are.

When I got to the center, there were maybe 10 people in the waiting room, including a set of parents with their little boy. The boy was crying and it kind of made me want to cry. His parents were saying "why are you scared?", "it's ok, they're just going to take pictures, it's only pictures", and "you were scared before that last test, and it wasn't so bad, was it?" They were called in while I did my paperwork, and before I was finished with the paperwork they were already leaving. He must have just had x-rays. His expression was a little shell-shocked; I thought he was going to look really happy afterwards. I was thinking if there was something I could have said that would have calmed him down--or distracted him. Like, it's the easiest test you'll ever have to take, or you don't have to study for this test. It's not going to hurt. (Things I had told myself, quite frankly). But I didn't know what his test was beforehand anyway. I guess I could have tried, "How old are you? What's your favorite color?" as a distraction?

When I was done with my test, the next MRI patient was waiting in the hot seat. I smiled at her and she smiled back. She watched me take my purse and glasses out of the locker and I looked back at her, all the while with my left hand on the side of the locker for stability since I had chose a locker near the floor because I had mistakenly thought the lockers at the top were taken. She said, "I was just looking at your nails--they are so long and mine are so brittle and peeling..."

I guess we all have something that someone else wants, without always knowing.

I've been feeling pretty good the last two days. I hate writing that, because usually that means the next day I feel really awful. I have the head cold, and I took Contact Cold & Flu medication this morning so that I wouldn't need to blow my nose while in the MRI machine (b/c you aren't allowed to move once you're in the MRI--maybe I took a chance with my clenched hand). But overall the gum infection is subsiding, I think I'm on the downward slope with my cold because the sore throat is mostly gone and I'm left with clogged ears and the runny nose, my knees are hurting only a little bit. And the back pain today has been at a 2-3. Of course, this afternoon I took a huge 2 hour nap, and I rested a lot outside on my lounge chair, as evidenced by my cloud pix!!!