
There's a long story about how I cut it out but ultimately landed on this....It only has 2 pattern pieces but you have to be really careful!
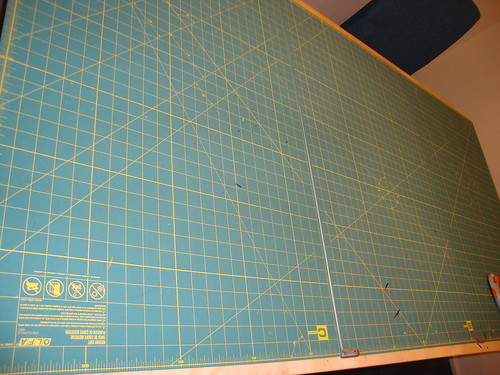
I got out my 3 big cutting mats and cut it out on my 72" long dining room table.
My cutting table in my sewing room is only long enough for 1.5 yards.
If you only have 2 yards (as recommended on the pattern envelope), you have to very carefully follow the cutting layout, especially while cutting out single layer. I did NOT do that the first time and basically ruined two yards of double knit. I blame the fact that I was cutting on a table that wasn't long enough, so I couldn't immediately tell if both pieces would fit at a time.
So here you go:
My three cutting mats on my dining room table:
The pattern pieces are upside down in this picture, but there are only two of them! Here I'm cutting them single layer:
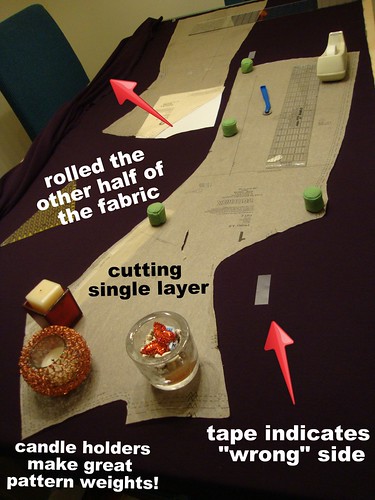
By cutting them single layer, the main thing is to roll up the other half of the fabric and not have it dragging off the edge, distorting your fabric on the table.
Spoiler alert: I learned in the PR class Understanding Knit Fabrics that double knit does not have a right and wrong side! But I had cut this out before the class, and I guess it's a good idea to decide which side you're going to use as wrong and right and be consistent about it. I used tape to mark my wrong side.
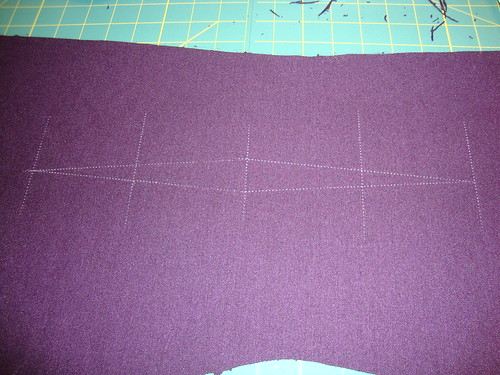
I used large sheets of wax tracing paper to trace the darts. I just love it!
By drawing out where the cross-lines are and exaggerating them, it makes it really easy to see when the presser foot is down.
So here are all the pieces cut out:
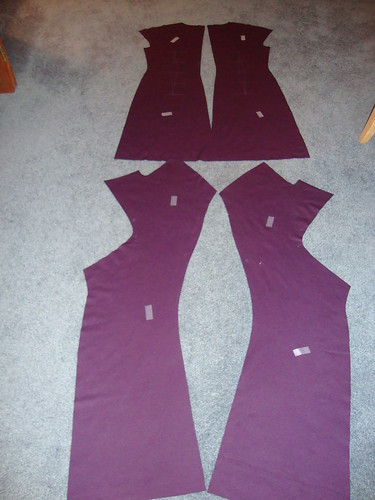
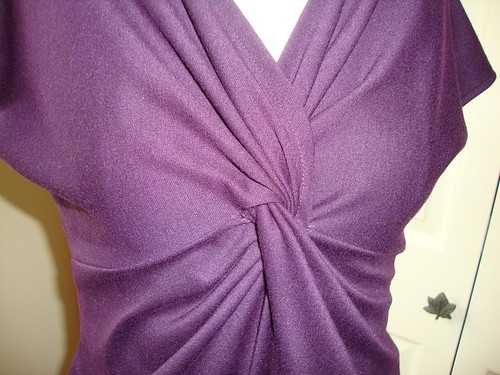
These are the front pieces--is your mind blown about how this is sewn together?
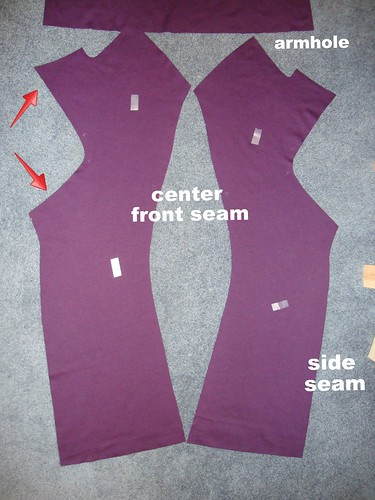
Hint: the two edges the arrows are pointing to are sewn together!
It is very simple to sew together and yet looks dramatic.
Just one more post about this dress and I'll be done!
Be well!!
Thanks for the photos-I have never made a twist top or twist dress, so it was fun to try to figure out how to connect the pieces. Enjoy your weekend.
ReplyDeleteLike Mary, I've never made a twist top either. Thanks for the photos and description; I am enjoying learning about this from you.
ReplyDeleteExcellent resource, if I ever start sewing again! But even if I do, I won't be as good as you!
ReplyDeleteThis actually is a very good post. I got bamboozled when I did this a few years ago.
ReplyDelete