I love the enthusiasm you are showing for my new backpack--I am enthusiastic about it too!!!
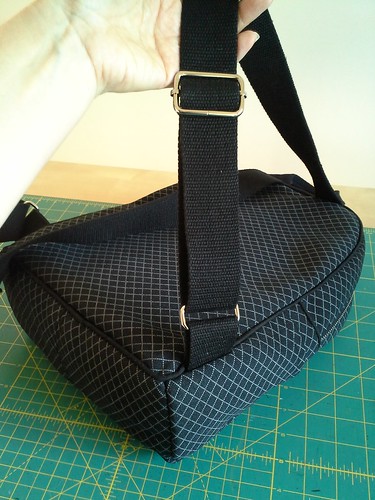
The Butterick 6072 has you make your own straps, and use no hardware. That means the straps are not adjustable. Instead, I raided my stash and found this 1.5" wide super sturdy and official feeling strapping from Pacific Trimming, and then bought the rectangle rings and sliders in nickel finish from this shop on etsy.
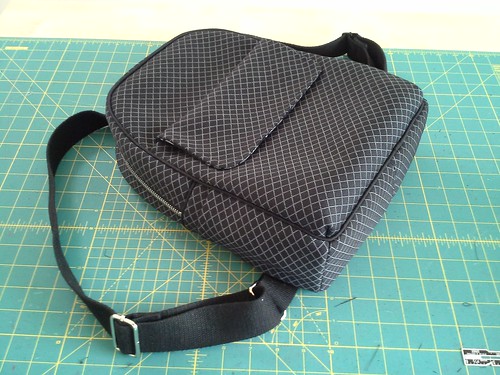
The Butterick directions have you sew the strap to the bottom of the bag, but I consulted 3 RTW backpacks and they all had the straps sewn on an angle to the side of the bag, so that is what I did (as show in the pic above).
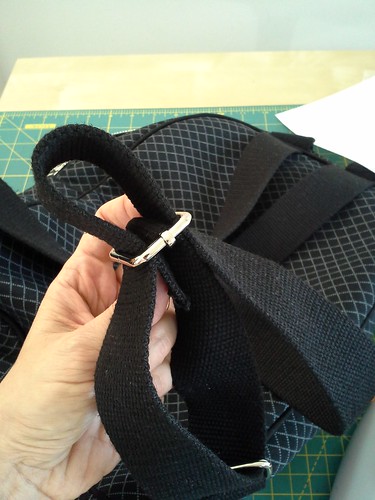
If you've ever made a bra or camisole with adjustable straps, the process of "threading" the straps through the hardware is exactly the same--it's just the length and width of the straps and hardware are much larger! Threading the strapping through the hardware feels very satisfying to me somehow, and I love the end result.
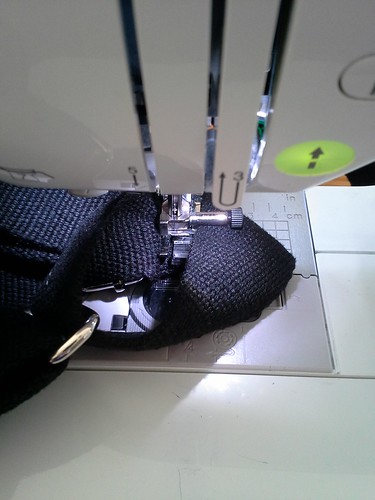
You can't tell what's really going on in the above pic because the strap is folding over but I am sewing the end of the strap to itself after threading it through the slider.
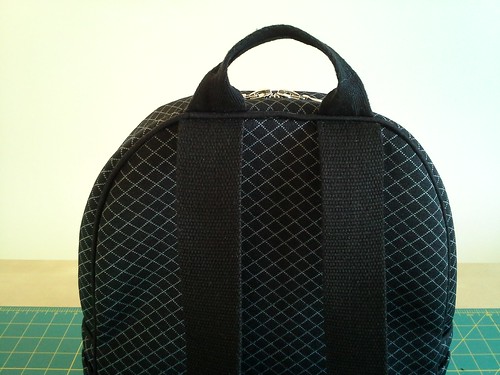
The directions also have you make a loop for the top of the bag, so you can hang it in a locker, and then sew it to the space between the straps. My 3 RTW backpacks all had handles, so I made one out of 1.5" strapping, also in stash, also from Pacific Trimming.
I folded the lengthwise edges together and used Wonder Tape to secure, then sewed it down.
I sewed the handle over the straps for balance and to make the handle functional. That way I could carry the backpack by the handle if I wanted to instead of using the straps.
Originally I made the handle too long and it was flopping over on top of the zipper, so I took that section apart and made the handle shorter to it would not cover the zipper when it flops forward.
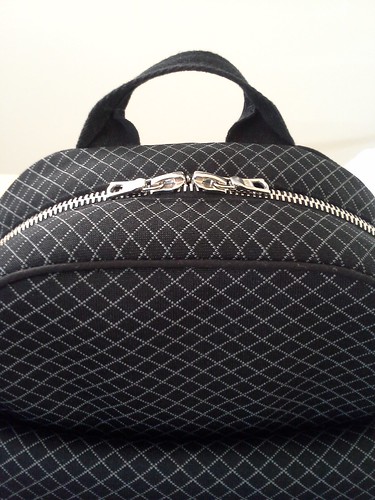
If you are curious, I sewed the straps on top first, then the piping, then the handle.
But on the side I sewed the piping first and then the strapping.
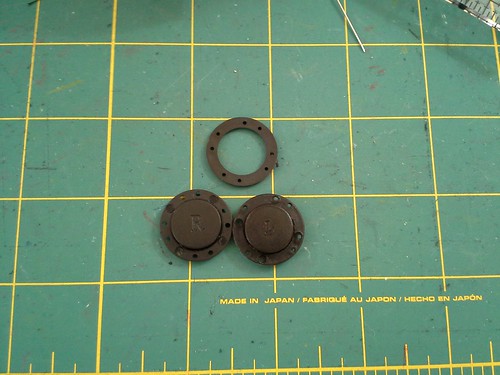
The Butterick directions call for velcro on the zipper flap but I don't like the attention-grabbing sound velcro makes when I'm in a quiet room, so I went for magnetic closure.
I bought the magnets (above) on Pacific Trimming.com, but by the time I realized that hey, these are probably supposed to be invisible magnets that should have been sewn between the layers, that ship had already sailed, and even I, perfectionist that I am, wasn't going to undo what I had already sewn to insert them.
I also don't know what that extra ring is for?
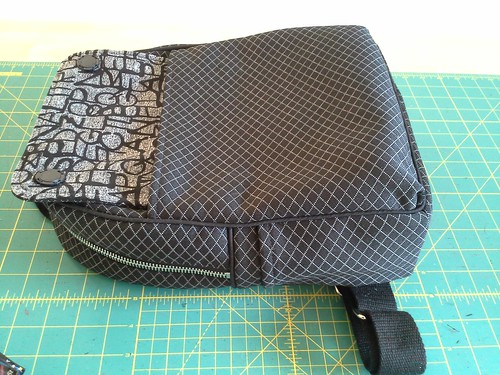
I sewed the magnets on the inside of the corner of each flap, but did not sew through the front of the flap. I then sewed the other half of the closure to the inside of the pocket, which was a total pain. If I had x-ray vision, it would have made that task easier. Ooph.
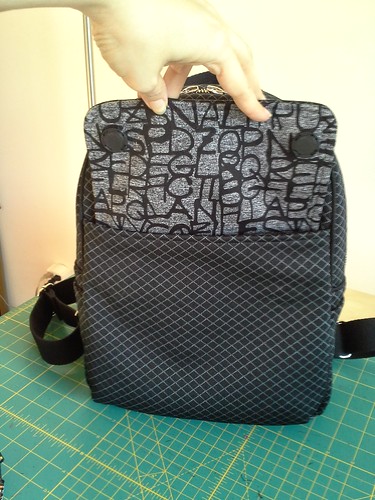
But it totally works!
This week I will post the final wrap-up post for the bag. It is done and I am going to use it tmw!!

This may possibly be my most favorite snow picture I have ever taken. That was the scene from my sewing room yesterday morning. Can you believe, the snow is all gone (except for snow pile remnants).
Be well!

Isn't it great to realize in your sewing journey that you have ideas to improve the functionality of the pattern AND the skills to make it happen.
ReplyDeleteThanks Kathy! I feel I have come a long way!
DeleteIsn't it great to realize in your sewing journey that you have ideas to improve the functionality of the pattern AND the skills to make it happen.
ReplyDeleteThat is an amazing backpack, all your hardware really sets it off and makes it looks extremely professional. Fabulous job.
ReplyDeleteThanks Lori! I am addicted to attractive looking hardware!
DeleteYour bag is beautiful! Functional and professional-looking. Bravo!
ReplyDeleteThanks Tomasa! I'm so excited by how it looks!
DeleteWow! Professional results that will be a joy to use, I'm sure. That's got to be very satisfying. Love it!
ReplyDeleteThanks nursebennett! It feels kind of surreal that I made it!!
DeleteThe snow picture is gorgeous, but that bag!!! That bag is amazing!!
ReplyDeleteAwww, thanks Pam! That is my best snow picture ever. :)
DeleteYour backpack is really professional !!! Great job !!
ReplyDeleteCan you pm me the name of the place you got the slider. I just made a purse & think I want a slider so it's adjustable !
Thx
Hi MaryEllen! I got the slides here: https://www.etsy.com/shop/tantalizingstitches?ref=l2-shopheader-name
DeleteHave fun!
Thanks -I just placed my order for sliders
DeleteMy gosh Kyle. Everything about this backpack is simply the best. You are the bag-making queen - hands down! From the fabric and lining to the zippers, piping, and straps - everything is well done and professional. You GO girl!
ReplyDeleteThanks for your enthusiasm, L! You are the Queen of Jeans!
DeleteAwesome bag.
ReplyDeleteThanks Sheila!!
DeleteKyle, your backpack is REALLY cute. And I LOVE that you have this tradition of sewing a new bag for every PR Weekend. Looking forward to seeing you again soon.
ReplyDeleteThanks Deepika! You remembered! I'm looking forward to seeing you again soon too!
DeleteYou continue to out-do yourself with each new bag! Fantastic job on this, my friend!!!
ReplyDeleteAwww, thanks Kristine! I agree that it's my best bag yet.
DeleteLove your new backpack.
ReplyDeleteThanks Cennetta! I love it too.
DeleteOh the snow look so pretty! And your bag…so professional. Beautiful job!
ReplyDeleteThanks Shannon! The snow was gorgeous! I am loving my bag!
Delete