
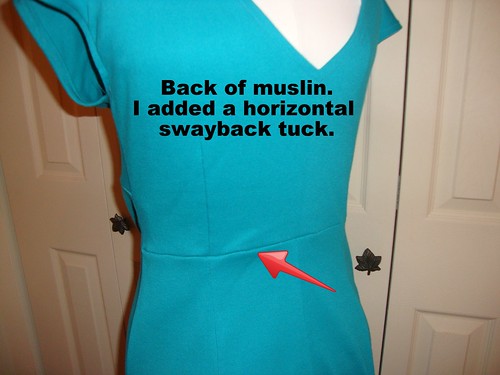
Now it's on to the swayback tuck and how I performed this little bit of magic.
So there was the tell-tale pooling above the derriere on my muslin, and the way I "fixed it" on my muslin was to cut a horizontal center seam on the back and sew up the excess.
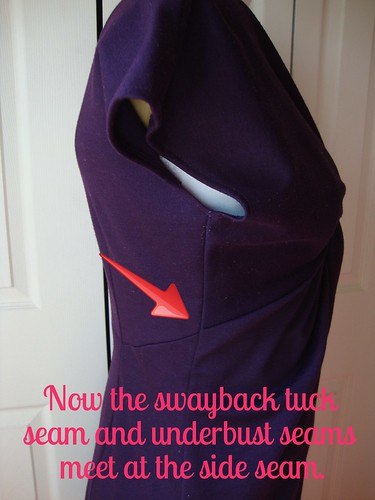
But I didn't like the way that the underbust-line and the swayback tuck line did not meet on the side seam.
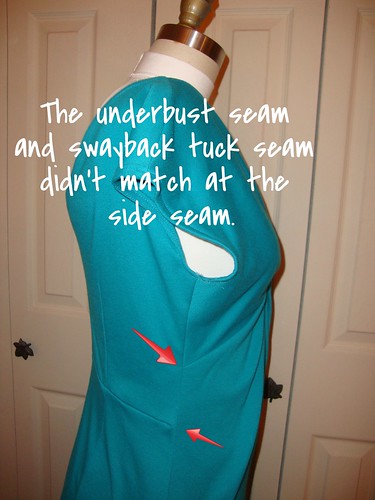
If I had mad pattern adjusting skills, I would have somehow taken the tuck out of the pattern but it was quite a lot to take out and I didn't know how to do it. Even my 1960's sewing book said more than (hrm, it might have been half an inch) and other adjustments would have to be done.
So instead, I binder clipped that puppy, and instead of clipping straight across, I "curved" it upward to meet the underbust seam.

I tried it on and it looked much better than without the clipping.
On the inside I chalked off the horizontal line (and I drew it all the way across). That is the amt that needed to be taken out.

I then pinned it to meet the underbust seam.
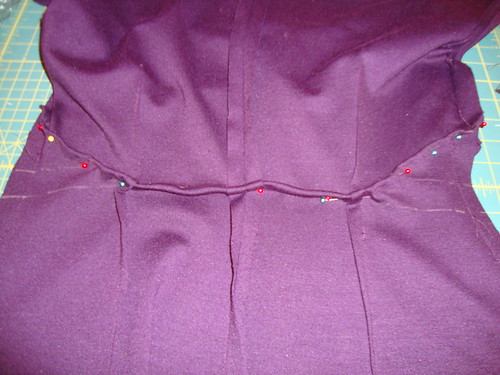
I then sewed it up.
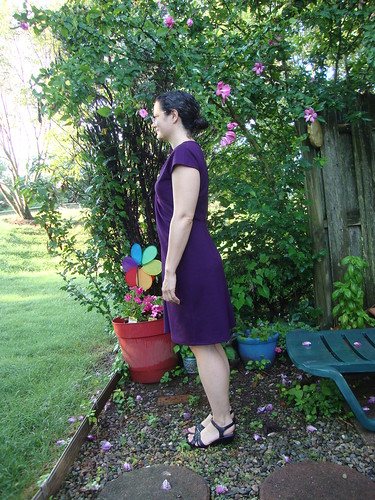
So this is how it looks on me:
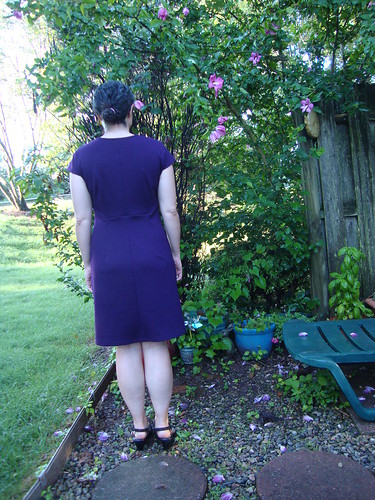
I think there is a little more that could be taken out, but it is MUCH better. I also think some of that might just be shadowing from me not cutting the excess off.
And here it is on Izzy:
And all is right with the world.

Next post: How I took care of the "holes" in the front of the dress, and the hem. Oh, and how I cut it out too.
Be well!
Creative fix, I like it!
ReplyDeleteWonderful remedy. Bravo for your persistence; your dress looks wonderful and that stitching line intentional.
ReplyDeleteInteresting fix. I like your solution.
ReplyDeleteI like what you've done Kyle. It looks like a much better fit. Nice.
ReplyDeleteSmart solution Kyle. I did something similar with a tunic last year. My motto-"Whatever works"
ReplyDeleteAh yes, another office supply (binder clips) to the rescue! I need to make a similar alteration (for me because of my posture); this tutorial will help me when I am working with commercial patterns. Thank you!
ReplyDeleteI think this is a great idea. I love the curving of the seamline to match/meet the bodice. I may have to revisit this pattern. Can't wait for tomorrow's post.
ReplyDeleteBrilliant fix - now it looks like a clever design feature as well as getting a nice fit at your back.
ReplyDelete