Showing posts with label jeans. Show all posts

Saturday, June 4, 2016

Fitting the Jalie Eleonore 3461 to my pear shape

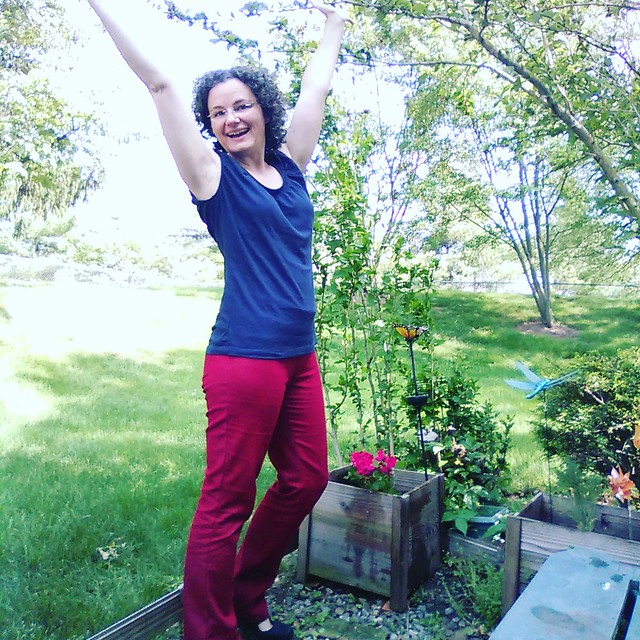
IMG_20160527_161759
After wearing all day.


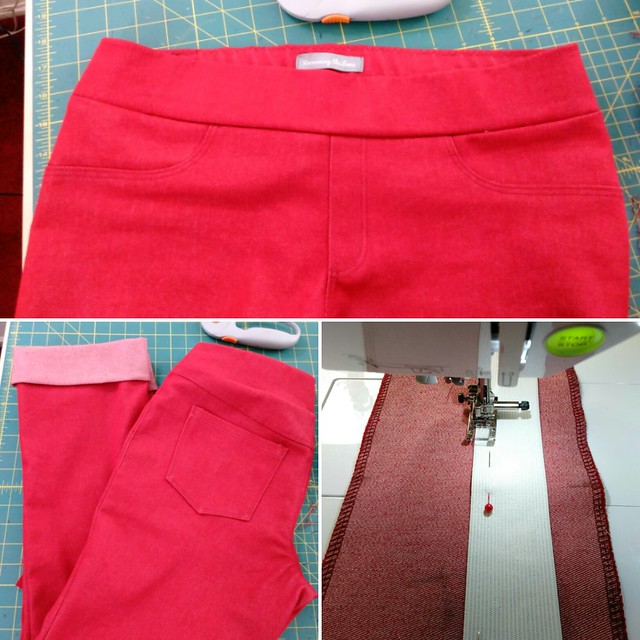
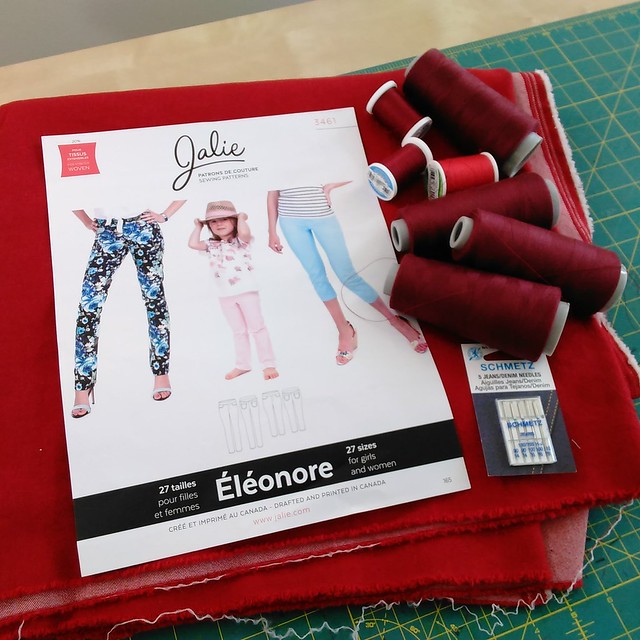
Let's talk about the Jalie Eleonores.  They are pull-on stretch jeans with a faux front fly and faux front pockets.  Over the last few months they have become uber-popular among sewing bloggers.
IMG_20160507_135424


I was a bit skeptical as the cover model seems to be more of a rectangle shape.  I am a pear with a 10" difference between my waist and hips.
IMG_20160512_083616
It was suggested that PR weekend attendees wear red jeans for the shopping day.  The recommended pattern?  The Jalie Eleonores.
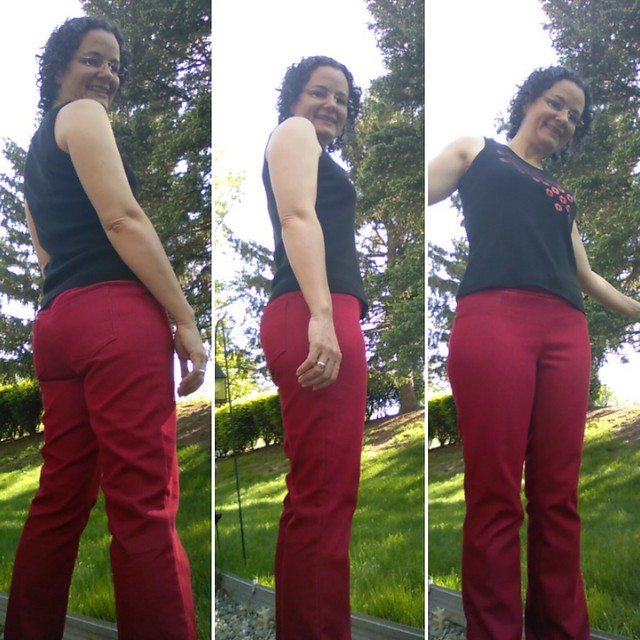
IMG_20160512_085945
Morning photo shoot, wrinkles and all!
  • Then Clio (of Five Muses) blogged about how, by essentially using ponte knit with 50% stretch and by taking a wedge out of the CB yoke, she was able to get the Eleonores to work for her pear shaped body.
  • Dawn (of Two On Two Off), an hourglass, also blogged about these and included a tip about cutting the back elastic shorter to get a snugger fit.
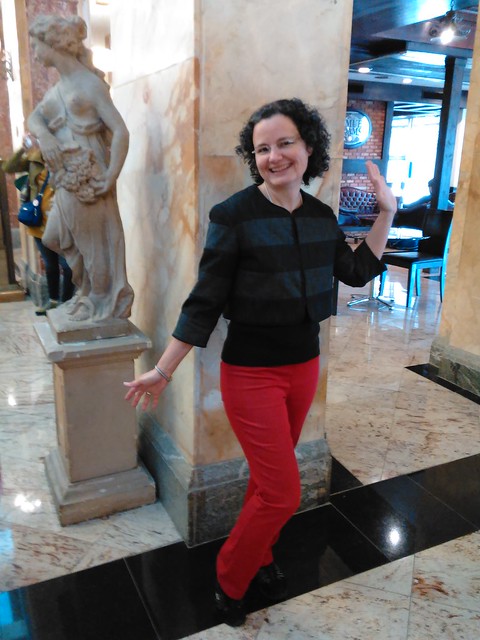
IMG_20160514_085407

So, on May 7 I decided I would start making these jeans to be worn on May 14 (and to fly with me on May 12).

I am an incredibly slow seamster compared to many other sewing bloggers.  I'm also a perfectionist, so I knew with this short time frame I'd have to speed my sewing up AND allow "good enough" to be, well, good enough.
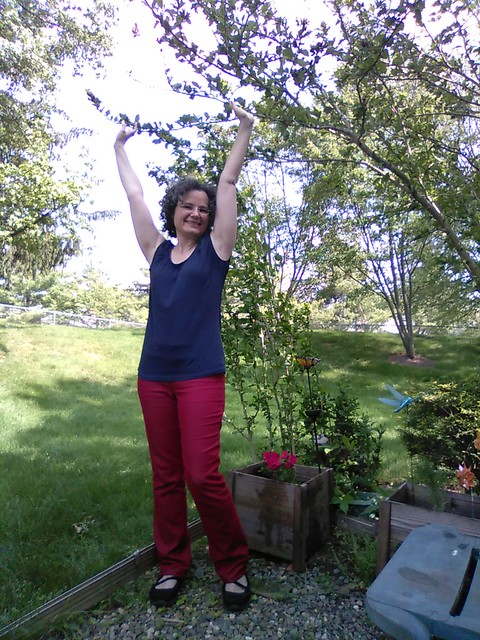
IMG_20160527_161151
After wearing all day

SPEED IT UP TIPS BEFORE I STARTED SEWING:
  • Located 4 matching spools of dark red thread in my stash
  • Located 4 serger cones of burgundy thread in my stash
  • Wound 2 bobbins at the start.
  • Threaded my BL Soprano with single denim needle 
  • Threaded my Brother PC-420 with a twin stretch needle for topstitching (this brilliant idea of using a twin needle for topstitching I stole from Clio--it's a great idea because the jeans are supposed to stretch all over)
  • Threaded my BL Enlighten serger with the burgundy thread and determined setting the DF to N setting worked for my fabric.
WHY SPEED IT UP TIPS WORK:
  • Regular stitching was done on the Soprano and all the top stitching was done on the Brother.  I didn't have to stop to unthread and rethread the machine.  
  • Each machine had their own bobbin, and by the time the Soprano ran out of bobbin thread, I was done topstitching on the Brother, so I could load the Soprano with the Brother's bobbin.
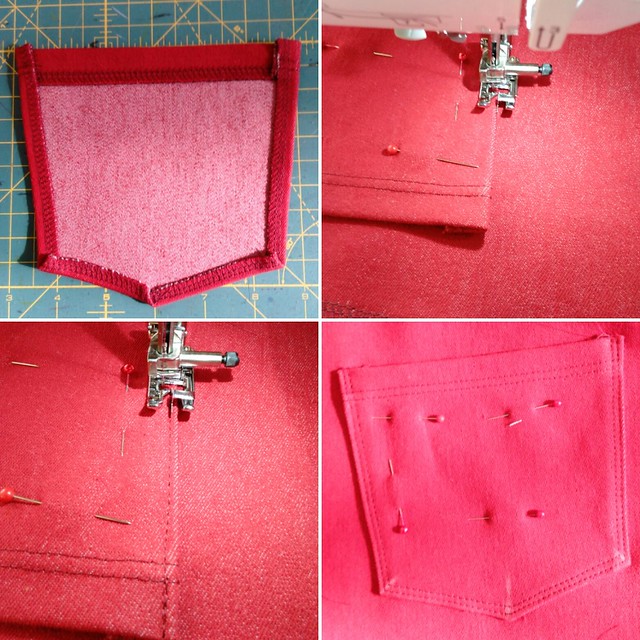

IMG_20160508_215024
Pocket pix...I could not use the twin needle to stitch them on (because no way to pivot!).  I used a single needle to stitch them on, and marked in chalk where I would need to pivot. I used the flange on my new "edge joining stitch-in-the-ditch" foot as a straight stitching guide.
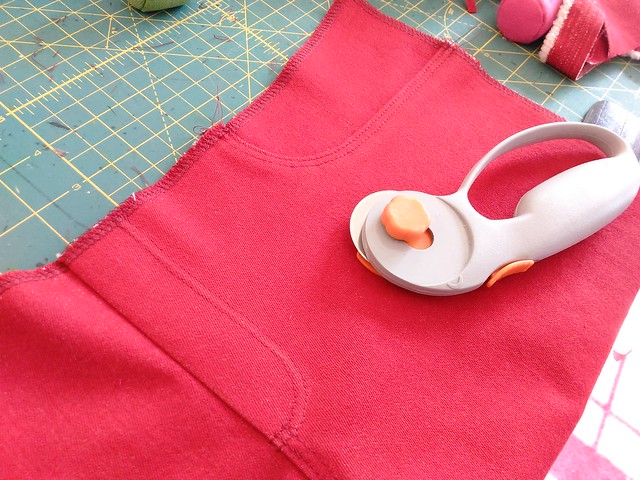
IMG_20160508_161820

MUSLIN #1 (after prewashing/drying fabric 2x)
  • I had 3 yards of red stretch Pacific Denim (originally purchased at Haberman's booth at the ASE in probably 2013 
  • The Eleonore takes 1.5 yards
  • I figured on one muslin (out of the red denim--I had no other denim in my stash like this one) and then the real deal.
  • Cut the size V as per my 40" hip measurement (as per the directions).
  • Basted them together (no topstitching) 
  • Tried them on
  • The front was pretty decent.  Some crotch wrinkles, but as per Michael Kors, the crotch was not insane.
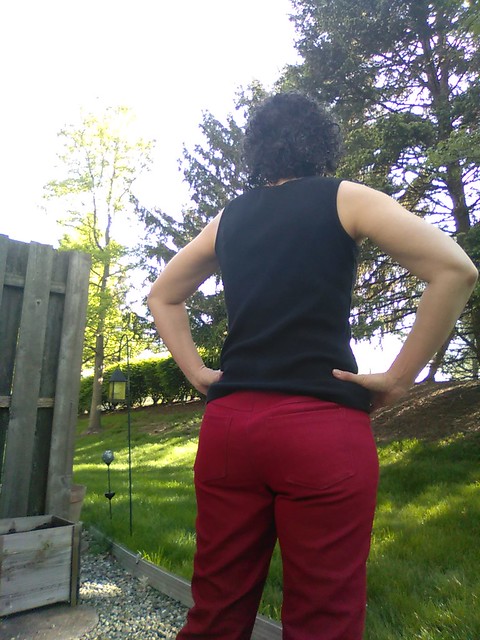
  • But the back....oh, I looked like a stuffed red sausage in the back.  Waaaay too tight in the booty.  Like exercise pant tight and then some.  Noooo way I could wear them out of the house.
  • Back gaposis due to swayback
  • I have hyperextended calves (or gorgeous gams,  however you want to look at it) and my calves were jammed in there.   Lolz on the "how to make your jeans into skinny jeans" instructions.  Just have hyperextended calves and they are already skinny jeans and then some.
  • Back leg wrinkles.
  • Side seam pulling toward the back in the booty and the calves.
  • Used Lynda Maynard's technique to determine I would need at least another 2" of room in the booty.
MUSLIN #2
  • Since the front was good enough, I undid the basting and kept the front as-is.
  • Cut just the back in size BB which is 1" wider than the V (times 2 for left and right sides is the 2" I needed)
  • Basted together
  • Overall this was better in the booty. I scooped the back crotch which made it a bit better.
  • Still not enough room in the calves though.
  • Too much room in the thighs though.  
  • Back gaposis even worse (not surprisingly).
  • Back leg wrinkles

MUSLIN #3
  • I honestly didn't have enough fabric to cut the backs completely again.  I thought I would, but you can't cut 4 back pieces from 1.5 yards of fabric (but you can cut 2 back and 2 front pieces from 1.5 yards).  So I pieced a scrap at the back crotch point.  I figured no one is going to see this piecing!!
  • This back piece was a hodgepodge of sizes, basically BB in the booty grading to V in the thigh grading out to the largest size for the calves.  
  • Added 1.5" to top of CB yoke grading to 0 at side seam 
  • Basted together.  I scooped the back again.
  • Finally this looked good enough.  Enough room in the booty, finally enough room in the calves.  Thighs weren't too large.  Back wrinkling, but I didn't care.   Time was running out.
  • I serged the raw edges of all pieces, then  to the yoke.
  • Gaposis was still present.  I took a wedge out as Clio did, but it was way too much (1" wedge is 2" total) and created like a point or a bubble or something.  Not a smooth look.  By this point I had already topstitched the yoke etc I felt this wasn't good enough so....
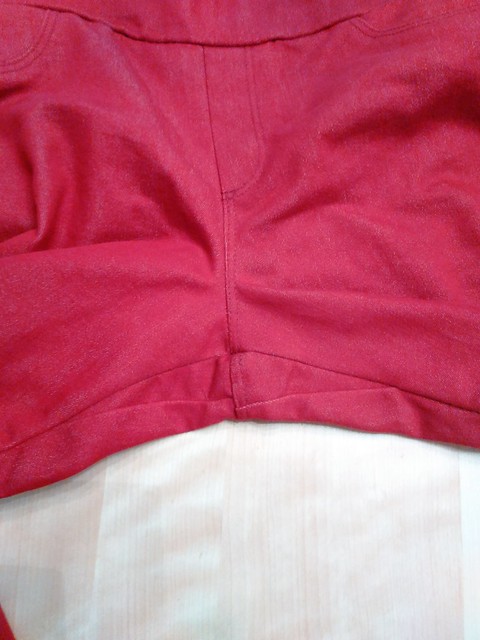

IMG_20160604_115914
Pieced together section no one will ever see.    Except you.
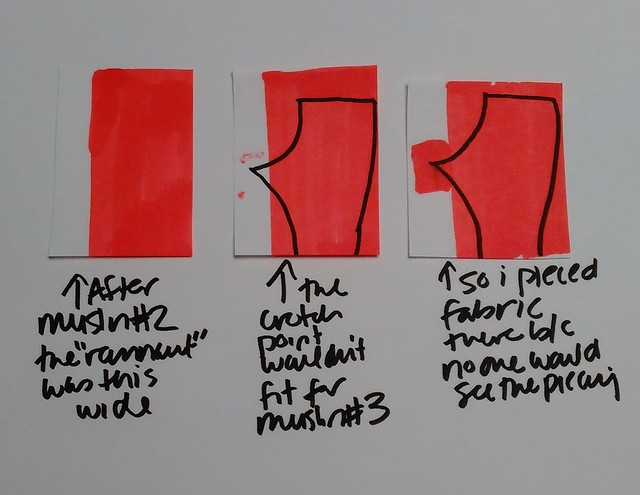
IMG_20160605_094329
To answer Joyce's question in the comments, here is why I pieced.

MUSLIN 3.5/REAL DEAL
  •  Undid the yoke from muslin 3.  Unpicked all the topstitching, etc.
  • Used Jennifer Stern's method (from lesson 2c of her online PR class From Blue Prints to Blue Jeans) to create a curved back yoke that fits the top of the size BB back of the jeans and transitions to the V sized waistband.
  • Wound up reducing the 1.5" I had added to the top of the CB yoke to .75" (but it probably needs to really be 1.5")
  • Finally was on to the waistband.  Dawn recommended reducing the back elastic by .5" for a snug fit.  I had to reduce by .75"
  • I cut 1" off the bottom and hemmed them the morning of May 11, in time for my May 12 flight!
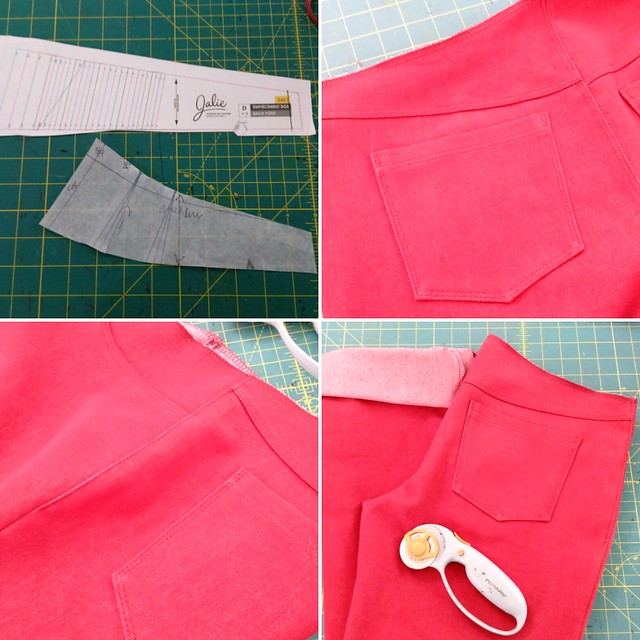


IMG_20160509_215527

IMG_20160510_231653
VERDICT
  • I was comfortable enough to wear them, even though they have back leg wrinkling.  
  • They are not perfect, but they are "good enough"
  • Even though I worried about the wrinkling, the fabric does wrinkle naturally from wear and to a non-sewist, they are not going to notice at all.
  • They do slide down a bit when I sit down.  I probably really need 1.5" at the CB seam and not just .75" to keep them from sliding.
  • Because of my adjustment, the back leg is so much wider than the front leg which skews the side seam from the bottom of the calf to the ankle.
  • Sewing that intensively before PR Weekend (the sparkle dress, the backpack, then the jeans) really wore me out.  I haven't sewn for 3.5 weeks, though I might sew today!
SOURCING MORE STRETCH DENIM
  • The pattern recommends 20% stretch denim.
  • I want to make them again, in solids and also a dark small-scale stretch floral with 20% stretch.  I am having a hard time finding small-scale florals that I like though.  I may need to make a trip to Mood to see if I can find them.
  • For some crazy reason I remembered that the name of the denim I bought is Pacific Denim
  • Fabric.com has Pacific Denim in a few colors (though they say it's 15%, I think it's more like 20%).  I ordered a swatch and it is the same denim.  So I ordered some more to make a denim jacket which has been on my sewing bucket list forever.  It turns out the Style Arc Stacie denim jacket is made with stretch fabric (whereas the Jacket Express is made with non-stretch).
  • This denim has AMAZING recovery. It does not grow throughout the day like some denim.  Huge props to this denim!
So please let me know, was this explanation helpful and if you think it will help or has helped you!
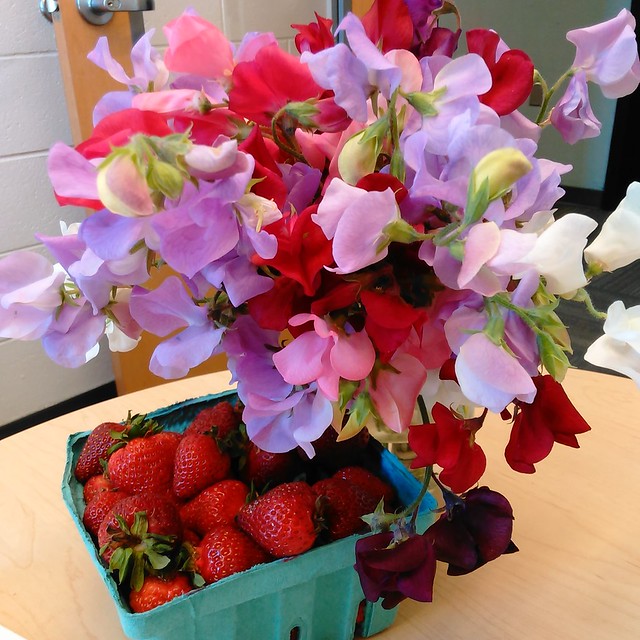

IMG_20160602_143320
Gorgeous sweet peas and strawberries from the Princeton Farmers Market (PFM) this week.

Be well!

Saturday, December 22, 2012

My first corduroys are done!

18 hours after cutting....they are done!
 J Stern Designs corduroy jeans done!
Side:
J Stern Designs corduroy jeans done!
Back:
J Stern Designs corduroy jeans done!
Sassy:
J Stern Designs corduroy jeans done!
The full view back:
J Stern Designs corduroy jeans done!
Side:
J Stern Designs corduroy jeans done!
Front:
J Stern Designs corduroy jeans done!
All buttoned up:
J Stern Designs corduroy jeans done!
Back with two belt loops at CB:
J Stern Designs corduroy jeans done!
Closeup of pocket:
J Stern Designs corduroys done!
Inside.  The button is from deep button stash, probably purchased at Cloth World's clearance bin when I was a teenager.  The card said the button was made in Italy.  It also says it's green.  Hrm.  It looks like a copper color to me! 
J Stern Designs corduroy jeans done!
Inside with flat felled yoke seam, and my name hand embroidered in the back, with the date.:
J Stern Designs corduroys done
This time I topstitched the inseam with my edgestitching foot:
J Stern Designs corduroy jeans done!
The hem. I used this technique from the Seasoned Homemaker this time, it worked very well!  
J Stern Designs corduroy jeans!
I heart tailor's chalk.  Here is how I marked it for sewing on the beltloops.  This time I cut six 3.5inch loops out of the strip instead of the suggested five 4" loops.  That way I could sew two loops, one on each side of the CB seam.  That was a lot easier than fighting my machine to stitch through who knows how many layers!

I also serged the cut ends of the belt loops and used fray check on them. 
J Stern Designs corduroy jeans!

Improvements over my jeans:
  • Sewed thighs with 1/4" SA, resulting in 1" additional space all around the thigh.  This is much more comfortable for sitting!
  • Before sewing on waistband, I sewed the very top of the jeans with a wider seam allowance.  The result is it looks like I won't have to wear a belt with these!  (Whereas I have to wear a belt with the jeans).
  • Topstitched the inseam.  Remember to do that before sewing the side seams!
  • I made fake bar tacks on the fly front.  My machine does not have an auto-bartack maker, so I used a narrow zigzag stitch with a very short stitch length to mimic a bartack.
  • Embroidered the date with my name in the waistband facing.  Maybe I will start doing that for all my clothes? Hrm.
I'm wearing these cords right now and they feel great.  The fabric is super nice.  It feels luxurious and the fact that it's no-wale corduroy means it looks like velveteen.

I still can't get over the fact I have made two pairs of pants with fly fronts.  Last year at this time, the idea was scaring me quite a lot!
J Stern Designs jeans and corduroys, done!
Be well!!!

Sunday, December 16, 2012

brown cords, hour 14

Just 3 steps to go (belt loops, button/buttonhole, and hem) and I'll be done with my first ever pair of corduroy jeans! Woot!

I hemmed and hawed over what design to use for the back pockets--here's what I came up with and really like it. It's the start of the curve from the jeans pocket, and then it veers off.   I used my jeans twin needle to stitch.  What does it look like to you?
J Stern Designs brown cords in progress
This time I embroidered my first name and the date on the interior waistband.  Next time I make brown cords, I'm going to do all the topstitching in gold jeans thread--wouldn't that be awesome??
J Stern Designs brown cords in progress
Here's the front:
J Stern Designs brown cords in progress
Here I'm showing how I used chalk to mark 3/8 so I would know where to stop stitching on the pockets. (I had already wonder taped the pockets down and edgestitched with my edgestitching foot.)


J Stern Designs brown cords in progress
So then it looked like this:
J Stern Designs brown cords in progress

And here's what it looked like going through the machine while I topstitched the waistband, this is to show how most of thejeans are shoved in that little space while the lower part of the waistband is edgestitched:
J Stern Designs brown cords in progress
And here's what it looks like on me:
J Stern Designs brown cords in progress
I don't think I will have to wear a belt with these! I sewed them up with a larger seam allowance at the top to get them to fit better.  And like I said last post, I sewed with 1/4" seam allowance in the thighs so I have an inch more room--MUCH better when sitting down.
J Stern Designs brown cords in progress
So I will finish these off next weekend.
Be well!

Sunday, December 9, 2012

Brown corduroy jeans in progress, hour 7.5.

I thought that making jeans the second time would go faster than the first, but so far I'm just about on track as far as hours logged.   The pattern is the J Stern Designs jeans pattern.

Here are my jeans, this time in brown corduroy, at hour 7.5.

The fabric is some glorious stash "uncut" corduroy fabric from Joann's almost 4 years ago, when I had this crazy idea I was going to start making a ton of corduroy jackets.  Ha ha ha ha ha ha ha ha ha.  (The "uncut" part means the wales of the corduroy are not cut).

I'm using dark brown "heavy" thread for the topstitching. Not as impressive as gold jeans thread on denim, but the detail is there even if it's hard to see.
J Stern Designs Jeans: brown corduroy edition, in progress
The inside pockets are made from a Robert Kaufman floral cotton I bought 4.5 years ago at J and O Fabrics in Pennsauken, NJ--on my way to my college reunion meetup--this is how I remember....
J Stern Designs Jeans: brown corduroy edition, in progress
I used an 11" trouser zipper that I shortened to 5". Do men's pants really use 11" zippers? Hrm. J Stern Designs Jeans: brown corduroy edition, in progress
I dove head first into make the flat felled yoke seams, and what a mistake that was!  It is hard to do that on a fabric with thick nap.  So I then go look at a sampling of my RTW cords and velveteen pants to find out that every single pair has a mock flat felled back yoke seam.   Knowledge for next time.

So now I need to decide what to do about the back pockets and what design to use. Hrm. J Stern Designs Jeans: brown corduroy edition, in progress
Also, I was really worried about the nap of this fabric and if it would be easily crushed.   When I hammered thick seams, I only hammered the seam allowance.  I did not want to permanently damage the nap of the fabric (and the nap does feel really good!)

 The good news is the nap has good recovery after sewing, and I sat in them during dinner tonight and they didn't make little moons where I sat down (my main fear!). So YAY for that. (All pix above were taken before wearing).

I plan on undoing the side seams so I can topstitch the inseam, then redo the side seams.  I am mighty fast at undoing things I sew lately, and not as frustrated when I have to redo them.  And I want to sew them tighter up around the very top.

Oh and I sewed the seams 1/4 inch in the thigh area inner and outer seam, to gain a whole inch there, and that is MUCH better for sitting down.  Yay!


I have this crazy idea to finish these pants by the end of next weekend but I think that's rather unlikely given the time of year...but I have a huge drive to finish them so let's see...

I also cooked tonight but sadly do not have pix (sorry Gwen!)
Be well!!

Saturday, December 1, 2012

Topstitching jeans & jeans details

Thank you for all your sweet comments about my first pair of jeans!
I wore them 3 days in a row then washed them in the washing machine and line dried.
They held up and didn't fall apart, yay!

I wore them to work yesterday (I never wear jeans to work) and my coworkers were saying things like "they look like you bought them in a store."   Ahhhh....delightful words to any home sewist's ears! 

(Does anyone else remember The Cosby Show episode where Denise Huxtable made a yellow polo shirt for her brother and it didn't turn out so well??)

I thought I'd share with you how I did the topstitching.
The "secret" is in the edgestitching foot, which I had never used before except briefly at a workshop at the ASE.

I bought a variety pack of feet for my machine off ebay this summer and it happened to include the edgestitching foot. Otherwise I think it would have been a lot more work to get nice looking topstitching so close to the edge.

the edgestitching foot
The edgestitching foot

The edgestitching foot has a flange that is your guide. Place your fabric edge right against the flange,  move your needle over so it doesn't hit the metal of the foot, and enjoy perfect topstitching!

dramatic reenactment of edgestitching foot
Dramatic re-enactment of how to topstitch with the edgestitching foot.  Of course I was using jeans topstitching thread when I sewed this for real...

Also I thought I'd share how I decided what design details to include. I piled up all of my RTW jeans on my bed.
my RTW jeans pile
Then I would "flip through" my jeans collection to compare/contrast how different manufacturers sewed the various details on the jeans, which then helped me decide what elements I wanted to include. I went back to the pile at every step!
it's easy to flip through my RTW jeans pile!
For example, my Old Navy jeans use two topstitching thread colors....I decided NOT to do that.
Also, some jeans had flat felled seaming on the inseam and others did not.
Plus the coin pocket was an area of interest on some jeans and not others.  Some manufacturers sew a little label into the seam of the coin pocket, or extend the topstitching of the coin pocket all the way up to the waistband.

Usually out of my jean pile, most would be done one way and then 1 or 2 pairs of jeans would have a different technique or style.  Very interesting to see.

This is my favorite pair of jeans as far as detailing goes.  It has embroidery all down the leg.  But these jeans are too big on me.

again, loving the embroidery on these jeans
Eddie Bauer jeans circa 2005
I am looking to get another sewing machine in the new year....maybe I should get one that does sewing and embroidery so I can recreate this detail???
love this embroidery on these jeans
I have already cut out my next pair of jeans from this pattern--using "uncut corduroy" (i.e. corduroy without the wales).
my next pair of jeans:  corduroy
I'm a little worried about the brown color being too light and the nap being easily crushed, but let's see what happens. It all starts with me rethreading my serger in brown...lol.
my neighbor's tree
Be well!

Tuesday, November 20, 2012

J Stern Designs Jeans DONE! The big Reveal!

J Stern Design jeans DONE!
The hem.(step 10)
J Stern Design jeans DONE!
The shank button and buttonhole. (step 9)

25 years after I learned to sew....I made my first pair of jeans (my first pair of pants ever with a fly front!) I finished steps 9 and 10 at 10:15am this morning and wore them all day!  They did not fall apart!!

I'm crashing from the adrenline rush of sewing for 21 hours in 4 days, so here are all of the glorious, unedited pix, messy sewing room included.

Enjoy!!!

Without the belt:
 J Stern Design jeans DONE!
J Stern Design jeans DONE!
Bathroom pix without the belt:
J Stern Design jeans DONE!

With the belt:
J Stern Design jeans DONE!
Out in public:
J Stern Design jeans DONE!
With my new candy apple red shoes:
J Stern Design jeans DONE!
And some pix from yesterday's post (just so the main stuff is all in one post):
The back:
 J Stern Jeans day 3 in progress
And the inside with my green and white floral pockets (before the button and buttonhole were done):
J Stern Jeans day 3 in progress

More pix are in this album.

Thank you for all the encouragement y'all left for me in the comments.  I love reading your sweet comments!

Thank you to Christine who gifted me the jeans fabric.

And a HUGE thank you to Jennifer Stern for teaching her jeans class on PatternReview.com, and for teaching the Professional Jeans Construction class at the ASE. I think I asked for the most help out of my fellow classmates  on Pattern Review and Jen was SO gracious with her time and sewing knowledge.

I want to refine the fit a bit more (they are a little loose without a belt and I'd like to refine the front crotch some more) and make some cords and velveteen pants from this pattern.  I'd also like to try the Jalie pattern for stretch jeans and the Sewaholic trouser pattern (Sewaholic makes patterns for pear shaped women like me!)   And I'd like to finally make the pants pattern that was adjusted for me in Austin last year, but never made because I was afraid of the fly front.  So yes, L, I am hooked on pants!   But there is a McCall's dress calling my name....

What a great sewcation!   Be well!