Showing posts with label sweater knit. Show all posts

Wednesday, January 20, 2016

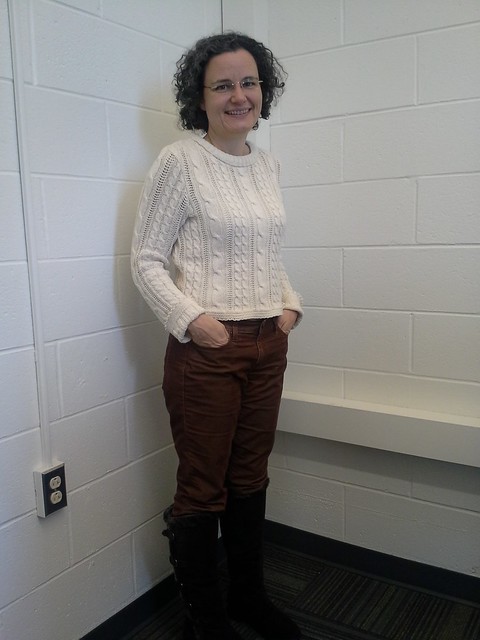
So, I Sewed a Sweater from a Blanket

20160116_144700
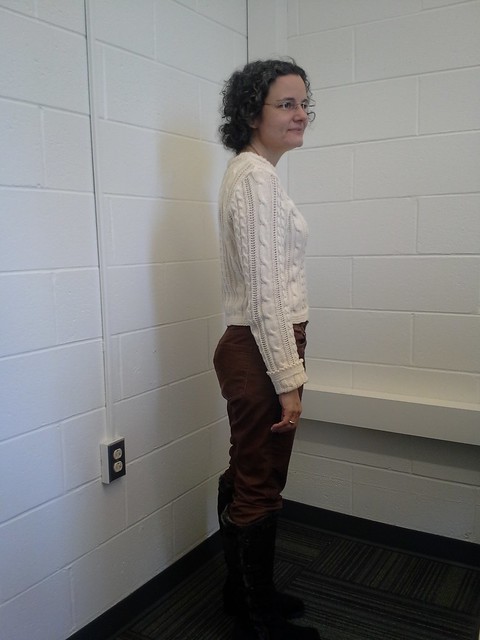
The squirrel on the fence likes my new sweater too!

This sweater was born from the following things:
  1. I love cotton sweater knits
  2. I am slightly allergic to wool, so I can't wear a wool sweater
  3. It is hard to find RTW sweaters that fit me the way that I want them to fit me. Usually they are way too long and pool on my swayback.  Really, I want cute little sweaters.  Sometimes I can find them in the Juniors section of Marshall's (yes, in that pink "The Cube" section) but I hadn't found any this winter.
  4. I don't knit.

20160118_140314
In May, I met Olgalyn Jolly from O! Jolly! , the same week I noticed her advertising on PR.  She writes a blog about how to sew with sweater knits, and she designs sweater knits for her shop.  Her cotton is grown in the US and knit by machine in NYC.   I don't think I've ever met a fabric designer before.  How cool is that?!.  I was immediately intrigued, but it was summer.  
20160118_140349
Fast forward to the holidays, and I purused her site looking at her sweater knits for sale by the half yard, but she also has what she calls "reclaimed" sweater knit panels, specifically blankets that are an overrun from the factory where her own knits are made.  They are finished on three sides, but the 4th side is unfinished.  The panel was $34, more than a yard long.   I bought it as my trial run, and also bought swatches of her other cotton sweater knits.    Her other cotton sweater knits are $14-$28 per half yard, so I wanted to try my experiment out on this less expensive option.  (I would have bought a swatch of the sweater blanket first, but there are no swatches available for it. Generally I have been swatching before buying fabric online; the result of too many "totally not what I thought" online purchases.)
20160118_140410
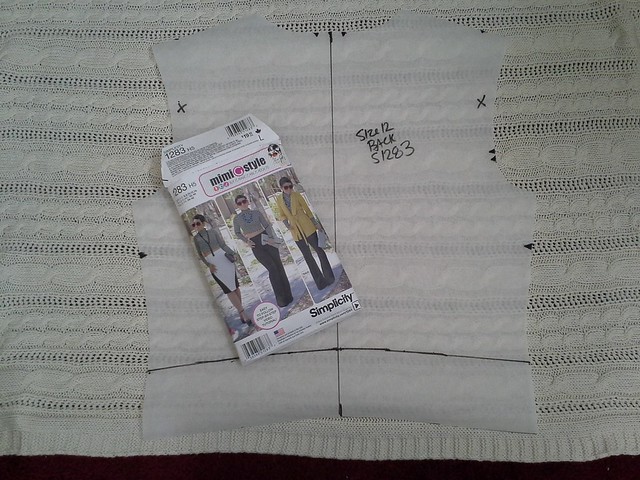
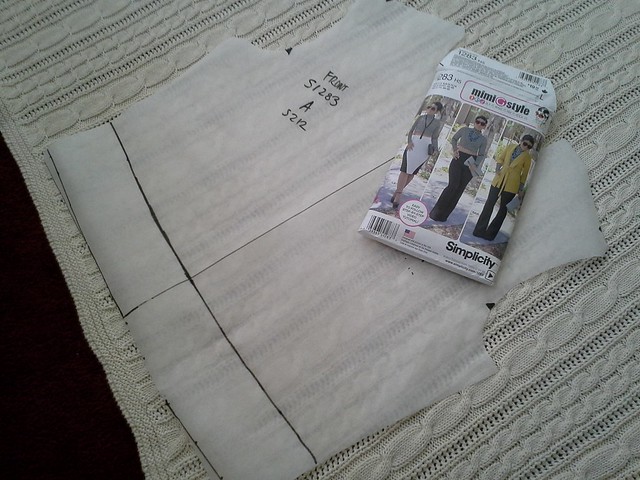
For the pattern I chose Simplicity 1983, the Mimi G pattern that I sewed the pants and shirt from last year.  This time I cut the shirt in a size 12 for a snugger fit, also knowing that the sweater knit had a nice amount of stretch.  I traced the pattern so I would have the full front and back so that I could center the pattern over the larger cable.    I added 3" to my traced pattern but then decided to add another 1" (the finished part of the blanket) for 4" of length total.
20160112_202847
On Instagram I asked about placing the cables vertically or horizontally.
20160112_202056
 Most folks said horizontally, but when I held the fabric up against my body, it just didn't look right, so vertical it was.
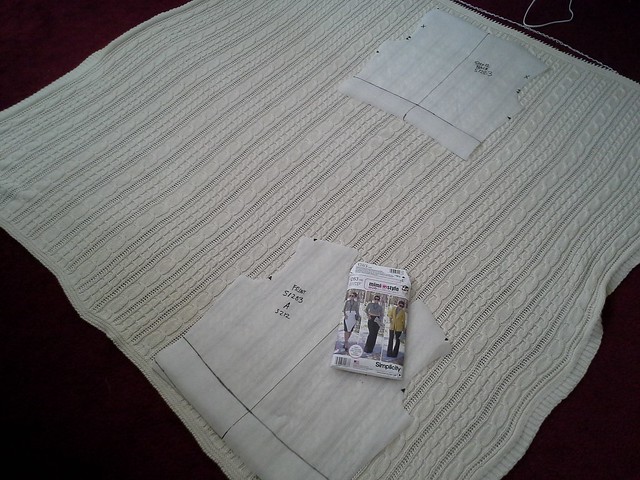
20160112_202645
It was a bit weird to take my scissors to a blanket--it really is a nice, substantial, snuggly blanket even if it's not finished on one edge--but I forged ahead and did it.

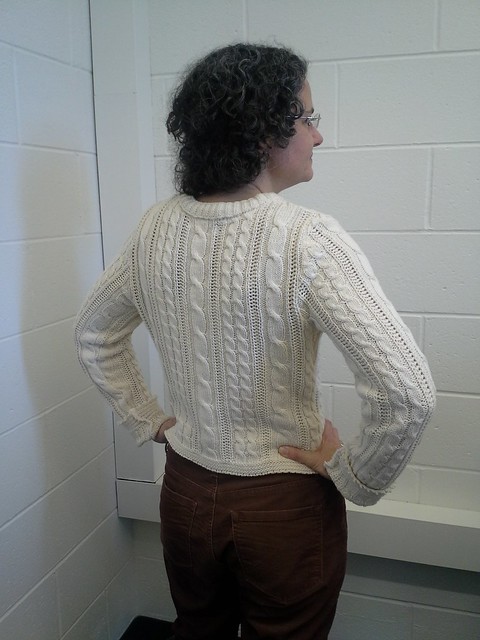
It was a straightforward sew.  I basted first to check for fit, then unbasted the side seams to sew the sleeves in flat, then basted down the arm and down the sides.   I wound up cutting a half inch off the entire armhole, then basted again.  I serged at each appropriate step.  In the future I might be tempted to serge before sewing the pieces together because it looked like it had snowed on my sewing room carpet.  Maybe that's an exaggeration, but little cotton bits were everywhere--very much like working with corduroy.  The rug in my sewing room is burgundy, so they really stood out.
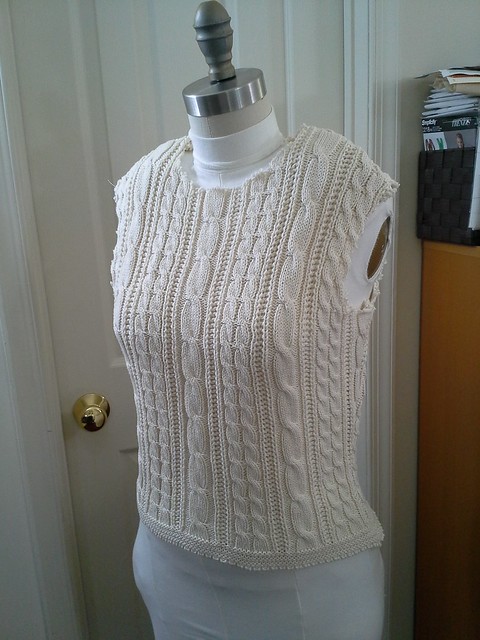
20160113_212925
I was able to cut the front and back so the bottom of the shirt would be along the finished edge, but the sleeves had to be cut to end on the unfinished edge.  I wound up cutting them too long, after thinking that I had cut them the right length, which was probably partially due to my error and probably partially due to the fabric stretching under the weight of the sleeves.  
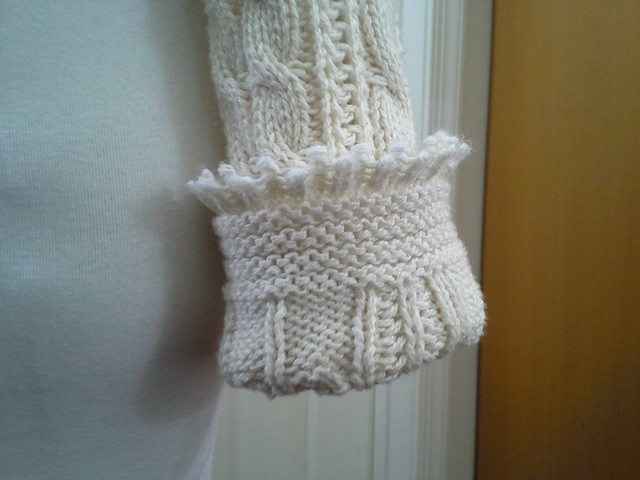
20160115_203759
Anyway, that particular unfinished edge started unraveling in the dryer before cutting, creating a fun decorative-to-me looking edge, especially once I turned it up like a cuff.  I took to IG once again and was able to ask Olgalyn directly about what to do.  I thought the unfinished edge looked super cute, but I don't knit.  To a knitter, does this edge look unfinished?    She answered right away, which I was totally immensely grateful for, and said I could machine zig zag that edge to keep it from unraveling further.  Others chimed in on IG begging me to keep this design detail while others warned it would unravel further.  I have zig zagged the edge to prevent that from happening.
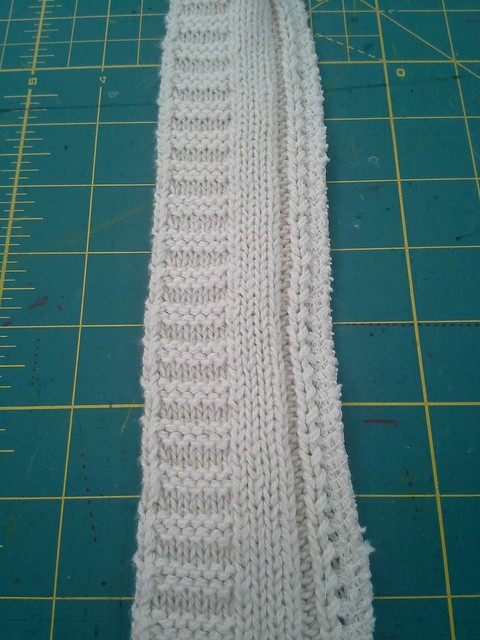
20160115_202932
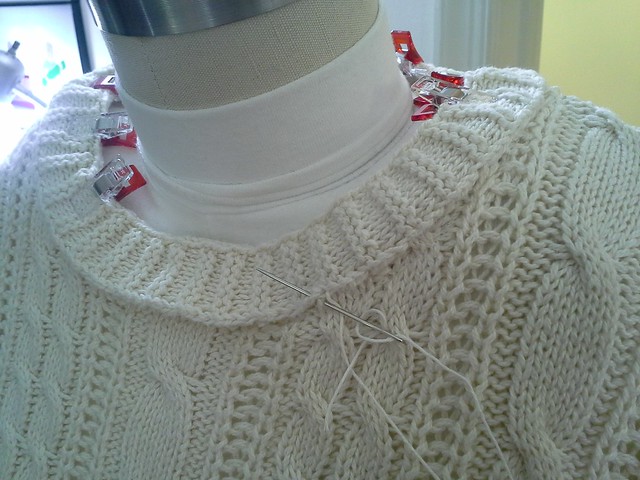
For the neckline, I basically cut the "selvedge" edge from the rest of the blanket and serged the raw edge.
20160115_180054
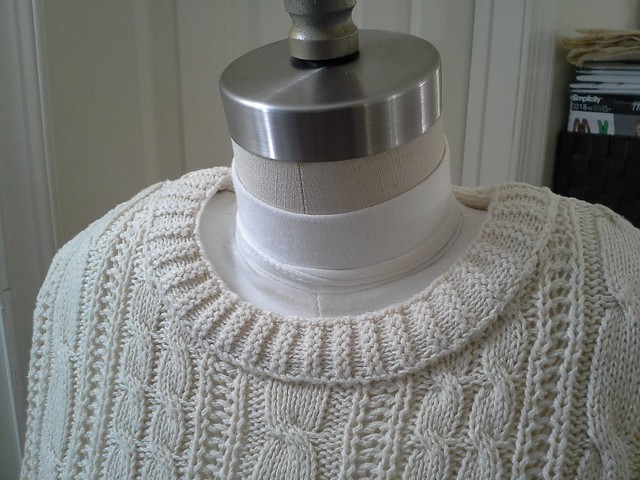
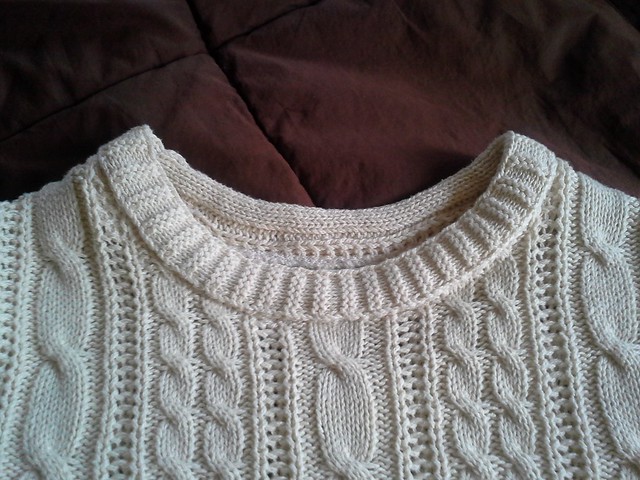
Then I folded that over the raw neckline edge, sort of like an oversized double fold bias tape.  I zigzagged,  by machine, the back of the binding to the inside of the sweater, but then I handstitched the front of the binding onto the front.  I have been doing a lot of small handstitching lately (the sashiko, the whimsy kits, the Mollie Makes kits) and so this just felt like an extension of that instead of something annoying and tedious, which is probably how I would have felt even just one year ago.
20160115_203707

20160116_094106
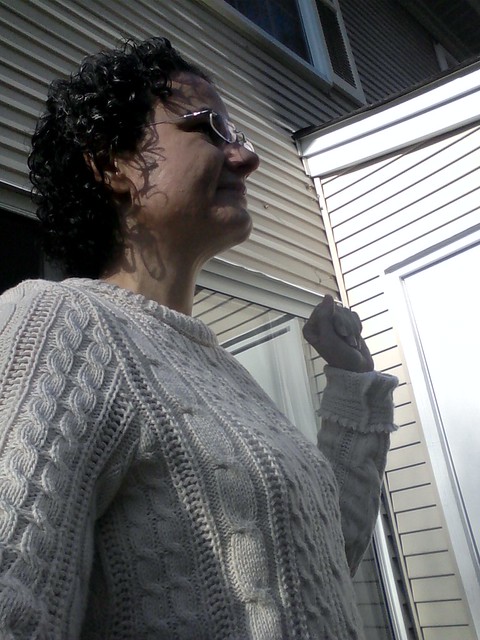
In the end, I really love this combination of pattern with fabric.    The cotton hugs me, there is no swayback pooling, there are NO drag lines anywhere (wow!) and it feels really warm and snuggly.  I wore it on Saturday and again to work on Monday with a tank underneath.  It could probably just a tad longer as the tank does peek out from time to time, but if i wear it with a skirt that hits at the waist, I think the length would be fine.

This little experiment has made me think about buying some of the O! Jolly!  sweater knits that she created, and also about looking at thrift stores for buying big cotton sweaters and then cutting the MimiG shirt pieces out of them.    I'm also thinking about a little frankenpatterning--cutting the Renfrew neckline onto the MimiG pattern and using that giant Renfrew collar.  I think that would be adorable!  I'm also thinking about shorter sweater options, the kind where the tank underneath intentionally is seen.
20160116_113035
So, that is how I sewed a sweater from a blanket!  Are you tempted to make one now?

Be well!

Monday, January 12, 2015

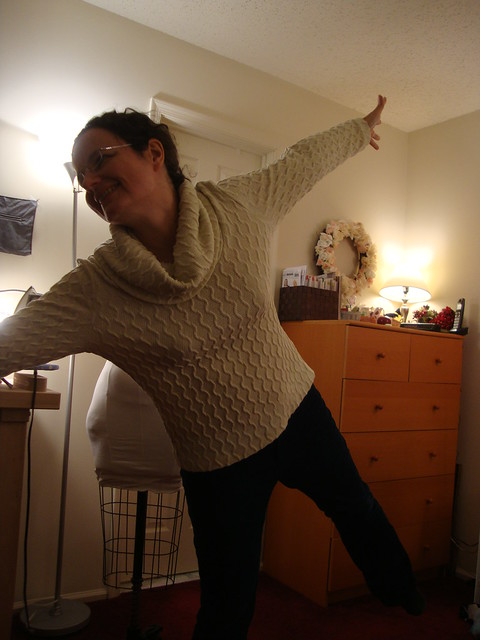
Sewaholic Renfrew in chunky sweater knit

Sewaholic Renfew in Sweater Knit
Hi!

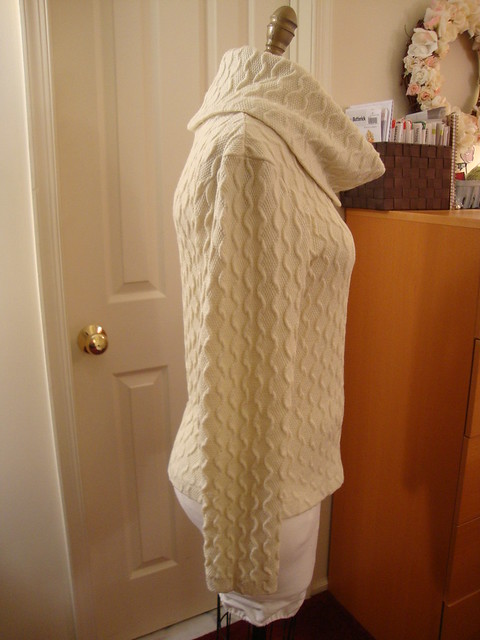
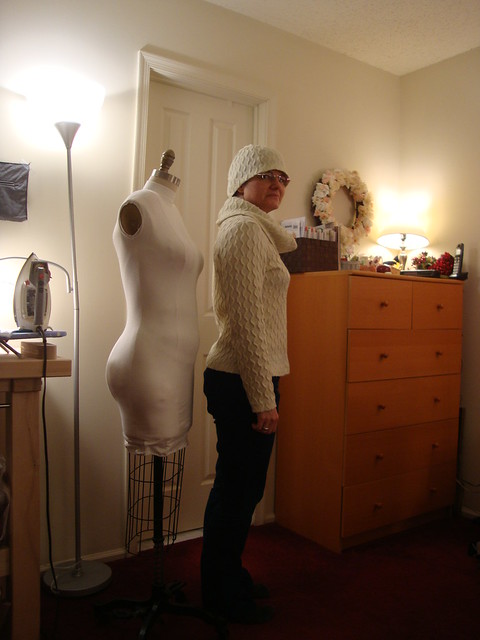
Sewaholic Renfrew in creamy sweater knit
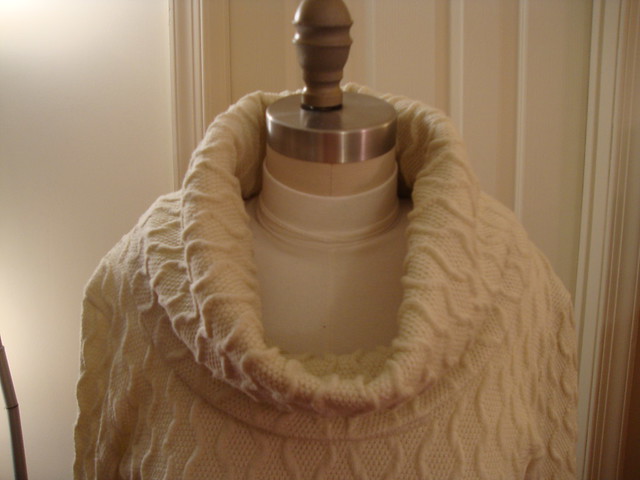
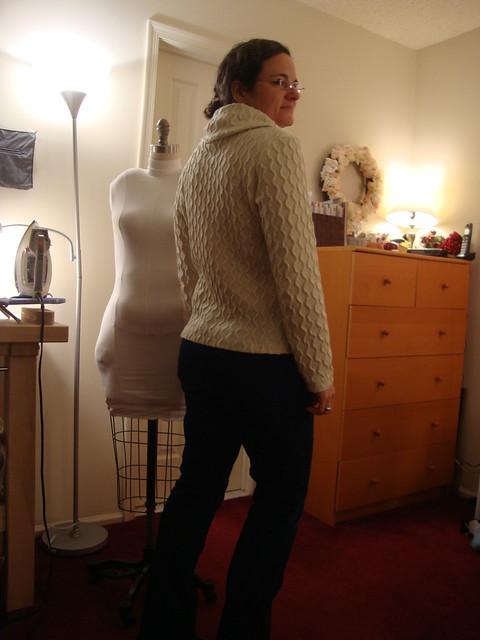
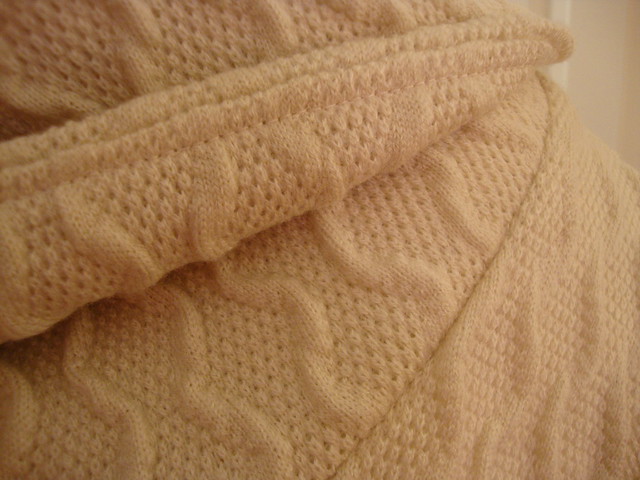
I love the giant collar!!

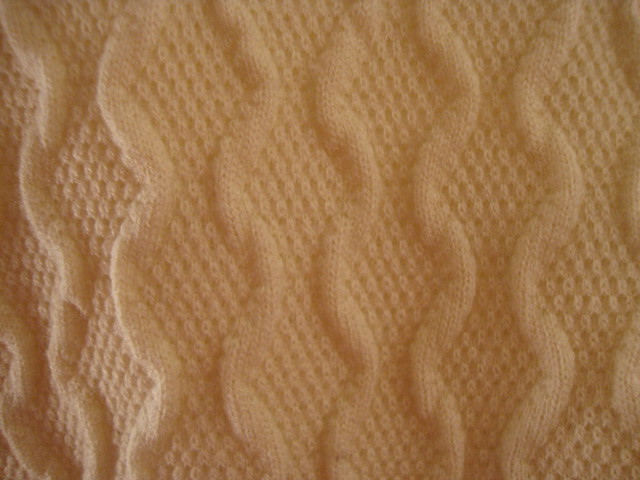
I made the Sewaholic Renfrew 3x before, in thin sweater knit here and here,  and a fabric that I refer to as Muppets here, but this was my first time sewing the Renfrew in a chunky acrylic sweater knit.
Sewaholic Renfrew in creamy sweater knit
I purchased this fabric at Haberman's in Royal Oak, MI, before the ASE in Sept 2014.  Fabric.com has what appears to be the same fabric right now if you search on "sweater knit".
Sewaholic Renfew in Sweater Knit


20141230_173653
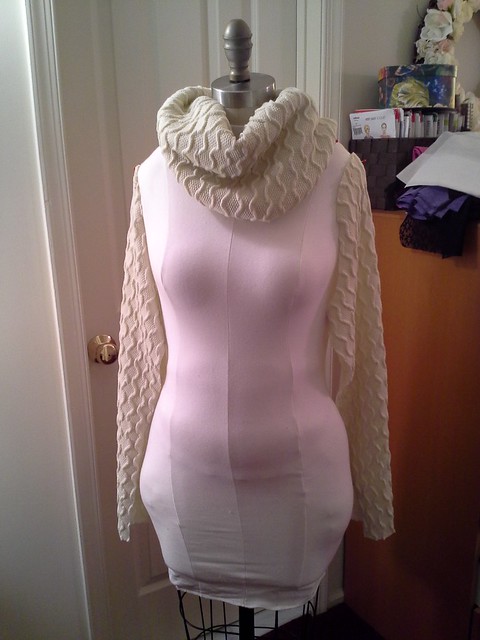
This is how I make sure I don't use a cut out piece as a "scrap" during my sewing process--I pin the pieces to my dress form also so they don't get lost
20141230_163901
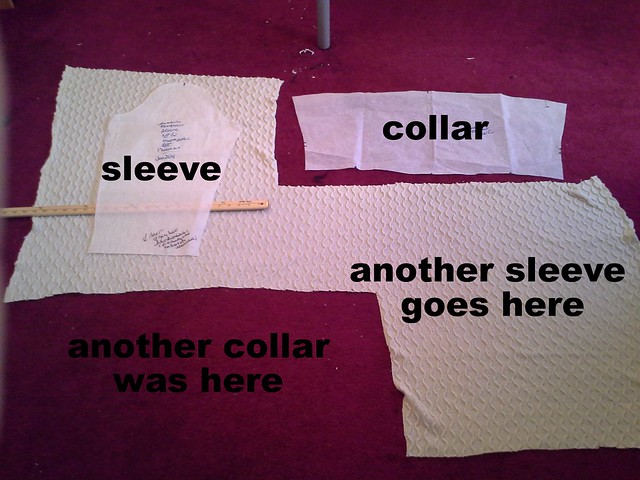
 I swore I had bought enough to make a sweater dress but it wasn't enough.  I had to get creative to cut out the collar (which is two pieces of fabric).  I should note that I don't actually cut anything on the floor anymore, this was just to get the  layout.  I rough cut the fabric and then cut the piece out on my cutting table with my rotary cutter and cutting mat. I cut it out at the end of 2014 and sewed it up but it was too big at first....

All the deets on how Sunny Gal helped me fit the Renfrew in early 2014 are here.  After making all those adjustments to make the sleeve fit and to make it larger in the bust for fabric with 25-50% stretch (Muppets:  25%; Stone Mtn knit:  50%), it meant it turned out to be quite large in the bust with this fabric which is almost 75% stretch, and I couldn't fill out the extra space without some socks, ha ha.

I had learned that point in the PR "More Knits" class while doing the homework for a half-scale t-shirt (if you sew the exact same size pattern in a less stretchy knit and a more stretchy knit, the less stretchy knit will be smaller and the more stretchy kit will be much much larger) but this was my first practical application and it totally made sense.  I wound up not including the extra length for bust, and sewed with 1" seam allowance in the arms and side seams, and then taking it in a bit more from the bust to the armpit.

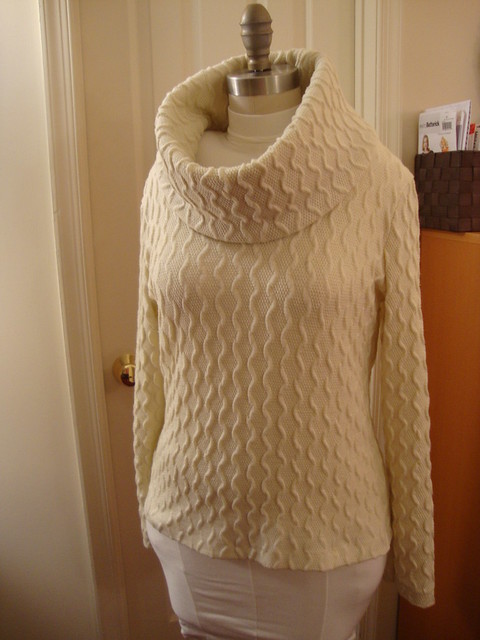
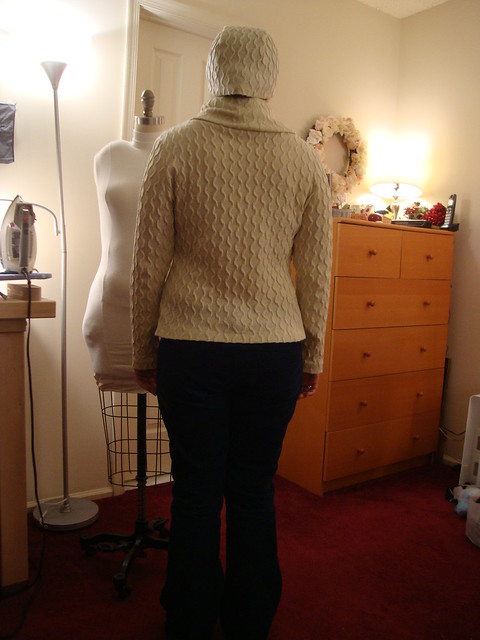
Dressform pix (after fitting)
Sewaholic Renfrew
Sewaholic Renfrew in creamy sweater knit


I understitched the collar so that the undercollar doesn't peek out.
Sewaholic Renfrew in creamy sweater knit


20150102_200100
I blind stitched the hems.
Sewaholic Renfrew in creamy sweater knit
Blind hem is blind


After sewing this and with all this cold weather I want to make the Renfrew like 5 more times in various chunky sweater knits, but I have no more chunky sweater knits in stash, just thin ones.  I'm contemplating taking one of my thin sweater knits in stash and just lenghtening the Renfrew into a dress, or frankenpatterning the Renfrew top onto the V1351 skirt.
Sewaholic Renfrew in creamy sweater knit
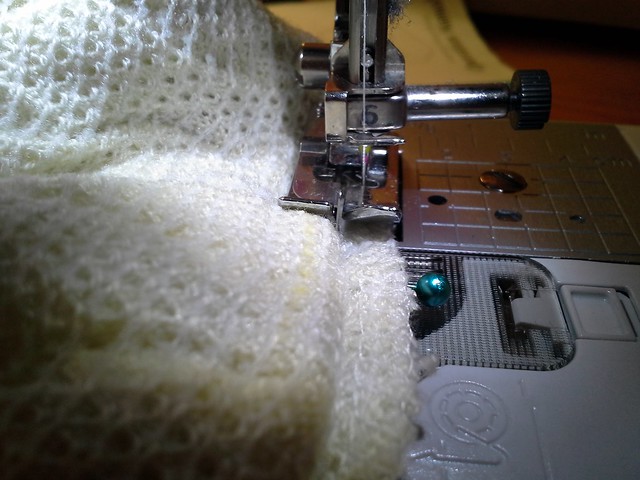
It like to baste each seam by machine first, fit, serge, repeat.

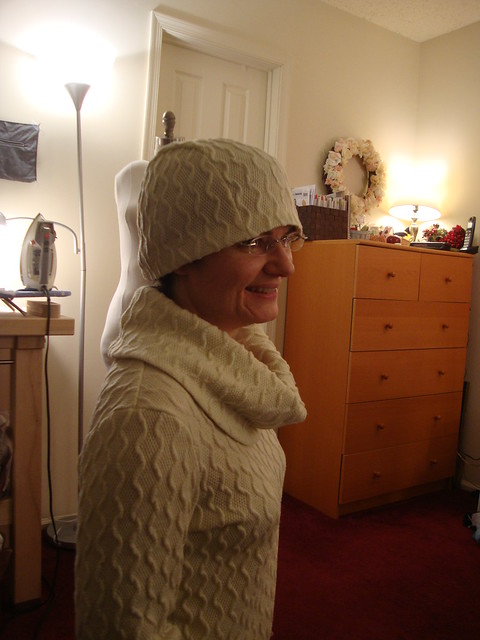
Out of the scraps, I made this hat (McCalls 4664) which looks sort of ridiculous when worn together with the sweater.  It is not the right fabric to wear as a hat in super cold weather, but I have made this hat before from fleece and wear the fleece one all the time.
Sewaholic Renfew in Sweater Knit
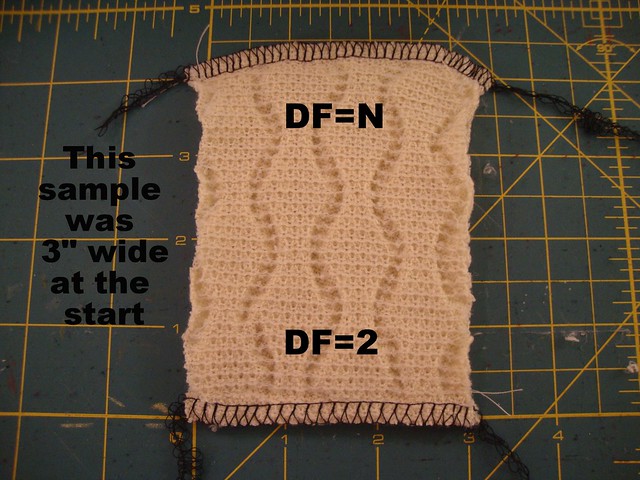
In my post about my new serger, someone asked about Differential Feed, or DF, and what it does.    I always run a test through my serger before serging the real deal to make sure everything's ok.  DF can correct issues with knit fabric being stretched or compressed.

Sewaholic Renfrew
Here this shows that with DF set to N, the fabric is stretched and convexes outward.
But with DF set to 2, the fabric is straight across.
Also note that this sample was 3" wide to start, so the finished serged seam should also be 3" afterward.  Sometimes serging stretches the fabric but not in such a crazy convex shape so it is not as obvious that it is stretched out, but if you measured it before serging, you know if it stretched (or shrank) or not.
You should test stitching horizontally and vertically, as you might need to change the DF for one direction and not the other, or slightly different settings for both.  You may even need yet a different DF setting if you are stitching on the diagonal (like an A-line skirt).


20150112_151450
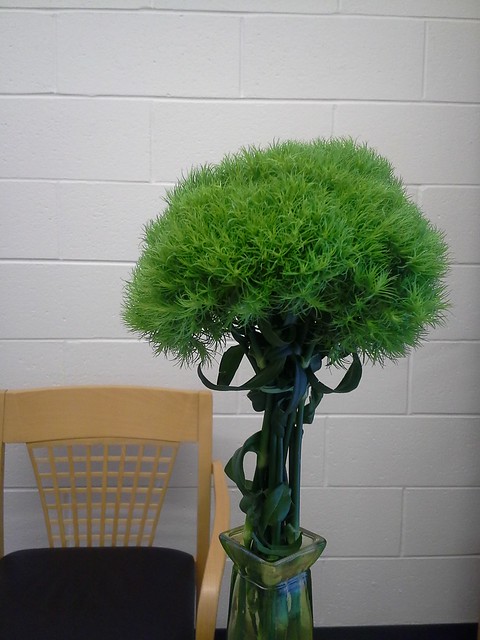
After all that winter white, here's some random color for your January!  It's green dianthus purchased at Whole Foods.  I take two bunches and arrange them like they're one giant pom-pom, then rubber band them together.  People love to touch them!  Very soft.

Be well!


Saturday, January 25, 2014

Fitting the Sewaholic Renfrew with SunnyGal Studio


Sewaholic Renfrew

In February last year I sewed up my first Sewaholic Renfrew muslin.  What attracted me to this pattern was the amazing collar in view C, and while the collar turned out great, the rest did not....
My issues:
  • I sewed the shirt in a double knit.  Oops.  Tight fitting + sleeves + double knit != good combination.
  • I started with the size 8.  That was too small to start.
  • It was too small in the back--the bra lines are not a good look
  • It was too small in the front in the armpit area, creating lots of wrinkles.  It generally felt uncomfortable.  Somehow I wore this shirt on a 6 hour flight but I don't know how!!!
  • I also was not loving the bottom band.  It wasn't wide enough really for my hips.  
  • Not loving the swayback either.
Sooo...recently Beth of Sunny Gal Studio announced on her blog that she is teaching others to sew in her home...in SF.    I commented that if I lived near her I would have her teach me a few specific things, one of which is fitting the Sewaholic Renfrew.

Two weeks ago, I cut out a muslin from blue sweater knit in 33% stretch crosswise.  I started with a 12 this time, after following how to do flat pattern measurements in the Tilton's Craftsy Class "The Ultimate T-shirt".  I went to the get my hair cut.  I came back and Beth had emailed me to tell me her ideas on how to get the Renfrew to fit. Great!!!

We fit the Renfrew through emailing pictures and Skype!

Here is the end result of the pattern adjustments.  These pix were taken on the fabric I used for the real deal.

1.  Make more space in the armhole area.  There's a lot going on in this photo, but essentially the slope of the shoulder seam was adjusted to add a half inch to the armhole. The sides of the front of the top were "fanned" outward to give more room in the bust.  An inch was added in the bust area of the front of the top but not the back.  I drew in notches on the front and back side seam bust area following New Look 6405 (which had this feature) as my guide.  Basically the back of the top is stretched while sewing the side seam in the notch area.  This gives more room to the bust without changing the side seam length.
Sewaholic Renfrew
 2.  Made a 1" CB swayback adjustment.  The shoulder area was adjusted just like the front (from original starting place at neckline out to an additional half inch at the armhole.  The notches were added.

Sewaholic Renfrew
I cut the pattern across the back at the waistline and overlapped 1".  Then I placed the pattern on the fold.  This means it is a bit wider across the back here but it is shorter.
Sewaholic Renfrew
So I am laughing at my wonky cutting lines. I had traced the stitching line from my muslin to the pattern in purple and then added SA in black. Sadly it wasn't til near the end that I remembered that Jacqui gave me the SA curve ruler to make that process easier.  I evened the lines out while I cut the shirt out.

Here's a closeup of the shoulder adjustment.  As Beth explained, this makes the armhole area larger and makes the sleeve drop, which makes the whole thing MUCH more comfy as there is more room!
Sewaholic Renfrew
3.  Because a half inch was added to the armhole, the sleeve cap needed a half inch added to it.
Sewaholic Renfrew
Soooo....all these adjustments, plus the fact that my "real deal" fabric had 50% crosswise stretch, lead to a VERY comfy top.
Also, I added a little feature....the thumbholes!
Sewaholic Renfrew

This picture reminds me, I sewed all hems using Emma Seabrooke's SewKeysE interfacings and then twin needled the hems.  I'll have to write about that in another post.
Sewaholic Renfrew
This one was sewn on my sewing machine; the next one I want to sew on my serger. The fabric is the same, it's just a different color.

Ok, some more pix
Sewaholic Renfrew

Sewaholic Renfrew
My coworker took the "at work" pix
Sewaholic Renfrew

Collar close up
Sewaholic Renfrew
It is hard to see but here I have flipped the collar up to show you that instead of cutting off the SA, I edgestitched it then stitched again a half inch away. This makes the collar roll quite nicely.
Sewaholic Renfrew
Sewaholic Renfrew
Sewaholic Renfrew
Sewaholic Renfrew
The fabric is from Stone Mountain and Daughter, from PR weekend 2013 in SF.

I want to make two more of these! Like I said, the next one will be on my serger. I've never sewn a garment on my serger before. Just serged the raw edges of wovens to keep them from unravelling.
DSC03586
DSC03585
Also, a word about the armpit wrinkles. I really wanted to eliminate them and Beth said it's impossible to do that unless you put a dart in, and darts can look weird in knits. The Tiltons put a dart in, in the armhole itself, and I may try that sometime in my quest for a wrinkle free world. But for now, I'm letting it go. ALL of my RTW knit tops have the armpit wrinkles. Part of why I sew is to get a fit that's better than RTW but for now, the top is comfy and I love the collar and the fabric so I have at least 2 more versions I want to sew.

Thank you Beth for helping me fit the Renfrew! I would not have gotten this far without you!  Sewing friends are the best, aren't they???

 Be well!