
This is the penultimate post for my Epic Jean Jacket, focusing on the buttonholes!
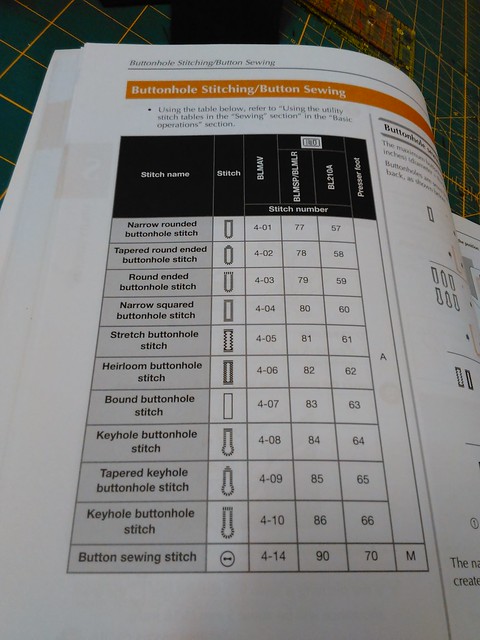
I used my BabyLock Soprano to stitch the buttonholes on the jacket. The Soprano has a few different buttonhole styles, so after examining my 3 RTW jean jackets, and making a few samples, I went with the tapered keyhole style just like them.
Before attaching the pocket flaps to the jacket, I stitched the buttonholes after everyone on IG agreed it is better to do that step at that point before actually attaching the flaps, even though the Islander and the Gertie instructions said to wait til the end.
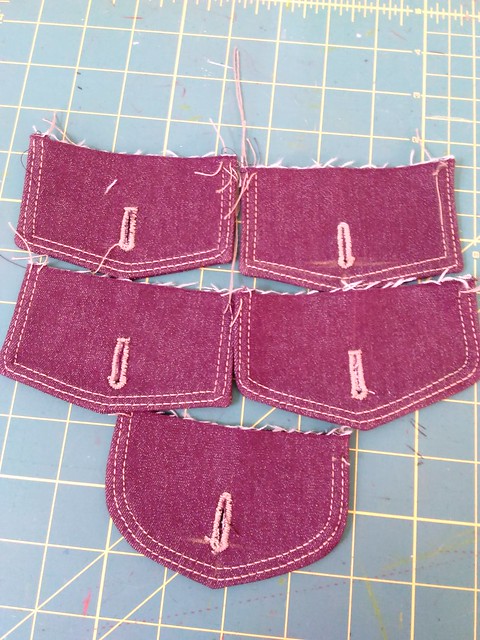
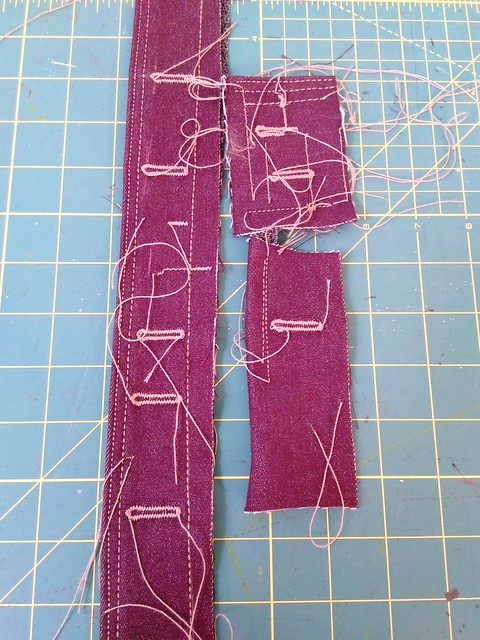
I remembered from Jennifer Stern's PR jeans class that she recommends using regular thread for buttonholes that is the same color as the topstitching thread instead of using the actual topstitching thread, but I had no thread in my stash that matched the "velvet fog" topstitching thread. I decided to try a few samples first and see if my machine could handle making buttonholes with topstitching thread up top and regular purple Coats and Clark poly thread in the bobbin.
Making a few samples was not a problem as I had already made many flaps for topstitching practice, and it turned out my machine could handle it very well.
However, when it came time to make the buttonholes down the front placket, I realized that the very top two buttonholes would be visible from both sides (since the jacket could be worn buttoned to the top or buttoned with the top two undone, or left totally open). By this point it was the next weekend, and while I could have gone to Joann's during the week to buy matching regular Coats and Clark thread, I had not. Of course I was not going to make the one hour round trip to Jo-Jo's (and on a weekend at that) to buy matching poly thread. Instead, I decided to push my machine and see if it could make buttonholes with topstitching thread in both the spool AND the bobbin.
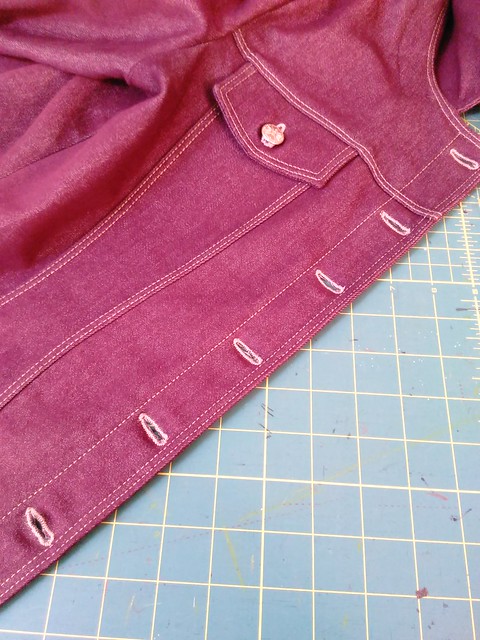
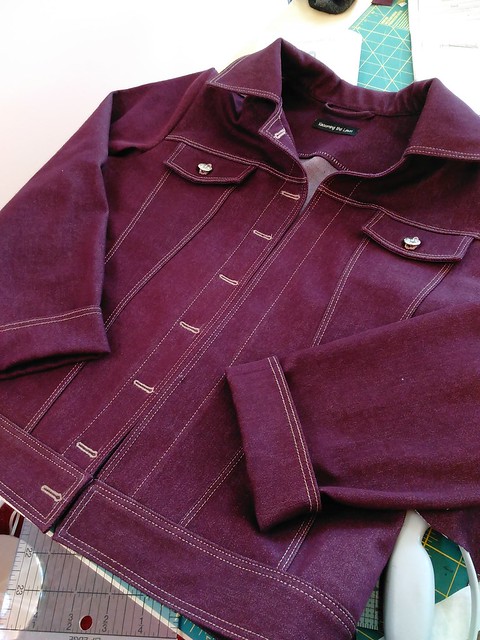
Front of the jacket--this is after it has been worn several times now
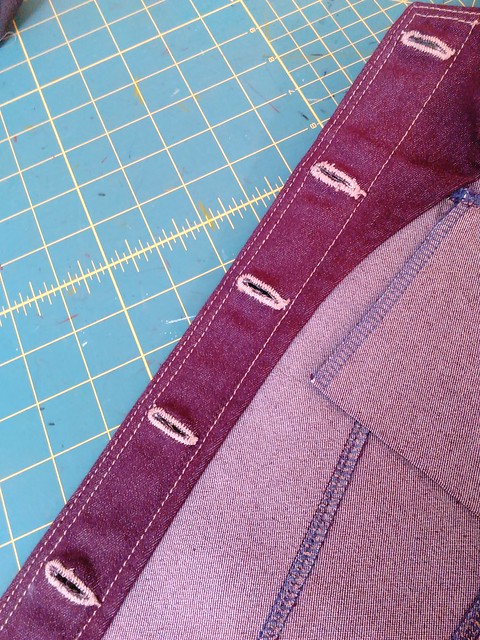
Interior of the placket--this is after it has been worn several times now.
I made a few buttonhole samples using the placket samples I had practiced topstitching on and they were ok. They could be better, and I had to push my machine at times into stitching them, but they were good enough so I proceeded.
I started at the bottom (so that by the time I got to the most visible, topmost buttonholes I would be a buttonhole expert ha ha) and worked my way up. My machine got hung up on the third buttonhole from the bottom and so I stopped and started again with the 4th one...it was fine until the 7th when it totally choked---this was because the long buttonhole foot was getting stuck on the pocket flap located directly behind the 7th button which I didn't realize until it was happening, UGH. It then made the 8th buttonhole just fine.
(I stitched the buttonholes down the placket horizontally instead of vertically, because that's how they were done on my RTW jackets. If I had stitched them vertically, the 7th one would not have gotten stuck on the pocket flap. If I wasn't stitching keyhole buttonholes but ones that looked the same in either direction, I could have started the buttonhole on the other side of the placket closer to the single row of topstitching instead of the side of the placket closer to the double row of topstitching).
I went back and removed the stitching on buttonholes 3 and 7 which took a LONG time. Looking back, it probably would have been faster to drive to Joann's on a weekend, 1 hour round trip plus waiting in line to buy regular thread that matched the topstitching thread than to have stitched and unpicked those buttonholes, but it all matches now. When I stitched the 7th one again, I pinned the pocket flap up and out of the way and kind of had to push my machine into stitching the buttonhole even more than the others.
These buttonholes are not as nice as the pocket flaps, but from a distance they are ok.
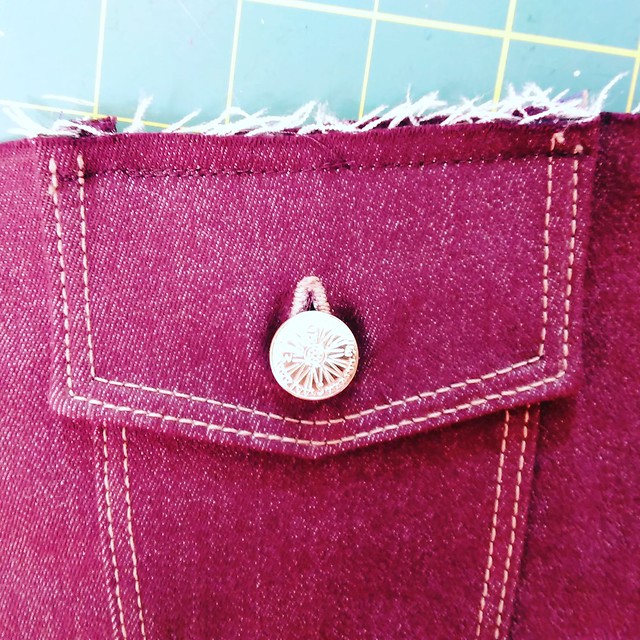
Before slicing the buttonholes open, I applied Fray Check to the buttonhole, then let it dry, then flipped the placket over, applied Fray Check to the other side of the buttonhole and let it dry.
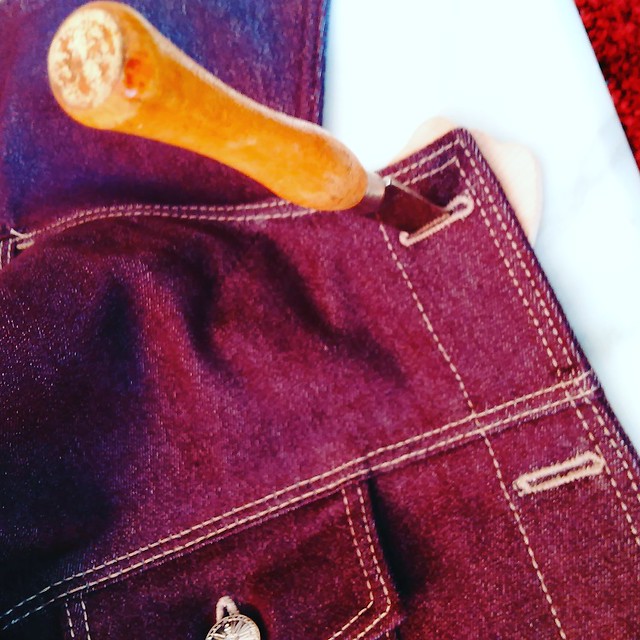
To slice them open, I used this buttonhole cutter I bought online from Nancy's Notions. I *highly* recommend this device. I had never used this device before (usually used a box cutter or snipped with my embroidery scissors or sliced it open with a seam ripper with some pins around the buttonhole to keep me from slicing through the buttonhole) but I am totally SOLD!!! Just whack the end with a hammer with the wooden piece underneath (shaped like a cute apple slice) and it is done. The set comes with an eyelet cutter as well, but that eyelet hole was too big for the diameter of my keyhole and on my practice samples had sliced the threads. For that part I used my embroidery scissors and snipped in a radiating pattern to open the keyhole up. I then applied Fray Check again to the front and back of the sliced buttonholes, waiting for them to dry each time.
Next time I'll write about the jean shank buttons. I had a little drama there... but ultimately it all turned out ok. I'm sure you can relate. :)
Be well!
Wow...you did put in a lot of effort into those buttonholes...lol. I like the buttonhole style you chose. I too have that buttonhole tool but have not used it yet. It's packed in a box somewhere....Anyway, next time you need buttonholes on a jacket, you might consider going to Jonathan's Embroidery on 38th Street between 7th and 8th. You bring the thread you want them to use, mark on the wrong side where you want the buttonholes and they will do the buttonholes for you with their industrial buttonhole machines for $1 each. I know you don't live very close to NYC but just something to keep in mind.
ReplyDeleteThanks Tomasa!!! So I was totally thinking "THIS is why people go to Jonathan Embroidery" while I was making the buttonholes. :) But I also had the drive to just finish the jacket that weekend. I just needed to finish it and move on. I will keep them in mind for future projects!
Deletei think buttonholes are about my least favourite thing to sew because of the potential for messing up. Well done!
ReplyDeleteAll your time and efforts definitely paid off, but this reminds me why I sew so infrequently!
ReplyDeleteI can never get all the buttonholes to stitch perfectly. Plus, I can relate to the pocket flap catching underneath! I wish I had a sewing superpower to see the underside as I am stitching. It would save me so much time from seam ripping!
ReplyDeleteVery nice! I have that buttonhole device! I am trying not to be afraid of buttonholes anymore. You did a great job.
ReplyDeleteEpic Jean Jacket Post, i really love those.
ReplyDeleteGoldenslot สล็อตออนไลน์ Gclub