
Y'all know I love that backpack I made last year. It's probably the best thing I ever made. While it's the perfect size for a wallet, keys, phone, plus a few little things, and is fully lined with interfacing, etc, as well as being totally built to last, I wanted a bag a little bigger and lighter for trips to NYC or even walking into town at lunch.
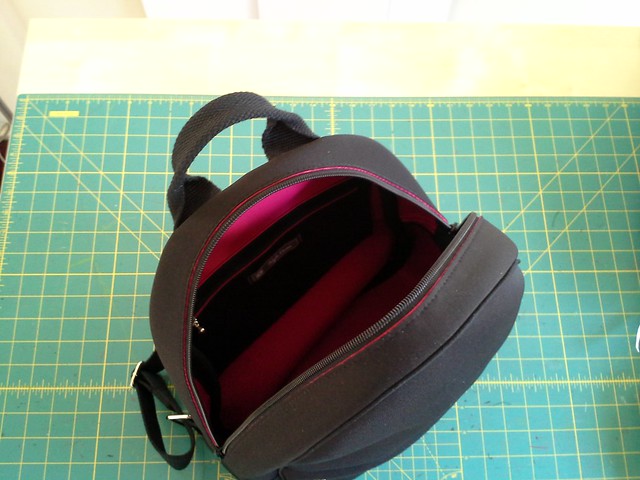
I have also been somewhat attracted to double faced neoprene. I thought neoprene was pretty light, so the plan was to make an unlined backpack with the dark side of the neoprene facing out, and the lighter side in, because I prefer my bags to have light linings as it makes it easier to see the contents of my bag. The plan was also to use plastic hardware and nylon zippers to also keep the weight down.
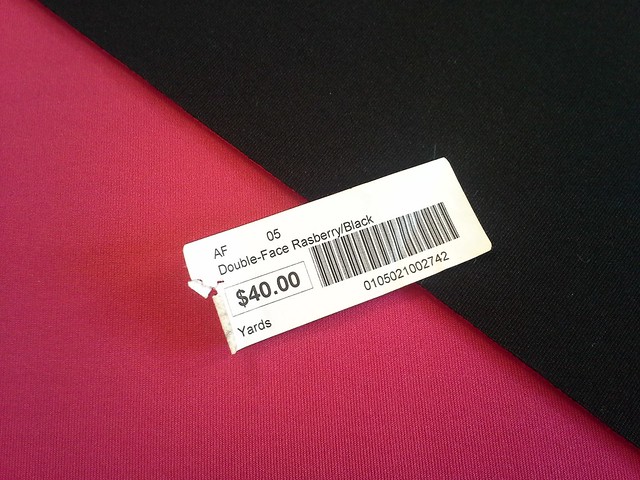
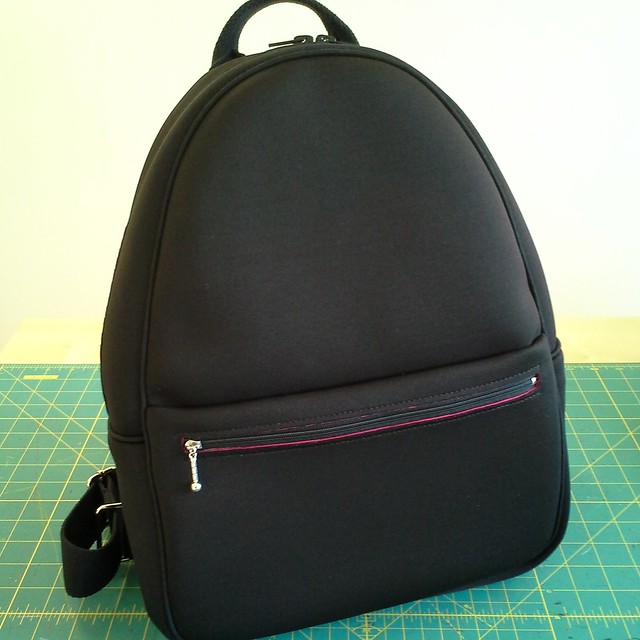
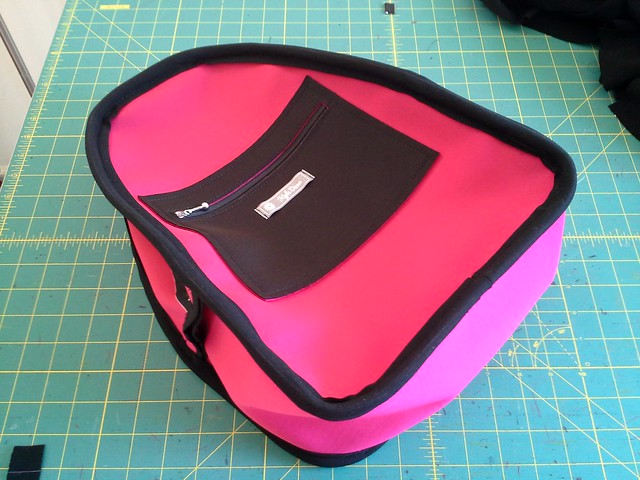
I bought 3/4 of a yard of double faced neoprene from a local, independent fabric store in Kingston, NJ called "More Than a Notion Fabrics". This fabric is $40 a yard, making it the most expensive fabric (on a per yard basis) I've ever purchased. It is a "hot raspberry" on one side and black on the other, and ~2 mm thick.
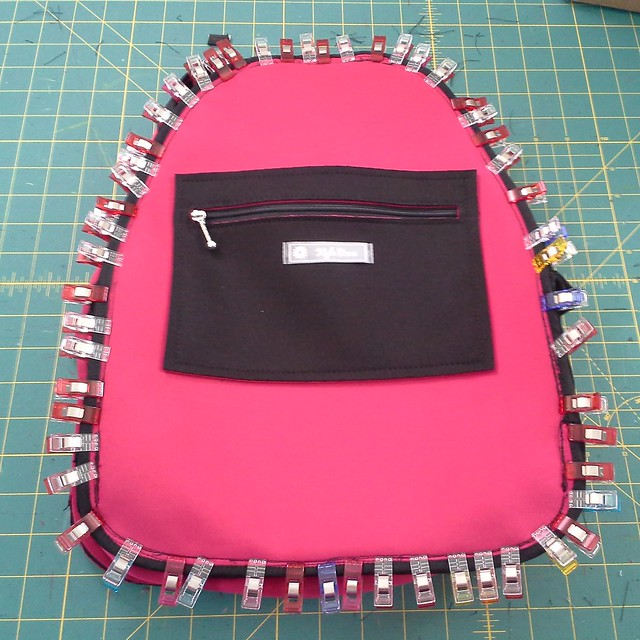
The cat bed stage of bag making....
First I did some internet research on how to sew with neoprene. The best advice I found was from Catherine Daze's blog, where she said to use the biggest needle available, which for me was a 110/18 leather needle I found at Joann's. It is a super thick and substantial needle. I lowered the tension on my machine to a 3 and used a 3.0 stitch length and 4.0 stitch length for topstitching.
I was also warned about not using pins as they leave holes. I love wonder clips, so I used them. When I did have to rip something out, I did so carefully and then ironed (with a press cloth) the neoprene on the cotton setting with a dry iron and it sealed the holes up, or at least enough that it was good enough!
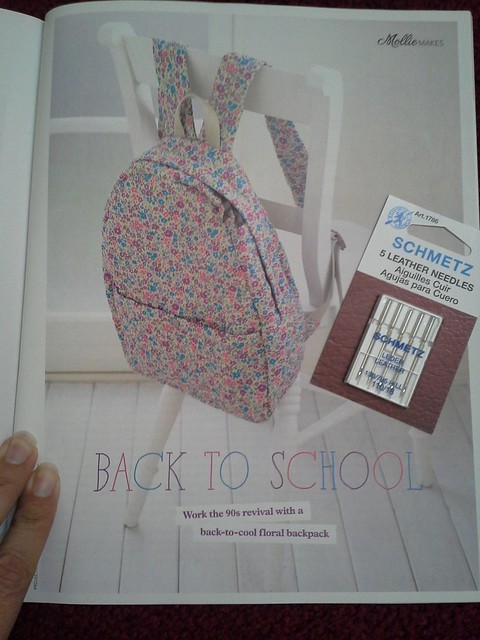
The Mollie Makes floral backpack; the leather 110/18 needles
As for the pattern, I used the floral backpack pattern from Mollie Makes Issue 42 as the base, but put my own pocket on the front, as I wanted a zipper and theirs was a magnetic closure. Their templates are free on their website. I have a few warnings about this pattern:
- There are no test squares on any of their pattern sheets to verify the pattern is the right size. Be sure to have your PDF settings set to "Actual Size" instead of "Fit to Print" (as I did the first time I printed the pattern).
- Their patterns are meant to be printed on A4 paper (they are a UK mag) and I'm in the US so the labels for each page were cut off.
- There are no grainlines on this pattern so I cut the "band" (for lack of a better term) with the grain so that it wouldn't be prone to stretching.
- If you do line the bag, do not follow the instructions which have you handstiching the lining to the zipper at the end. Instead, make a zipper sandwich with your zipper and exterior fabric and lining pieces and go from there.
So then I started sewing, knowing that this is just an experiment and maybe #thismightnotendwell. I had a few false starts here and there, but it actually ended very well!
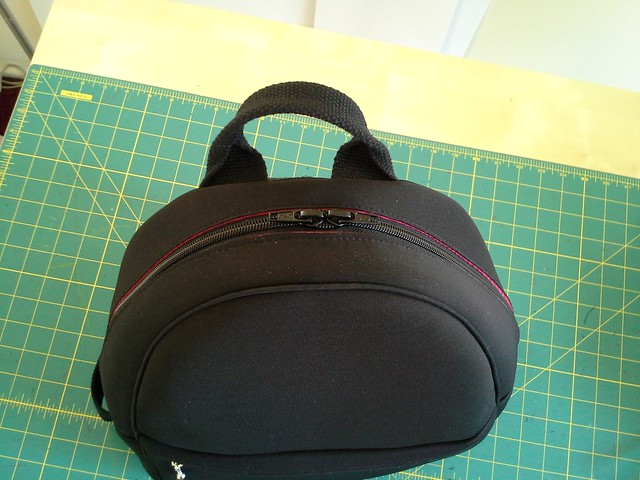
The main zipper
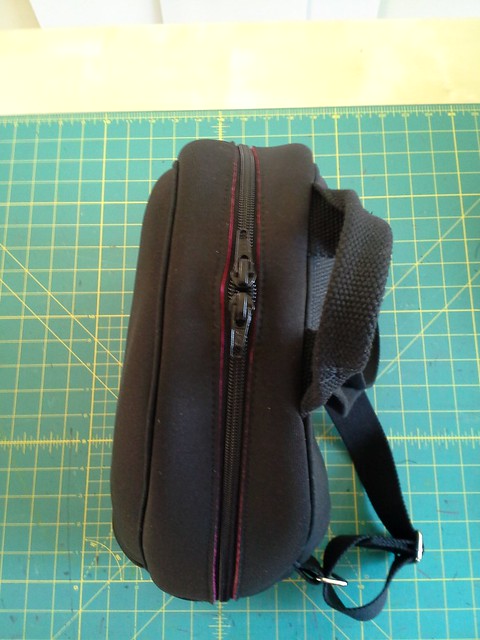
Surprisingly, the main zipper is a 22" purse zipper from Joann's! It is an "O" type zipper, meaning it has two closed ends and two sliders, like a luggage zipper. This zipper is totally perfect!

Unusual pattern shape
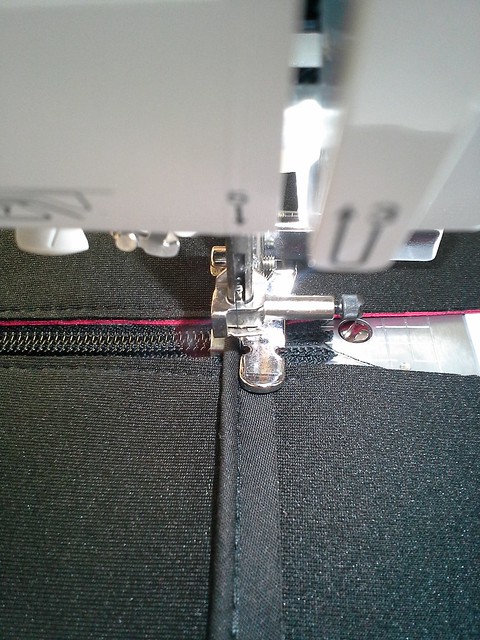
Sewing the piping across the side of the bag
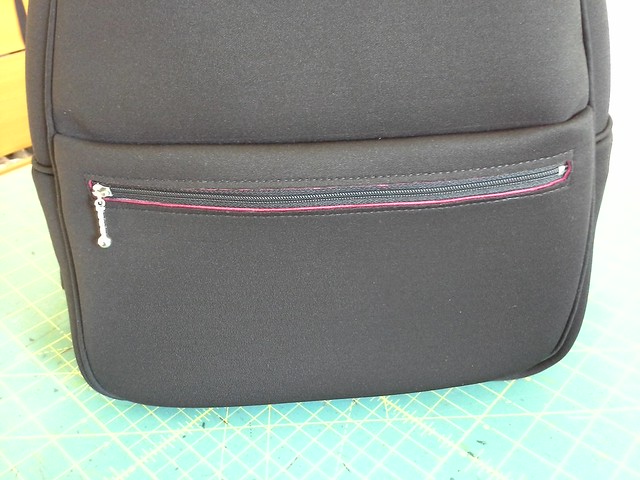
The pocket zippers
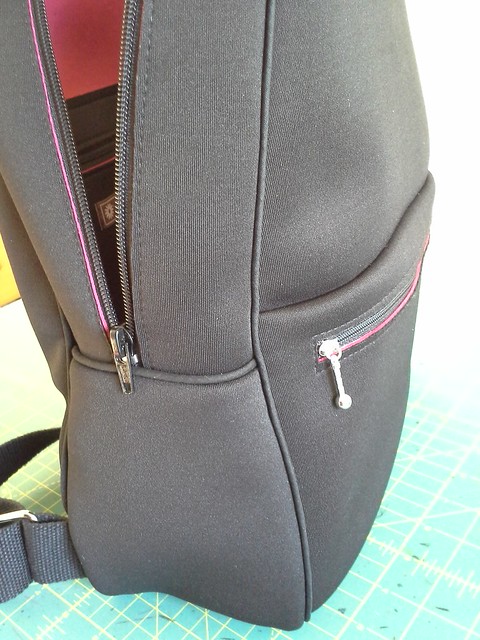
The pocket zippers are nylon zippers from Emmaline bags website. I love the little foxtail pull.
Another pocket
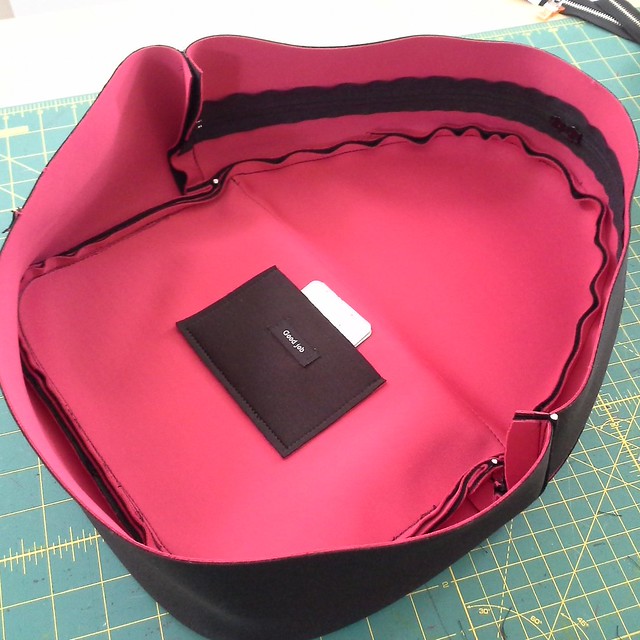
I added another pocket for my calling cards, no zipper so I can access them easily.
More surprises
Having a machine with an extension bed, and one that is powerful enough for quilting, really helps with bag making. This is my BabyLock Soprano and is the first bag I have made on this machine. The amount of power this machine has is amazing.
- At a few points I wanted to sharpie marker the raspberry edge but then I decided not to. It is neat to see those pops of color
- I was surprised at how heavy the neoprene was.
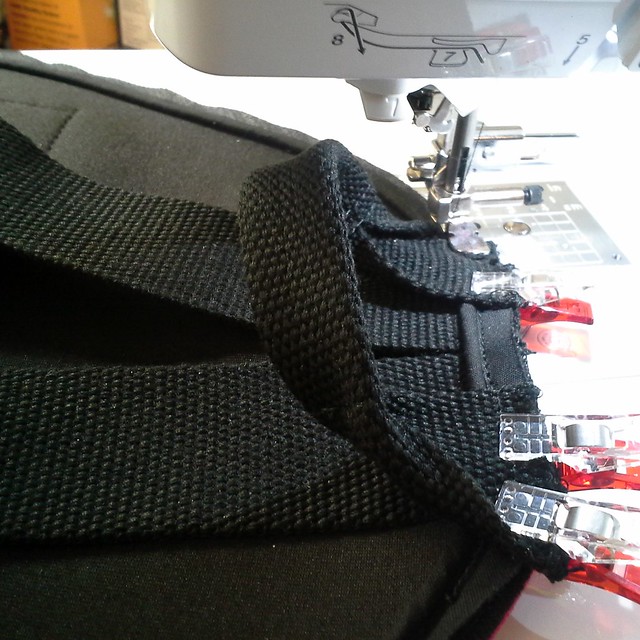
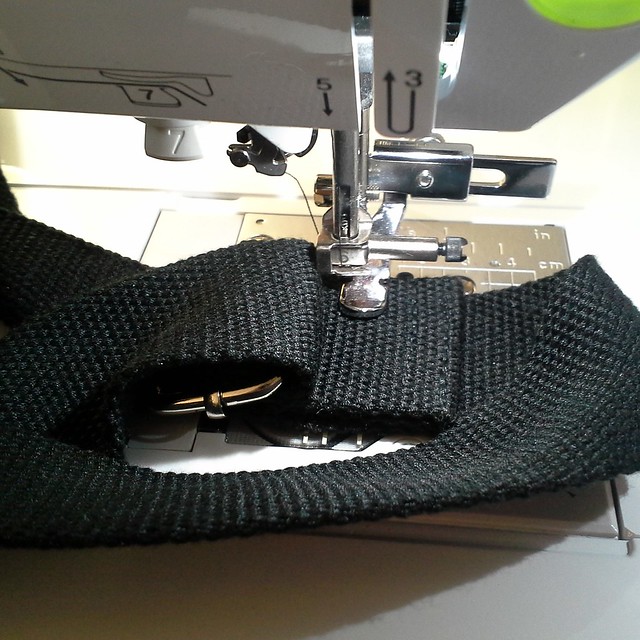
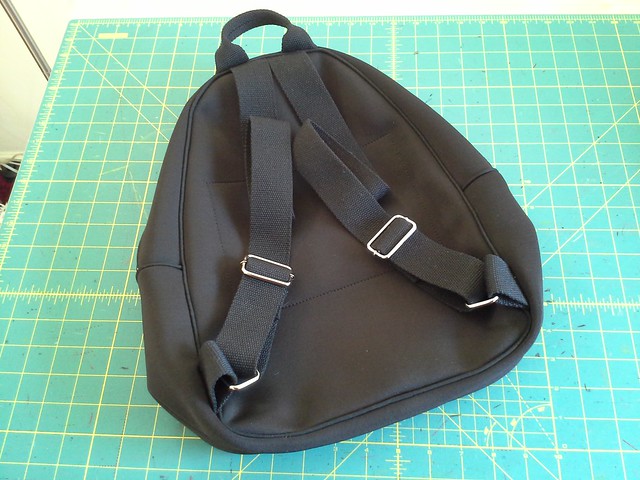
- I was more surprised at how heavy the straps were! The strapping is cotton and from Pacific Trimming, stored in my stash, and that really weighed the bag down.
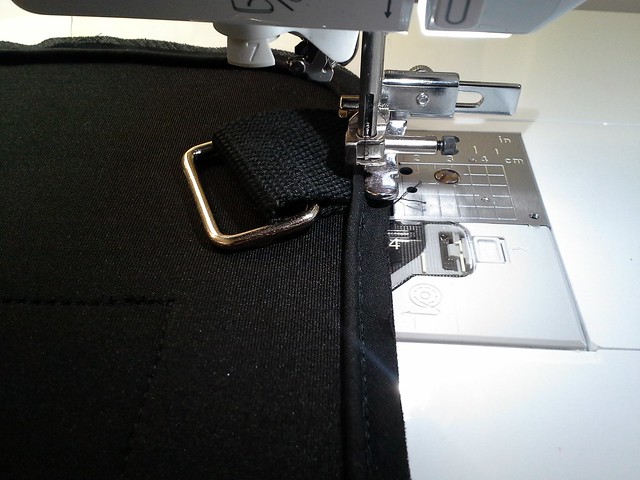
- I had already sewn in the nylon zippers, but because of the above, I decided to use metal rectangle rings and sliders.
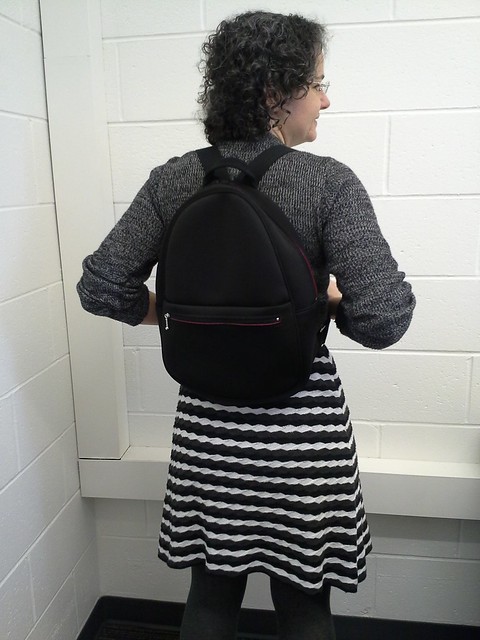
- It actually doesn't feel too heavy wearing it. Phew!
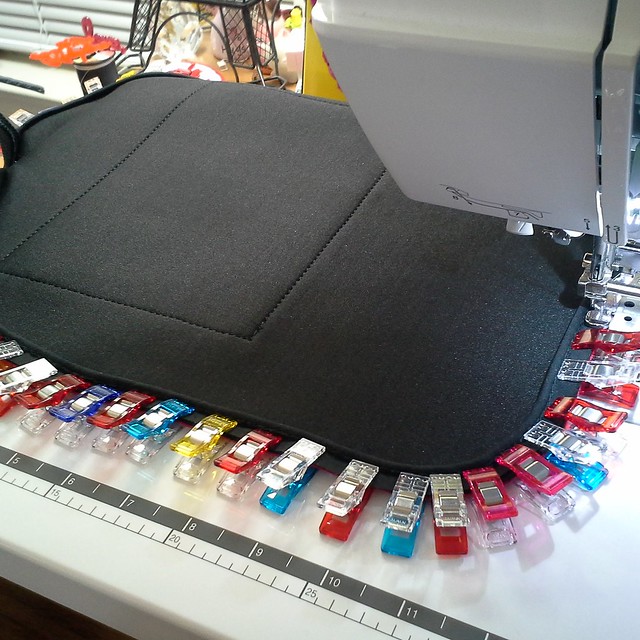
The raw edges
- Initially I was going to leave the edges raw
- Then I bound some of the edges in narrow double fold bias tape which looked nice to finish the raw edge itself, but my stitching line of the bag pieces was with black thread, and on hot pink it didn't look so good (especially as I sewed over some seams many times to get the piping to be as close as possible.
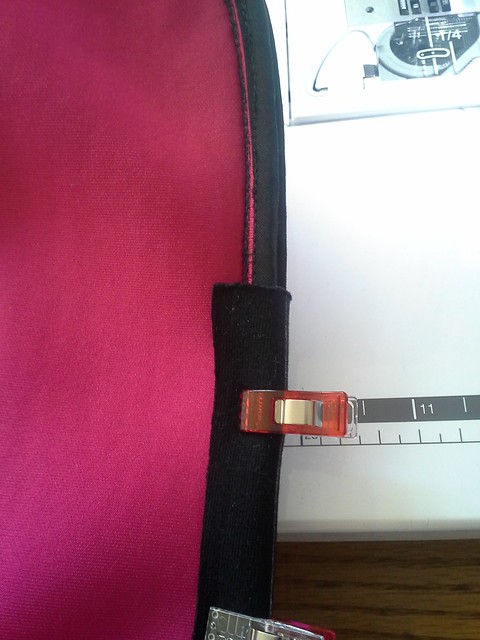
- A commenter on IG suggested using strips of bias tape to wrap around the whole edge. I wound up using strips of black ponte knit and that really made the binding look nice, professional and intentional! Yay!
The verdict
I love it! It is a great size, holds a lot without being too large, and is very functional. I have used it almost every day since making it and really enjoy it. There is a little journal (actually the Five Minute Journal, have you heard of it?) I have been carrying around that has a white cover, and the raspberry is rubbing off on it, but that doesn't bother me. However, it is something to be aware of: the color might rub off. It kind of makes me wonder if the black is rubbing off on the back of my coat, but my coat is a dark gray so I guess I wouldn't notice til it's time to switch coats.
Be well!
Wow! Very professional job. Enjoy your efforts, Kyle.
ReplyDeleteExcellent job Kyle! You did an amazing job. I like all the details you pointed out.
ReplyDeleteI had to go look up five minute journal! Your binding really takes your 'bag' to the next level.
ReplyDeleteTotally in love with your bag pack! You transformed it completely wih the neopren and the colours you have used.
ReplyDeleteGorgeous!! I love the pops of pink peeking out around the zipper!
ReplyDeleteKyle you have done an amazing job, again! This is a terrific bag. I love the bright insides and the binding. It looks so professional. I agree a light colour inside makes it easy to find things quickly.
ReplyDeleteWOW! That is a darling backpack..........GREAT WORK!
ReplyDeleteWow, this is one of the best projects I have seen. You are masterful :-). The piping is a great touch and I loved reading about your decision making as you proceeded through making this beautiful backpack.
ReplyDeleteI'm more inspired than ever to make a backpack! Maybe I can have one by Fall. Still lots of planning to do, not mention gathering all the bits and pieces.
ReplyDeleteHaving seen this bag in person, I know how wonderful it is! I love everything about it but my favorite is the pop of color peeking through...I am glad you did not put a Sharpie to those areas!
ReplyDeleteLove it!!
ReplyDeleteQuick question: I'm sewing a leather purse (Don Morin's Craftsy class) and he recommends upholstery thread. My fancy schmancy Bernina doesn't like it in the bobbin, and I don't know what to do. What thread did you use for the neoprene? Do you think it's strong enough to last?
I've seen all-purpose polyester recommended for the bobbin, but don't see the point of strong top and weak bottom thread. If you (or anyone) can help, I'll name my first ... uh ... cookie recipe after you!
Hi SunGold! I haven't sewn a leather bag before, so I don't know. I used Coats and Clark all purpose poly thread for my neoprene bag and it feels sturdy. I have also topstitched jeans using topstitching thread on top and regular all purpose poly thread in the bobbin.
DeleteHave you tried asking the instructor on Craftsy? The instructors seem to reply pretty quickly to questions. Good luck!
Very nice Kyle. You are a wonderful bag maker.
ReplyDeleteI love the fabric of your backpack. It's so soft. And size is just right for small woman's back. I always have a problem with size buying backpacks. Thank you for idea.
ReplyDeleteGreat bag Kyle! Neoprene, what a terrific idea, love it!
ReplyDelete