Showing posts with label pumpkinette. Show all posts

Monday, September 12, 2016

The Angela Wolf Delila Cold Shoulder Top

IMG_20160827_185315
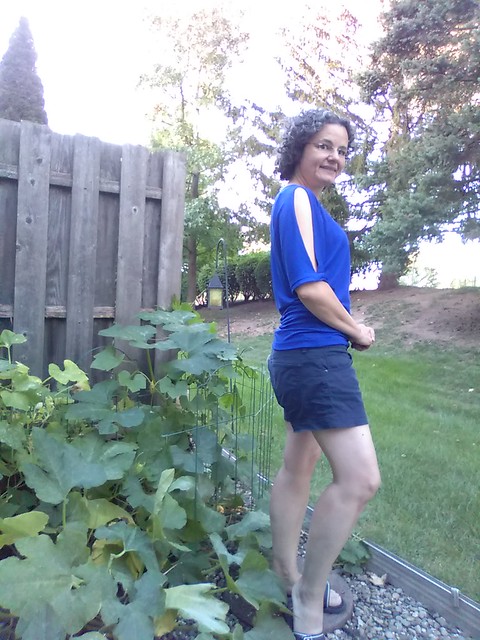
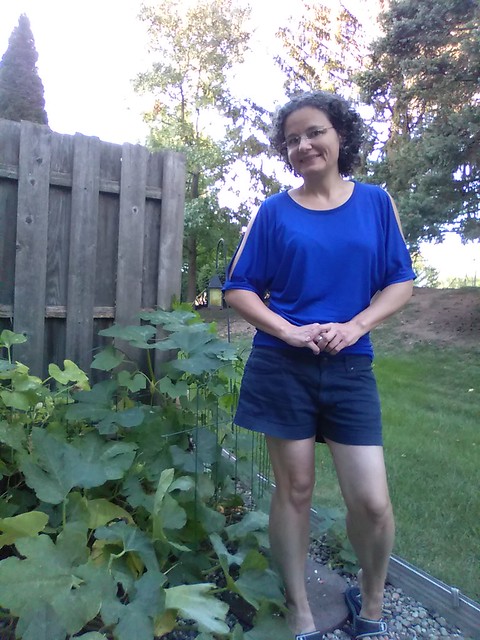
So....the Angela Wolf Delila Cold Shoulder top was not on my list of this summer's #summersewingdreams, but maybe for next year.  (At PR weekend in Austin in 2014, Deepika said that "When we like a pattern, we must buy it right now. We won't sew it for three years, but we have to have it now!" which really resonated with me!)   Recently, Clio made a trendy off-the-shoulder top, in-season at that, and that inspired me to sew up the Delila pronto!

IMG_20160901_091740


I used some royal blue lightweight ponte in my stash, purchased from Michael Levine's website in 2015.  It takes 2 yards of fabric, regardless of if you make it long or short sleeved.  I bought the pattern off the Pattern Review website earlier this summer.

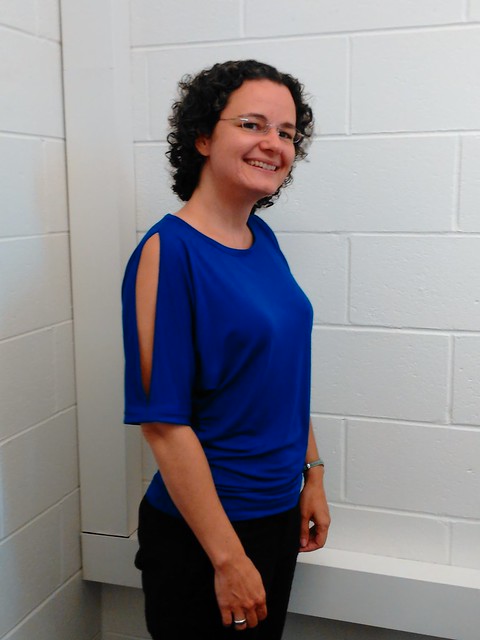
This is a seriously easy shirt.  Because it is a dolman style top, it doesn't require much fitting. Based on the finished garment measurements in combination with the general body measurement chart, I cut out a small grading to a medium at the waist, and went with view I, which is short sleeved but with the cold shoulder detail.
IMG_20160912_193111


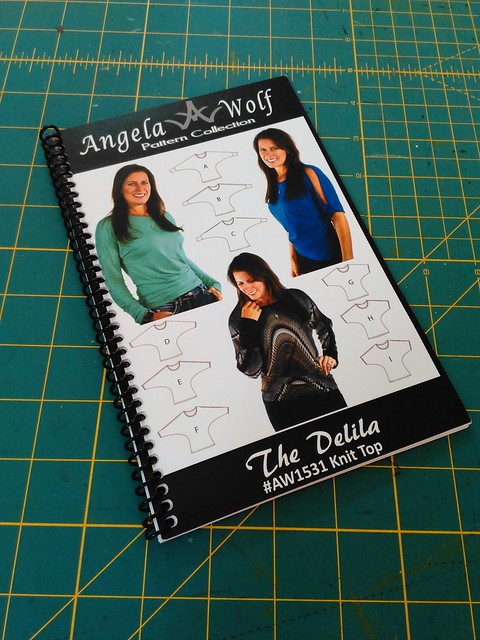
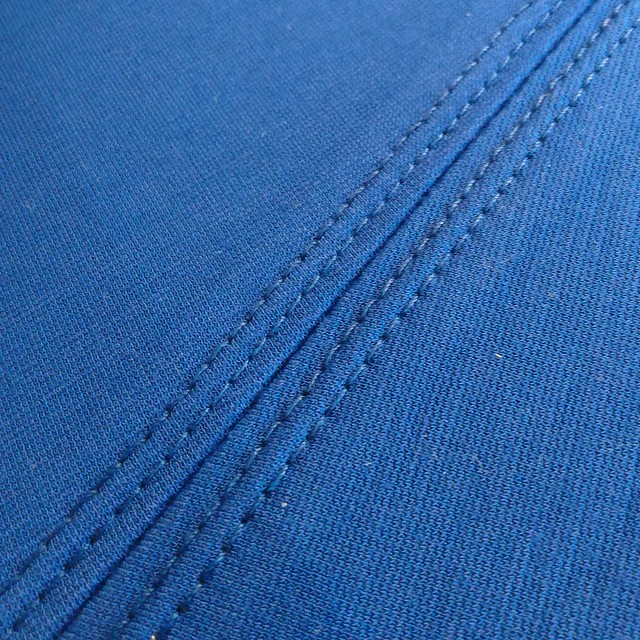
The pattern instructions are a spiral bound notebook, and really detailed.  Angela is very much pro-twin needle (yay! I am too as I don't have a coverstitch machine yet) and the only improvement I would have made to the instructions is to specify that it should be a stretch twin needle.
IMG_20160827_181658
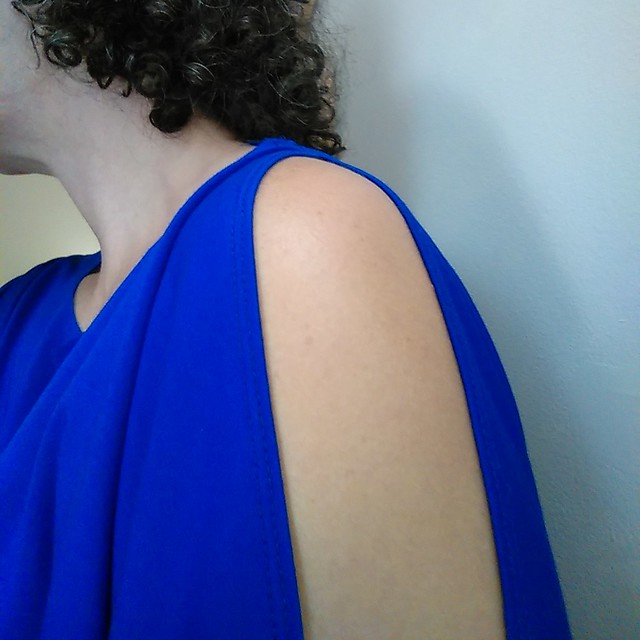
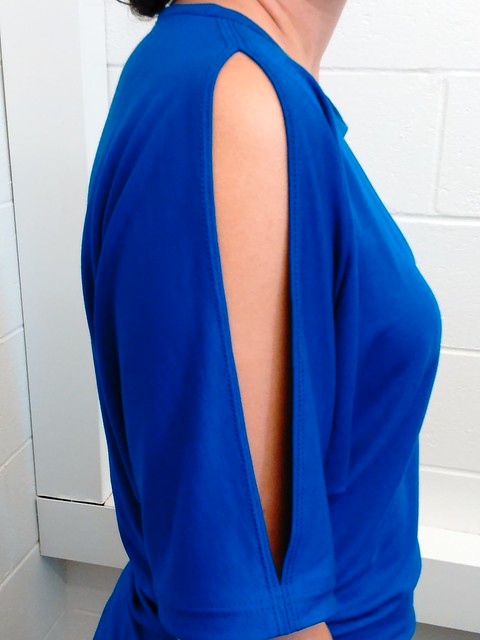
The notches for the cold shoulder opening actually ended after the short sleeved line, so I went with the instructions which said to start the slit about 2" after the neckline and end it about 2" before the hem.
IMG_20160827_181918
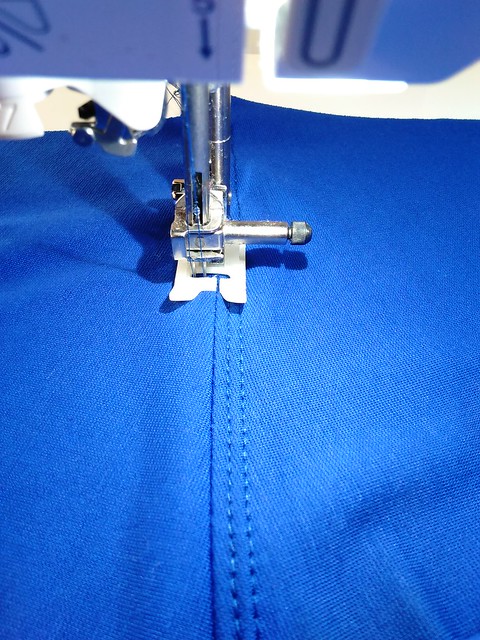
I bound the neckline in a different way (used a strip of 1.75" wide fabric, which was serged on one long edge.  Sewed the band on to the neckline with .5" SA, RS together, raw edges together.  Then I wrapped the band to the WS and wonder clipped into place, then topstitched the band down.


IMG_20160911_183115
I made the hem 1" instead of .5" on the sleeves and the shirt (because it is easier for me to press a knit up by an inch instead of a half inch) .
IMG_20160901_091807
I pressed throughout with my Elna Press and my clapper (which happens to be the Angela Wolf clapper, felt like it all came full circle!)
IMG_20160911_183112

Next time I think I would shorten the sleeves by an inch or so, so that they end before my elbow.  As it is now, they end right in the crook of my elbow and get wrinkled there.

I have worn it twice now and it is a fun and cool shirt to wear, and totally different from the other shirts in my wardrobe.

Thanks for the inspiration, Clio!

IMG_20160906_054949

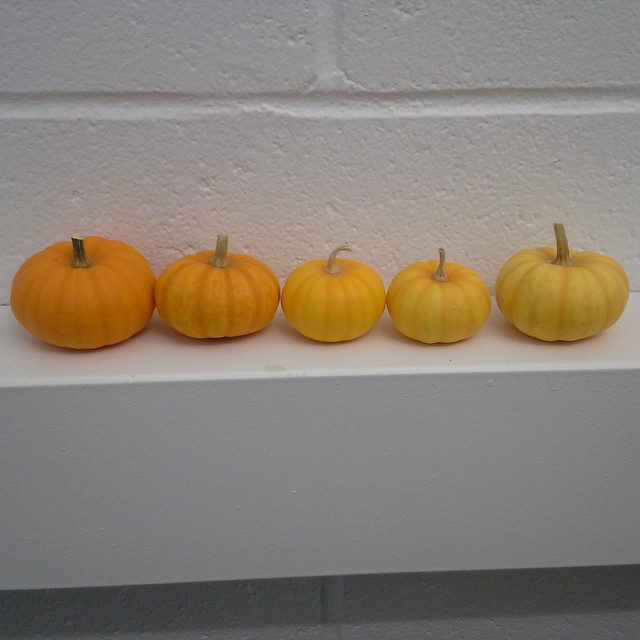
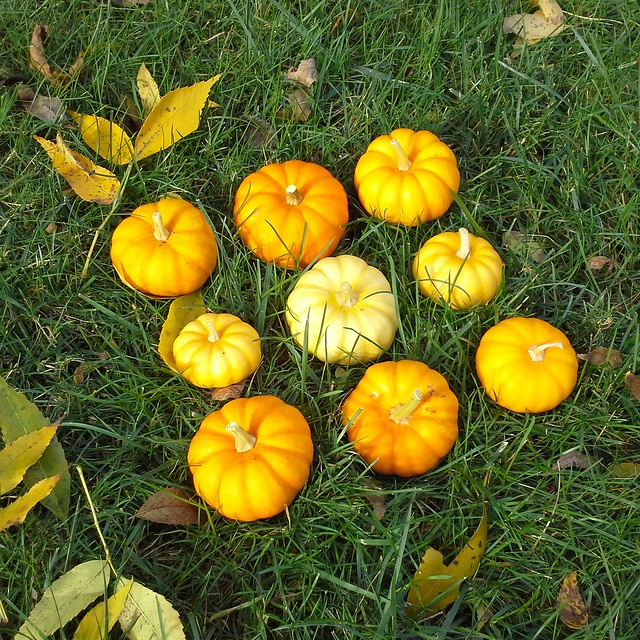
My first pumpkinette harvest of the season!  Woot!  There are a bunch more growing on the vine right now but I am always weary that something is going to eat them....hopeful for a second crop this year!

Next post, I will cover my #summersewingdream #9, the #epicjeanjacket.

Be well!

Wednesday, October 21, 2015

Handstitched Heidi Boyd Fox Whimsy Stitches Kit

20151021_192349
Soooo.....back on August 2, I was checking out at the City Quilter in NYC before sprinting to get the bus home, and saw this kit, all stitched up, on the wall.

As I was already forking over my credit card, I decided I would buy the kit online. I was disappointed to find that CQ didn't sell it online, and couldn't remember the name of the company. I did a google image search for fox embroidery kit to find it is by Heidi Boyd. There was free shipping that day on her etsy site, and when it arrived it was wrapped like a present, with a turquoise bow, felt flower and little fox pin, and even a handwritten note with a little fox drawn on the note. Sooooo cute.
20151021_192602
I stitched this up one afternoon during my week-long vacation waaaay back in early September, the day after I stitched up the Mollie Makes foxes.  Remember these cuties???
20150903_184132
Unlike the MM kit, this kit came with a high quality needle, yay!

It was awesome to be in my sewing room on a weekday afternoon, just stitching in a sunbeam.

20150904_141100
I had never done anything like this before, but it has some parallels to garment sewing:

  • Iron your fabric (the embroidery cloth)!  
  • Cut out your pattern pieces!  
  • Cut your fabric pieces (the felt)!

20150904_144655
Pop the fabric into the hoop, and start arranging the pieces.   Pin some of them on. bI was dying to use Wonder Tape, but I restrained myself.
20150904_151246
Start hand stitching.
20150904_160556
And stitching
20150904_170928
And then, a few (was it 4?) hours later, it's done!  I didn't give my fox whiskers; somehow I didn't like how they looked.  I added my initials and the year.
20150905_114703
I really liked the clever way to finish off the cloth.  The directions say to cut the fabric about an inch away from the hoop.  I went the extra mile and serged that part off (if you do that, take extra care around the metal part of the hoop, as far as its "interaction" with your metal presser foot!)
20150905_115956
Then I made a running stitch by hand to pull it together, as per the instructions.  How neat and tidy is that??  I cross stitched as a teenager and had no idea that's how you're supposed to finish the back!
20151021_192349
YAY!  I bought this kit again as I'd like to have a fox with me at work and a fox at home too.  Why not???  I may have bought a few other kits as well, uhmmmmm.....

Overall I enjoyed the slow, meditative stitching and the lack of fitting.  I did rip out here and there and started again, but that is par for the course for me.  And since I didn't know what I was doing, I really appreciated the clear instructions.    It is very straightforward.    Foxy!

IMG_20151021_163938
Here's a lineup of 5 of the 9 pumpkinettes I grew this year.  The printer ran out of ink....(silly joke I borrowed from the internet....you know, where they line up kittens...)

Be well!!!  (After having norovirus this weekend, I feel that takes on special significance!  Tonight was the first time I really felt like eating again, hurrah!)


Tuesday, October 13, 2015

A tote to make your eyes go funny

20150920_163114
"It makes my eyes go funny" --says quite a few people.
20150919_182352
I bought this fabric in August at Paron during ATP's visit to NYC.  It's Tom and Linda Platt fabric, and is reversible.  It has a really neat pattern to it.  Originally I thought I would make a skirt, but it's a bit much.  And I was thinking of making a bag for Anne's birthday. It was the weekend before the ASE, so it was then or never, if I was going to give her gift to her in person.  She had told me when she visited in August that one of her coworkers doesn't like all the prints Anne wears that "make her eyes go funny" so I was pretty sure Anne would like this tote.

20150919_172952
Initially I started folding the fabric in different ways, to find the right placement....this way....
20150919_173020
....that way....

but it was when I put the entire piece of fabric on the floor and photographed it that I saw that there were converging lines both horizontally and vertically which helped me decide on the placement.


20150921_104446
You can see the converging lines in vertically in the middle of the bag, and on the bottom.

20150921_104524
Yes, I did match my outfit to the bag for this photo shoot....it's a Vogue wrap dress and Jalie shrug.  I showed it to two of my coworkers who each said it made their eyes go funny...uhmmmmm....

20150920_164435
There is no bottom seam; I cut the fabric as one continuous piece so each side is symmetrical and I didn't need to worry about anything matching on the bottom.  There is peltex in the bottom to keep it stiff.
20150921_174836
This bag is made with reversible methods, so you can't tell where it was turned inside out.  I piped the top and topstitched in cream.  (Hint: the topstitching hides where it was turned inside out.)
20150920_164418
The lining is black duck cloth; the exterior fabric has medium weight Fashion Sewing Supply interfacing fused to it.
20150920_164240
The side seam somewhat matches.  Again I tugged-tugged-tugged to try to grain the fabric.  It's not bad but it could be better.
20150920_164116
Interior zipper pocket, with my label.
Fun fact: some of the cream from the pocket lining could be seen, so I used a black Sharpie marker (made for fabric) to cover up the cream.
20150920_164131
Fun pocket lining.
20150920_120954
Patch pocket on the other side.

20150927_093345
Anne and me at the ASE with her bag.  She loved it and used it all weekend long.  Yay!    Happy Birthday Anne!

I have enough of this fabric left to make myself a bag, and a zipper pouch or two...hmmmm....
IMG_20151004_172113
Pumpkinettes I grew this year. There would have been 10, but something (a deer?) ate one of them and several pumpkinette leaves.

Be well!