
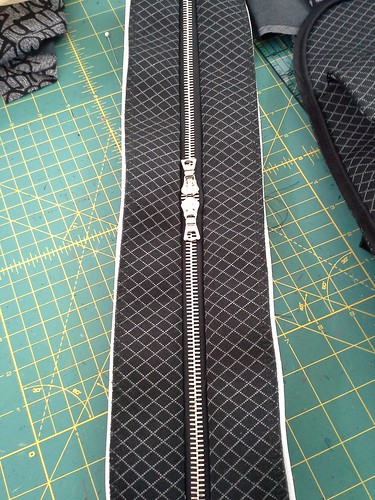
Gorgeous 2-way Riri custom cut zipper purchased online from my favorite store in the world, PacificTrimming.com (yes, you can order a LOT of their stock from their website now, including custom zippers!!)
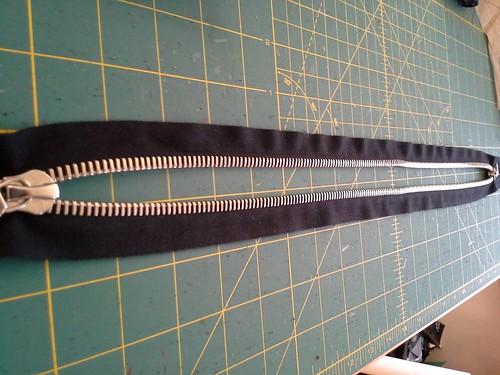
Riri Zipper Stats:
- 20" long
- M8 (the chunkiest zipper they are selling online; maybe that is their chunkiest zipper--I don't know)
- nickel finish
- 2 way, closed end, center open zipper (like a luggage zipper where both pulls can meet in the middle and the zipper is closed, not like a 2 way separating zipper)
- At $28, the most expensive zipper I've ever purchased.

The pattern envelope calls for a 20" zipper.
Be aware that the length of the pattern piece (the strip of fabric that is sewn to the zipper) is only 20.25" long. The seam allowances are .25" all around (yes, a quarter of an inch instead of the usual Big 4 5/8"). This means that leaves 19.75" lengthwise to be sewn to the zipper.
If you bought your zipper and had it custom cut to 20", because you followed the pattern envelope, and your zipper is metal...what are you going to do when it's time to sew the gusset to the end of the zipper??? You can't sew through metal, and I personally like seeing the chunky shining gleam of the zipper stops so.....I cut those pieces again (both the exterior and the lining, after fusing medium weight interfacing to rough cut pieces first) and cut them extra long with the idea of cutting them down to size later.
This is the second bag pattern I've sewn where the envelope calls for one size zipper but then it turns out the zipper needs to be just slightly shorter (the other was U-handbag's "It's a Cinch" pattern).
In the future I will always cut those strips of fabric longer than the pattern piece, like I do for waistbands, and cut off the excess later.
Lesson learned!
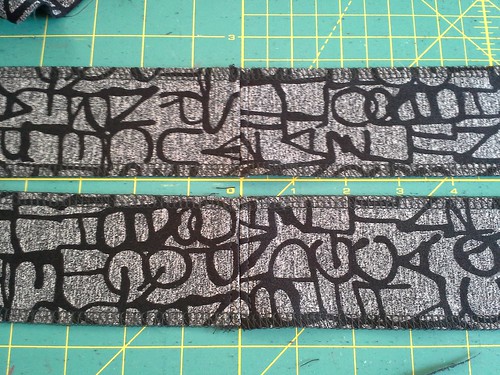
And because the lining print is one direction, I cut it down the middle and sewed it together so the print would always be "up", like this:
I'm also going rogue and not following the order of construction (which has you sew the lining to the zipper by hand at the very end as the final step).
Instead I have used the "zipper sandwich" method.

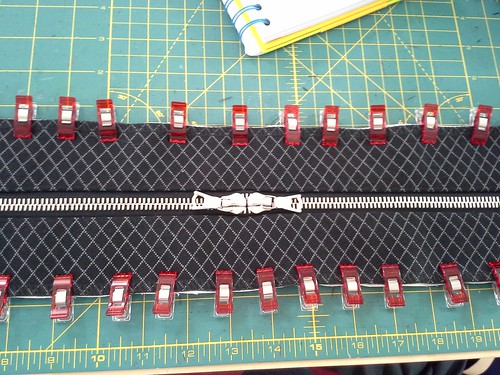
A peek inside the sandwich
What the sandwich looks like from the outside
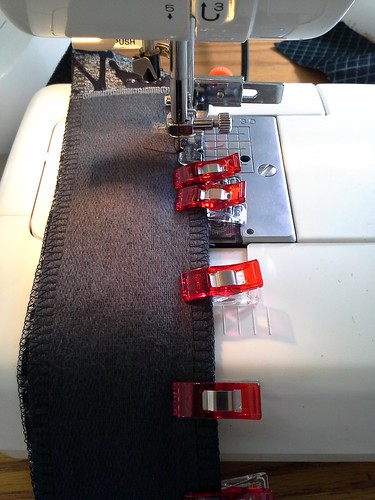
Then I added yet another layer of interfacing, this time the heavy duty sew in interfacing from Fashion Sewing Supply. I was afraid that with a zipper that heavy/chunky that it might collapse in on itself without extra support
The heavyweight interfacing is white and is peeking out
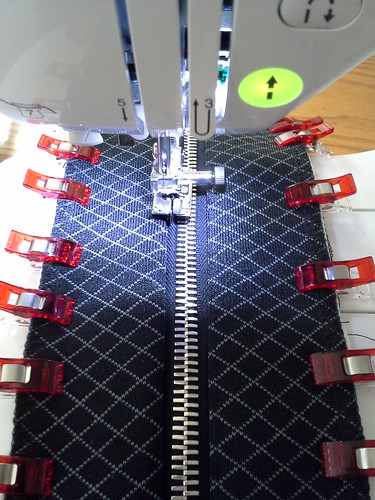
Topstitching it into place using my blind hem foot--I am using the flange as my guide while using a regular straight stitch to topstitch.
I think I'll do a separate post about the Wonder Clips.

It is taking shape!! Above is its current status. Backless, and...

...like a cat bed.
Be well!
It's looking so GOOD!
ReplyDeleteOooo...it's looking very good. I love that zip! (but WOW, how expensive is that!
ReplyDeleteAnother amazingly beautiful bag! I like the fact that your fabrics match your other creations. I makes it all look so expensive.
ReplyDeleteOh my gosh, it's going to be gorgeous!
ReplyDeleteYour backpack is coming together beautifully.......... loving it.
ReplyDeleteOkay - I am officially on the hunt for a super chunky zip!
ReplyDeleteOh my goodness. With your sewing skills, you can go rogue and make up your bag and it will still look perfect. It's such a lovely piece of work Kyle.
ReplyDelete