Showing posts with label zipper pouches. Show all posts

Saturday, June 27, 2015

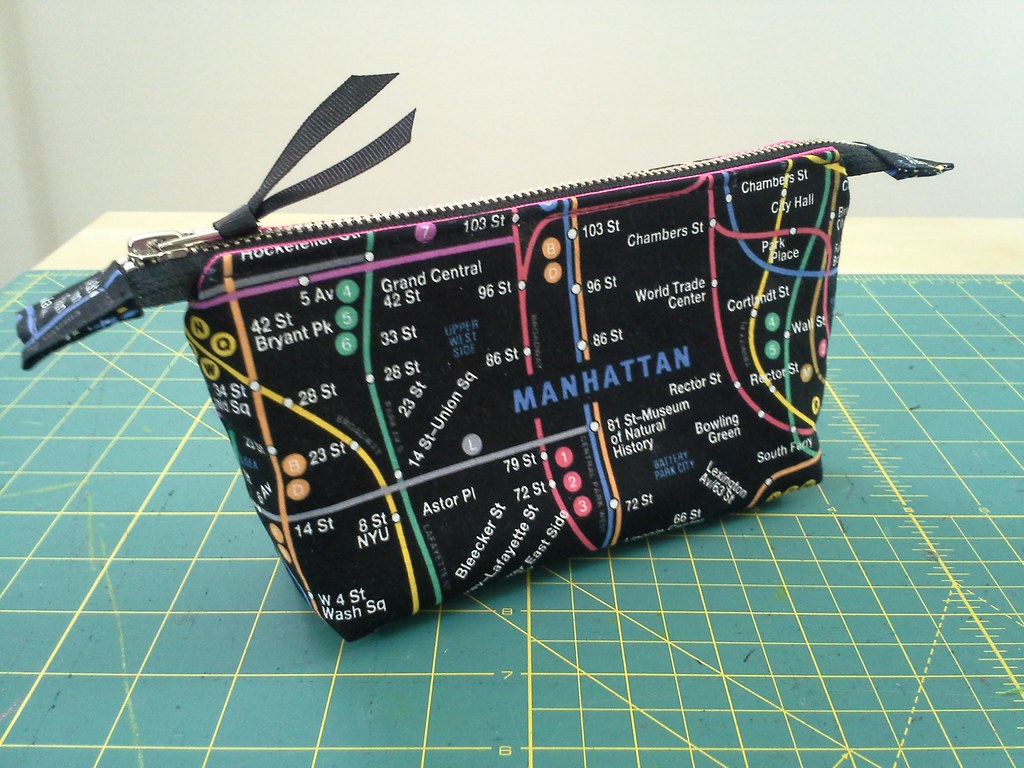
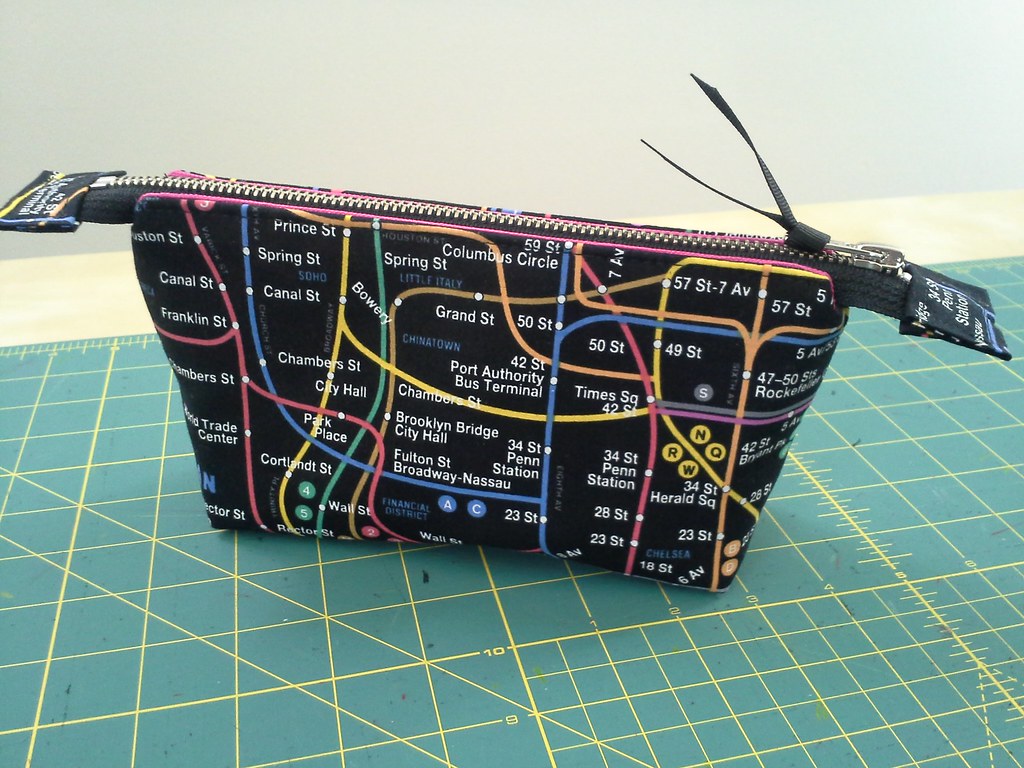
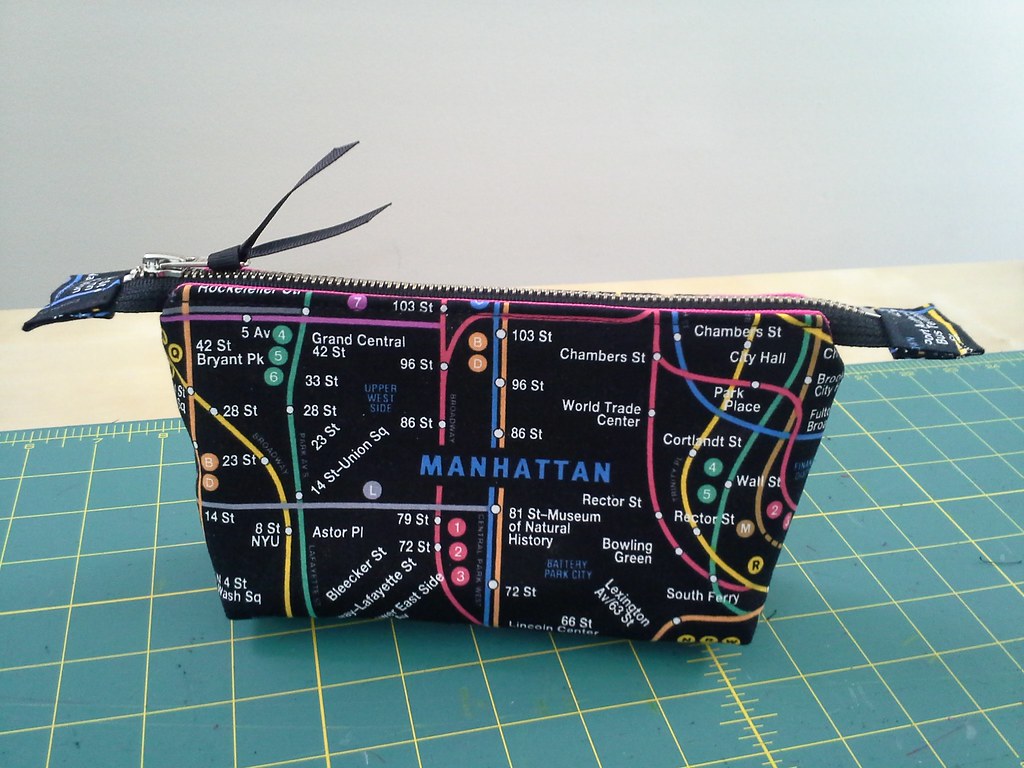
McCall's 6256: NYC subway zipper pouch, again

20150621_223923
I wanted to give a special gift to Gina, one of my #mmmay15 work photographers.  I felt she had gone "above and beyond" and is leaving to move on to other things.  I rarely sew for others but felt this gift was perfect for her as she has spent a lot of time in NYC.

20150621_223952

I've made this zipper pouch before, in the large and small sizes, laminated and non-laminated, and even in non-NYC fabric.  For this version, I chose the small, non-laminated size.  You can see all my posts referencing the various versions of this zipper pouch here.
20150621_223639

I am still on the fence about the best way to fussy cut the front.  The word "Manhattan" is not centered over the orange and blue subway lines.    This time I centered the front over the subway lines but then Manhattan is off center.  Previously I have centered it over Manhattan but then the subway lines are off center.    I'm on the fence about which version is better.  Definitely a first world sewing problem.

20150621_223650
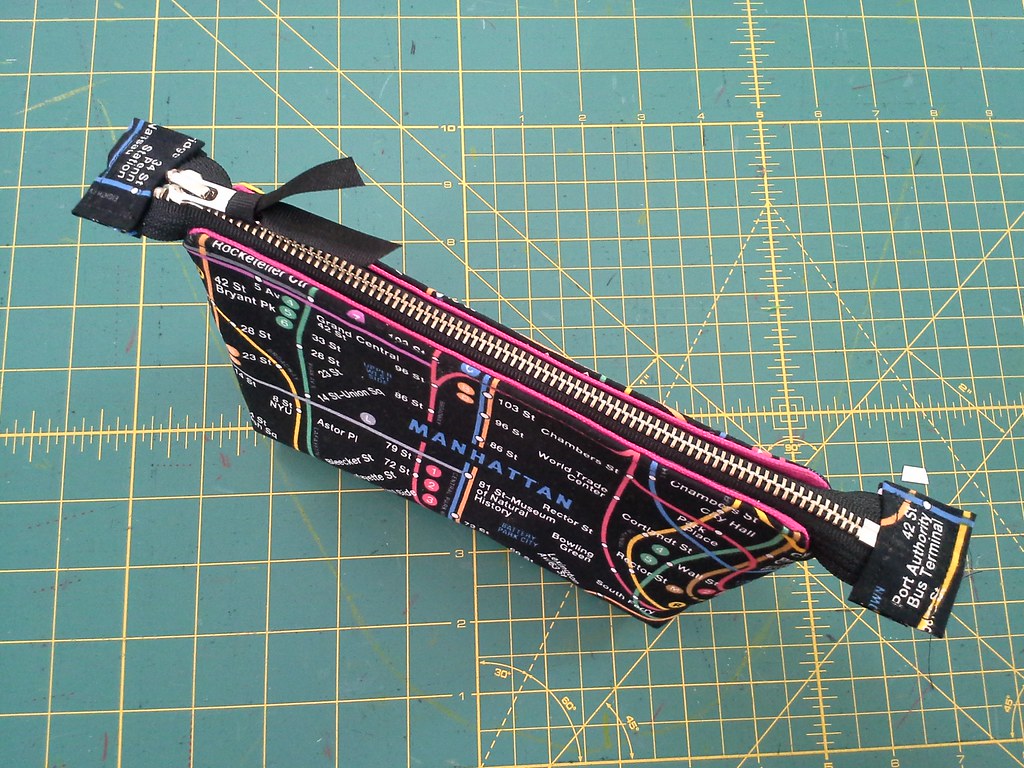
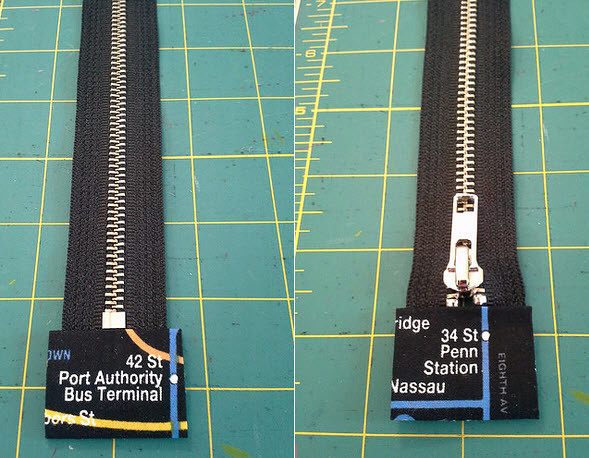
This time I added a grosgrain ribbon to the zipper tab.  I think velosewer did that with hers.  It's a nice touch.
zippertabs
I used a 9" metal YKK zipper from SIL Thread in NYC.
I also used wonder tape for temporarily attaching the zipper tabs before stitching them down.
20150621_223844
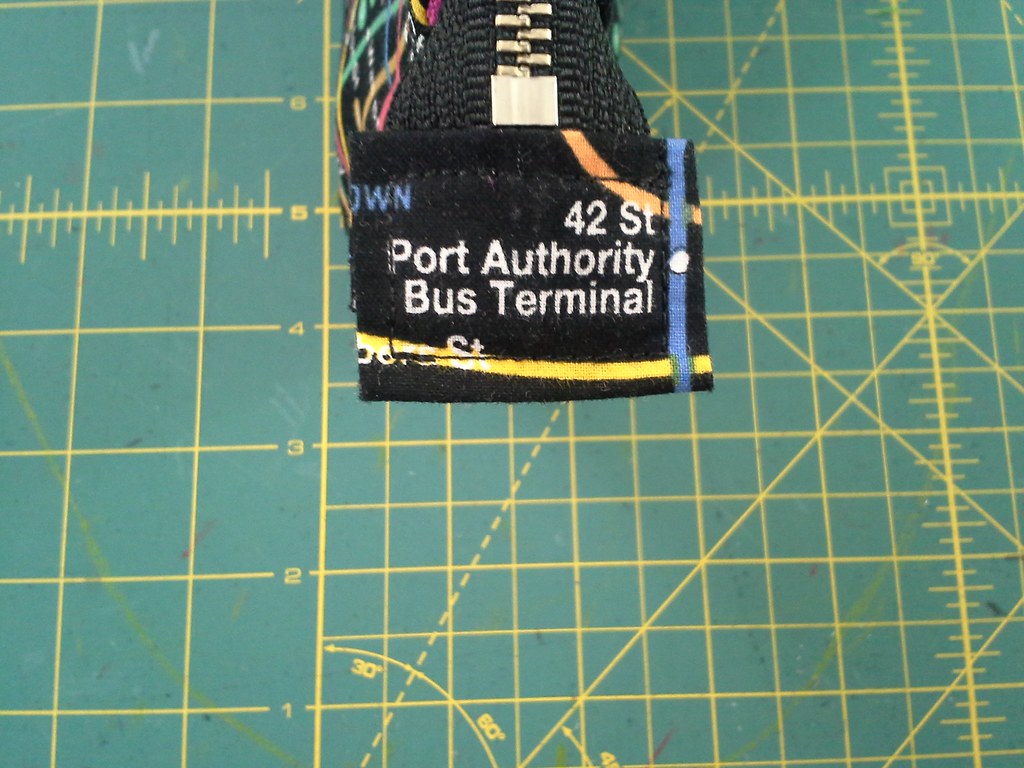
The zipper tabs were fussy cut featuring the two main ways I have gotten into the city...the bus (above) and the train (below).

20150621_223751
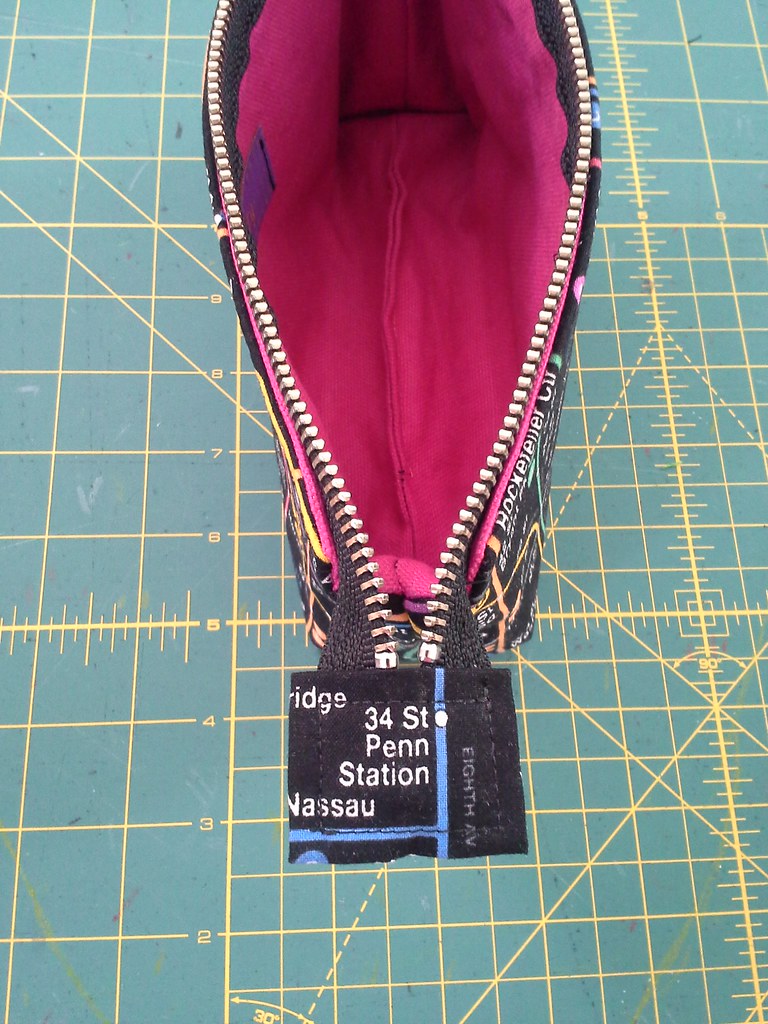
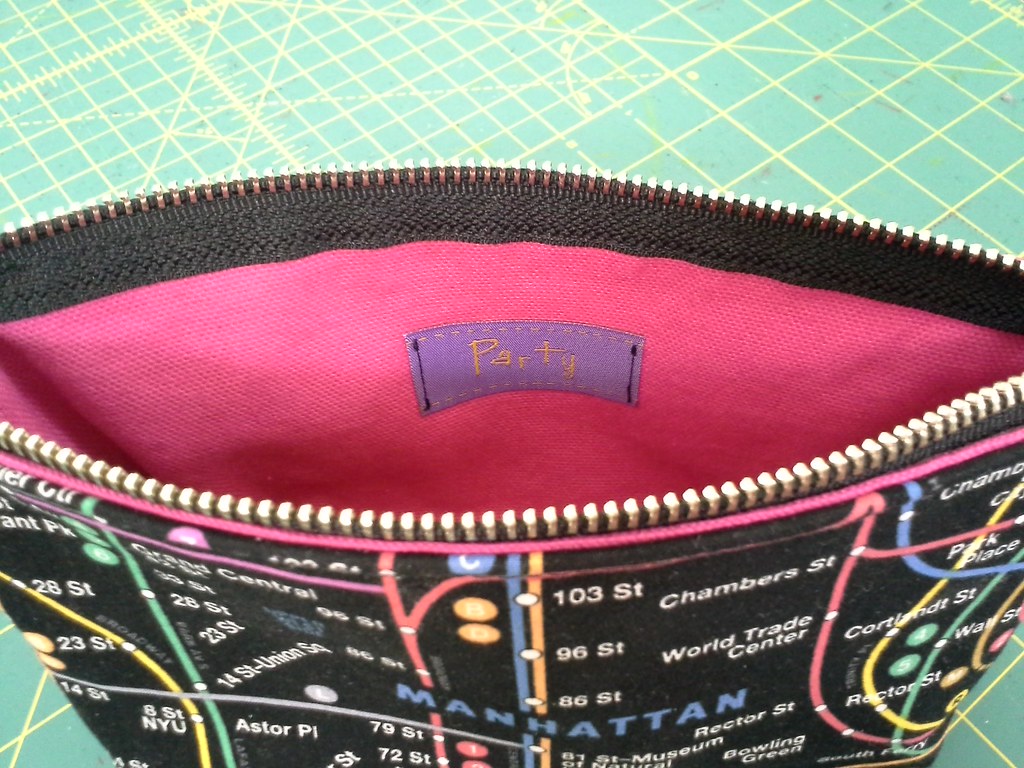
Other versions were lined in green denim; this version was lined in pink duck cloth.

I also used Fashion Sewing Supply sew-in medium weight interfacing in between the layers.  FSS medium weight fusible interfacing is fused to the outer layer too.  The duck cloth and all that interfacing makes the bag quite sturdy and it stands up on its own.

20150621_225106
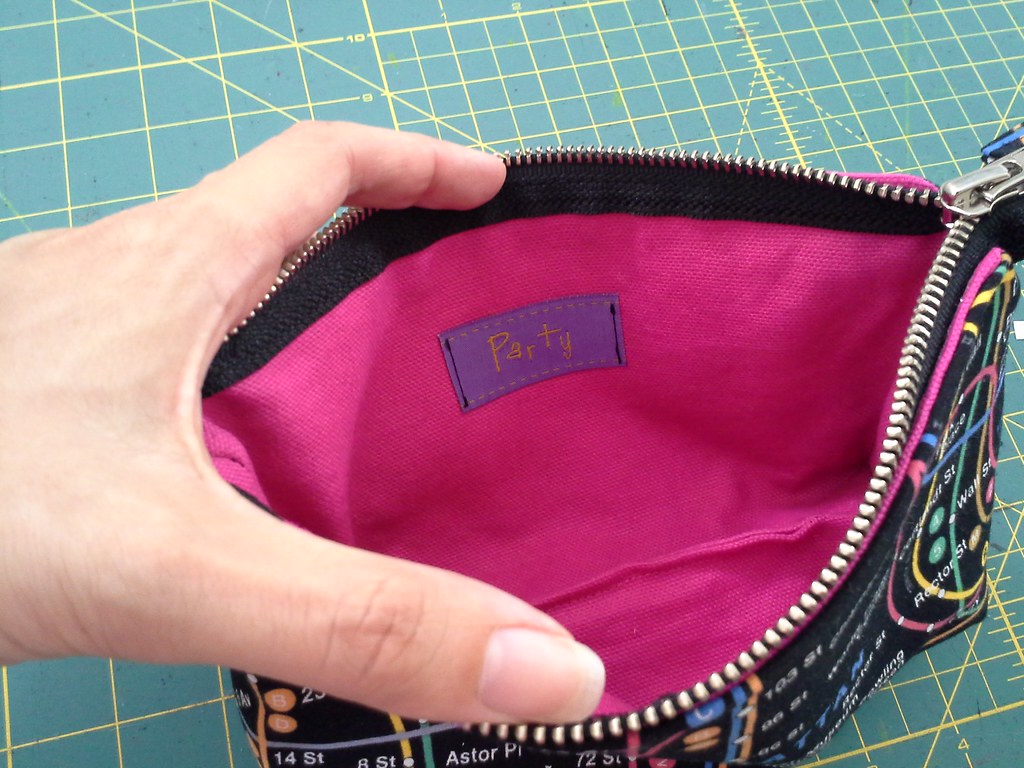
I added the "Party" label.  I am running out of labels with fun words on them but I have ordered some of my own custom labels which should arrive soon.
20150621_225145

Gina loved it and let out a little silent scream when she opened her present. I forgot to tell her that she can tuck the tabs in if she prefers.

You've seen me use this fabric for interior zipper pockets on tote bags and backpacks. I'm thinking of making a full-on tote bag using this fabric.  It seems like it would be fun.  Guess that means I better order more from The City Quilter as this fabric has I am running out of it.  Cotton version is here.   Laminate version is here.

20150627_104512
Black-eyed susans at the PFM are back, yay!

Be well!

Monday, December 30, 2013

Pressing Matters: The Elna Press

You know how they say, if you write out what you want it's x number of times more likely to come true?

I wrote about wanting an Elna Press in this post, and my dreams have come true.
Elna press Alize
The ElnaPress Alize.

My parents read my blog post and then hopped over to ebay where they snagged this one for Christmas.

I saw the Elna Press in action in Janet Pray's "Sew Better, Sew Faster" Craftsy class and was AMAZED.  You might even say I was impressed (ha ha ha ha ha).  Plus velosewer, who is the fastest seamstress I know, owns one, so it has to be one of the secrets of her speediness.

Elna press Alize
I tried it out yesterday when I made another NYC subway zipper pouch.  Here I'm ironing  pressing on the interfacing:
Elna Press Alize
Perfectly pressed!
another zipper pouch!
It makes ironing  pressing on the interfacing a breeze because it takes all of 10 seconds to fuse the interfacing to the fabric!!! And it times it for you and beeps to let you know when it's ready.

So it's speedy + times it for you + really fuses the interfacing to the fabric. Yay!  I wish the surface was a bit larger, but I think this will speed up part of the sewing process.

It does not have a light, the sleeve board, or the "vap o jet" (it's a dry press, so I use a spray bottle to spritz) but it is still pretty awesome.

Here I'm ironing pressing some corduroy. I know, I know, crushing the nap. But this is for pillows. And I suspect those who disapprove of my dodgy sewing techniques long ago stopped reading this blog.
Elna press Alize
This is the pillow I'm working on.
Fabric pressed.
Interfaced pressed (you can see the interfacing on the bottom left piece)
Fabric raw edges serged.
My inspiration leaves....
pillow I'm working on

And my zipper pouch:
another zipper pouch!
the zipper
another zipper pouch!
The inside
another zipper pouch!
If you own the Elna Press, do you have a stand for it? If yes, which one? I'm thinking of either buying a pressing stand or buying another tall Ikea table for it. It will live where the pile of fabric used to be against the wall.

Be well!

Thursday, December 26, 2013

What I sewed mom for Christmas

Thanks for all your comments on my Christmas post. I love that cat fabric too!  Hope you all had a great holiday!

So I did a little last-minute Christmas sewing for my mom: two aprons and a zipper pouch.

DSC03356
Here are the supplies:
zipper pouch I made for my mom

Turquoise upholstery fabric: from stash.  I love this fabric as it has great texture and color and weight.
Heart lining fabric: remnant from Joann's, rediscovered during the stash clean out.
Interfacing: medium weight iron-on from Fashion Sewing Supply
9" zipper: SIL Thread in NYC
Iron on heart patches: Pacific Trimming.  As soon as I saw those heart patches I knew they were destined to be on a zipper pouch.
Pattern: McCall's 6256, which I made a few times this year.

I started cutting out this pouch at 8pm on Monday night and had it finished ~2 hours later.   I impressed myself as I am such a slow sewist and the first time I made it (with laminated fabric, in the larger size) took about 7 hours.  I loved all the little notes I wrote to myself in the pattern instructions, in particular the one about sewing on the fabric tabs to the zipper:  "Remember, you can't sew over a metal zipper".  Bwah ha ha!

zipper pouch I made for my mom
I love the interior.  It's like a heart explosion.  Mom loves hearts and turquoise, so this was a great match.
zipper pouch I made for my mom
Zipper tab
zipper pouch I made for my mom
The back
zipper pouch I made for my mom
The view from the top
zipper pouch I made for my mom

Makin' the tabs. Wonder tape is definitely my friend when making zipper tabs.
zipper pouch I made for my mom
I think it's totes adorbs.

I originally wanted the two hearts to overlap so I did a test sample (I had purchased a few of those heart iron-on patches) but you could see the heart in the background through the heart in the foreground so I just put them side by side.

Here are the aprons.  Mom likes her aprons to be a big rectangle with two ties.  It's a very simple thing to sew.

aprons for my mom
This particular piece of cat fabric (left) was the original 3/4 yd piece I bought in Hawaii that was intended for this very apron!  The one on the right is fabric from the City Quilter, bought in either May or June, in their clearance section.

Here is how mom wears her aprons:
Christmas cat apron for my mom
and
  apron for my mom
I *love* this particular cat on the Christmas apron:

cue the squee!
A cat wearing Santa slippers! Love it!
Mom wore both aprons on Christmas Day, one in the morning and one in the afternoon, so I think they were a hit.

I realize in my last post, the pix all had my apron with the ties tied in front (which is how I like to wear them) but here is one with the ties tied in the back to show maximum streamlined cat cuteness.

my cat apron

So, what have I learned from making 3 aprons and 1 zipper pouch in 2 days?  It is really, really nice to be able to sew tried and true items and not worry about fit!

In my next post, I will write about what I got for Christmas from my parents (spoiler alert: it's an Elna Press!)

Be well!

Sunday, June 23, 2013

McCall's 6256 small zipper pouch, now 3.5 hours & laminated

(Ok, here is my attempt to take some pix outside, as it was expressed at PR weekend that I need to get my pix out of the bathroom....here you go!)

So I made the 7 hour zipper pouch for myself, only this time in the "small" size.  It took ~3.5 hours.   I think I can get it down to 3.
McCall's 6256 view C, small & laminated!
There is nothing in the bag...so it's a little saggy.

This is the laminated version of the subway fabric from the City Quilter.  Maria and I each bought some on our big shopping day.

This is how I used to go to the city (via train, exiting at 34th St Penn Station):
McCall's 6256 view C, small & laminated!
And this is how I go to the city now (via bus, exiting at Port Authority bus terminal):
McCall's 6256 view C, small & laminated!
I used the same dimensions as the last zipper tags, but minus a half inch length-wise.

Yes, it had just rained (and was drizzling a little while taking these pix).  But the fabric is laminated, woot!  I lined it in green denim from deep stash, same as Maria's.
McCall's 6256 view C, small & laminated!
The zipper is from SIL Thread, purchased on the same trip with Maria.   I think this zipper was under $2.  What a deal compared to Joann's.
McCall's 6256 view C, small & laminated!
I like having Manhattan centered on the "front" of the bag....but I somehow put the zipper pull to the right instead of the left. I never realized that zipper pouches always have the zipper pull on the left.  So I guess the back of the bag is now the front.
McCall's 6256 view C, small & laminated!

It is a really cute little bag.  I plan on making the larger version again soon, also out of the laminated fabric, and then comparing in one photo.

Oh, and I made a skirt with a piece of my Kaimuku fabric today.  Here is a sneak peek from an outtake photo!
New Look 6843 view E-ish
Here are your Princeton Farmers Market flowers for the week.  The ones from last week were Nigella--there are a few of them left...
Princeton Farmers Market flowers 6/20/13
Be well!

Friday, June 14, 2013

McCall's 6256 view C done: The 7 hour zipper pouch

DSC01608
Thanks for your comments on my last post.  I wound up going with mystery project #6 from my last post (and also did one mending of #5, many more pieces to go!)

Sooooo....here's my second round at zipper pouches.  It's McCall's 6256 view C.
Is it possible to be in love with a zipper pouch?  I think it is.

It took me 7 hours, because I did a lot of ripping out and redoing.  I think I could sew it again in 3 hours or less.  So below is how I finally figured out how to do this pouch and make it look good.  (also next time I will serge raw edges and maybe interface the exterior like I was supposed to...and also sew the label on the inside first before doing anything else)

Here's the pattern, I made view C, which comes in two sizes, large and small.  I made the large.

McCalls' 6256
I am in love with the zipper tabs. I had to make them larger, though, as the tabs with the pattern were skimpy! (I cut mine 3.5" tall by 2.25" wide, then folded under with .5" SA, then fold in half again to "wrap" around the zipper and sew down.  For centering the words, I made sure to center on the top half of the tab).  Also, note that you cannot sew over a metal zipper.  Ask me how I know (as Jennifer Stern would say).
McCall's 6256 view C done!
Here's an in-progress pic of the zipper tabs:
McCall's 6256 in progress
Here's the back of the bag.
McCall's 6256 view C done!
Here's a view from the top:
McCall's 6256 view C done!

So....unlike other zipper pouches where it's sewn by making a zipper sandwich (where the zipper is sewn in between the exterior and interior fabric), I followed the directions in which the lining is sewn to the exterior fabric, right sides together, so that upper edge has, like, a lip.  In this pic, the top edge and corners are sewn together, right sides together, flipped out and ironed:
McCall's 6256 in progress
Then, that lip is sewn onto the zipper, which means the zipper tape is visible from the inside of the pouch. I thought that was going to bother me, but it doesn't. I used a size 16 jeans needle since the interior fabric is denim, and the zipper tape is pretty thick.

The pattern calls for a 12" zip but they didn't have one so I bought the 14" zip and cut it down. Then I used wonder tape to "attach" the upper edge of the pouch right up against the zipper teeth instead of pinning. Wonder tape is amazing for this. This zipper is a meaty Coats and Clark "designer metal zipper" from Joann's. It's such a fat zipper that the fabric is not going to get caught in the teeth, so placing the fabric right against the teeth was no problem.

I used my overcasting foot, using the right side of my foot as a guide, butting it right up against the fabric edge:.  This worked well since the right side of the foot was on the metal zipper teeth. (When I initially tried this step, er, several times, I used my zipper foot which was terrible, the fabric got all wavy and crumpled looking underneath and I ripped it out and tried again and again.  The overcasting foot plus using a size 16 denim needle took care of that, I think because the teeth are so thick, they acted as support for the foot instead of getting in the way. Also as I sewed I would occasionally raise the zipper foot to neaten the fabric, that helped too and the end result does not look wavy.)
I used my edgestitching foot, but butted the side of the foot against the fabric
When I got to the zipper pull, I lifted my presser foot with the needle still in the fabric, turned the fabric ALL the way around (well, 180 degrees) and was able to somewhat easily slide the zipper stop out of the way. That was somewhat of an epiphany moment, as just lifting the presser foot and trying to slide the zipper stop back wasn't working, it's again, a very thick zipper with a thick zipper pull.  Then I rotated the fabric back to where it was and was able to finish topstitching.
DSC01585
This was the most clever way of attaching the lining to the exterior fabric:
clever way to join lining to the exterior fabric
It's step 10 and I totally didn't think it would work.  I trusted the instructions and voila, it worked!

In the finished product, you can see the lining from the outside...because it's not a zipper sandwich. But somehow I'm ok with this too.
McCall's 6256 view C done!
The inside is super cool, isn't it?
I sewed on a tag bought long ago...and made me laugh!  Sadly I forgot til the pouch was all done, so it's actually sewn on through both layers.  Oh, and I attached the label with wonder tape first before stitching so it wouldn't shift around.   Here you can see really well how the zipper tape is visible from the interior, but it looks pretty cool, methinks.
McCall's 6256 view C done!
The tabs can be tucked in, but I prefer them out.
McCall's 6256 view C done!
Tucked in
McCall's 6256 view C done!
Not tucked in.
My two main gripes with the pattern were:
McCall's didn't provide the full front pattern piece! Why not provide the full pattern piece to make it easier for centering?? Note also that on the fabric, the word Manhattan was not centered over the blue and orange subway lines. I decided to center the front over the subway lines instead of the word.
come on McCall's!
Also those zipper tabs were really skimpy (they're in the pic on the right, above), so I enlarged them like I said earlier. Also the width of my zipper is probably larger than a regular zip that was supposed to be used.

Ok, I am so smitten with this pouch, I brought it to work and showed everyone.  I was carrying it around like a 5 year old with a blanket. Or like I was a 5 year old at show and tell.
It is pretty big and it holds a wide variety of stuff:
McCall's 6256 view C done!
I'm writing this post Thursday night but am scheduling it to post on Friday.  That's because I'm giving it to velosewer on Friday while she is visiting NYC. Back in January she sent me two zipper pouches when I was initially into my zipper pouch woes and now I'm returning the favor with this one.  I'm really excited that an Australian is meeting up with me in NYC!!  She has commented on almost every one of my posts for at least a year and a half now, so how cool is that?

Anyhoo, I'm trying not become too attached to this pouch. I will make myself one very very soon!!   And this success has reignited my drive to sew again, yay!

The exterior fabric, by the way, is from The City Quilter in NYC, and was designed for their store and cannot be bought elsewhere.  When I was there with Antoinette in May, I meant to buy some but got distracted.  So I bought it on their website.  I also wanted the laminated version but didn't see it on their site 2 weekends ago--it turns out it *is* on their site.  I hope to go get some of the laminate in person tmw!!

The interior is green denim from Joann's, a longtime resident of my stash.

Here are last week's Princeton Farmers Market flowers:
Farmer's Mkt flowers, 6/6/13
Be well!