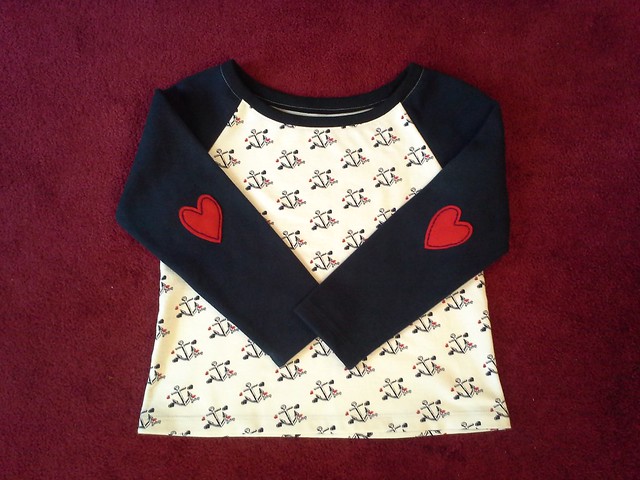
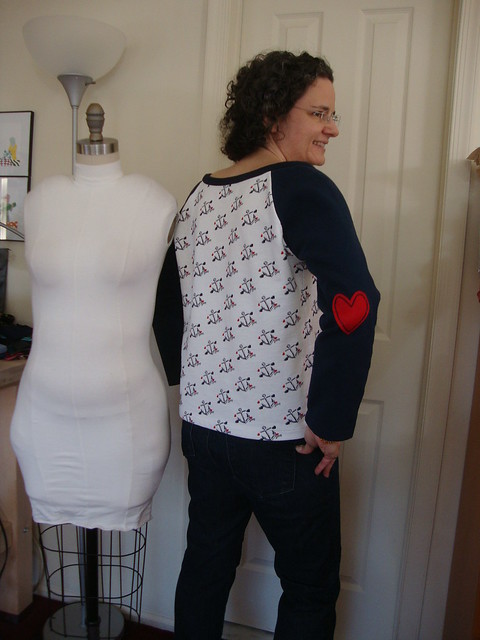
Showing posts with label mccalls. Show all posts

Monday, April 4, 2016

Athleisure Wear: Three Little Bears Edition

IMG_20160320_145406
Juuuuuust right!

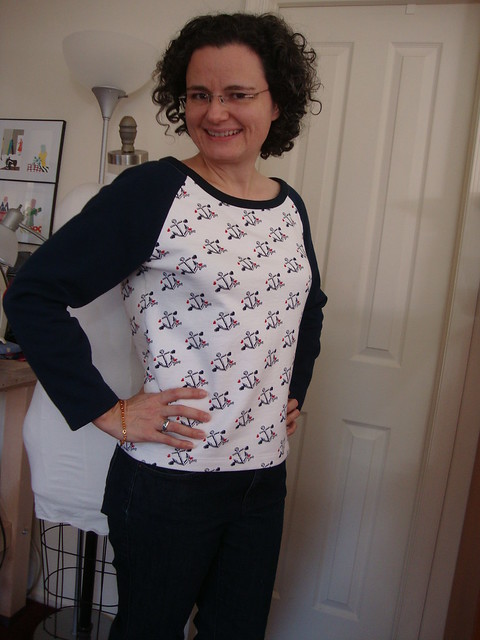
Soooooo....back over holiday break I made the heart sweatshirt....and since then I've made two more sweatshirts and a pair of sweatpants.  Mainelydad, who tracks all the Milan runway trends for me, says this is officially called Atheleisure.  Ok, let's strut the runway!!
20160201_093019
Ok, so I did not wear this to work. This was just for the photos!
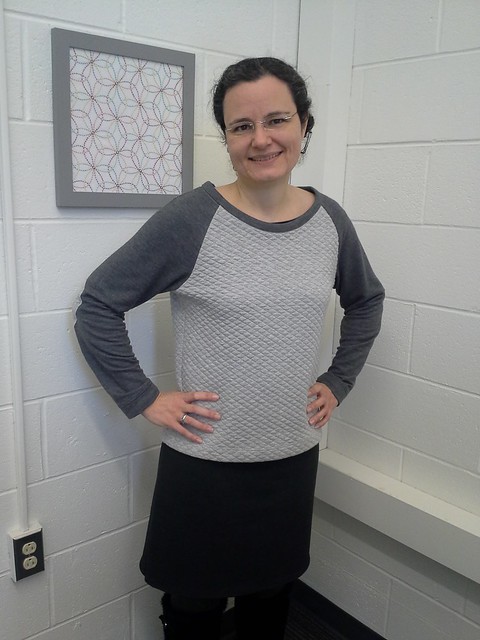
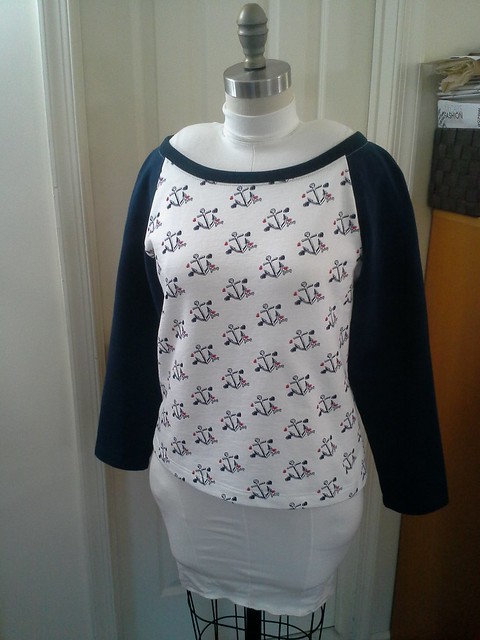
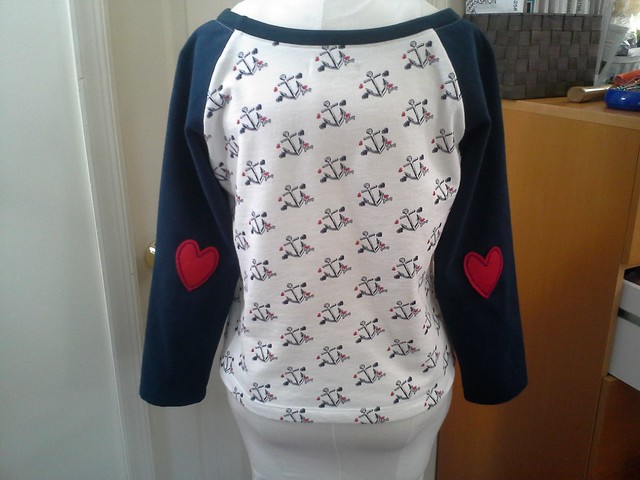
20160201_092921
Front
20160201_092957
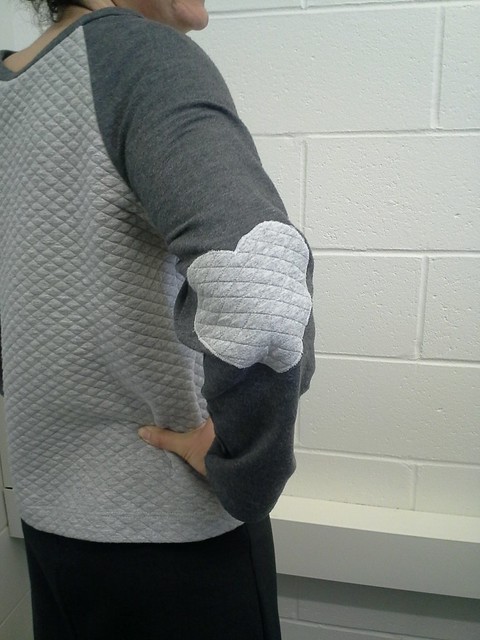
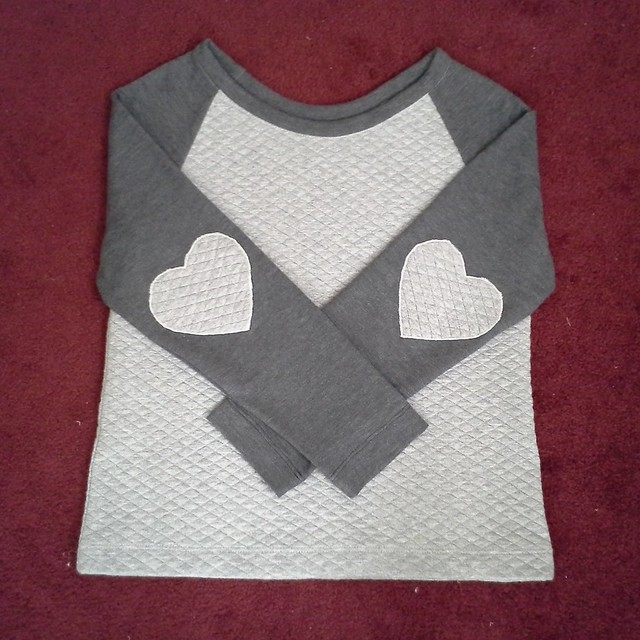
Boom!  Elbow patches!


IMG_20160404_202005
Versions and Fabric Guide:
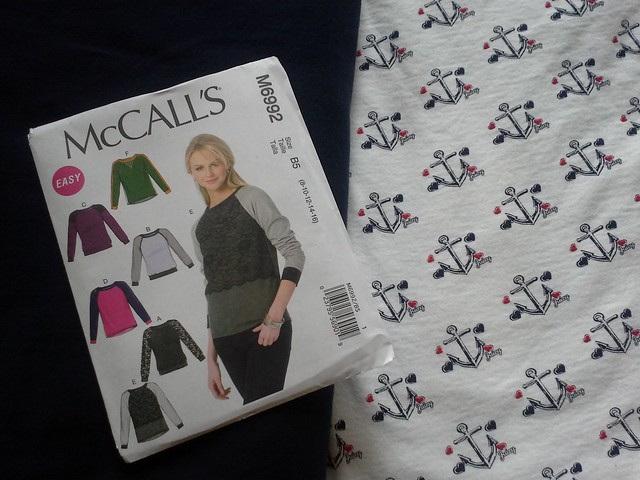
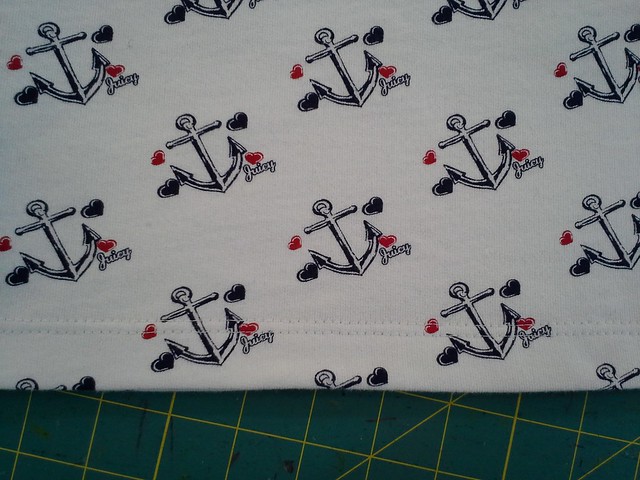
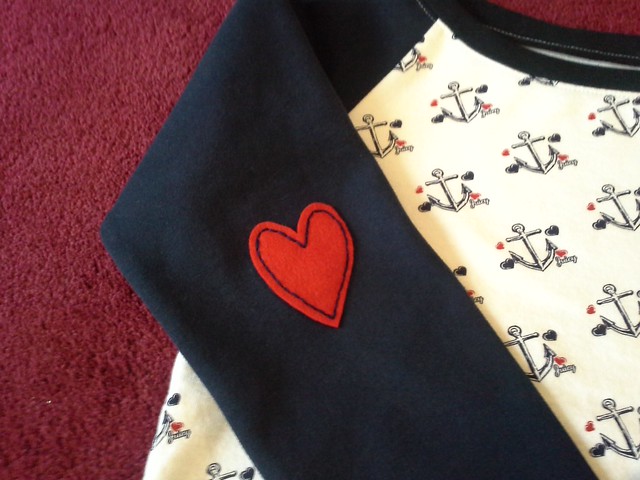
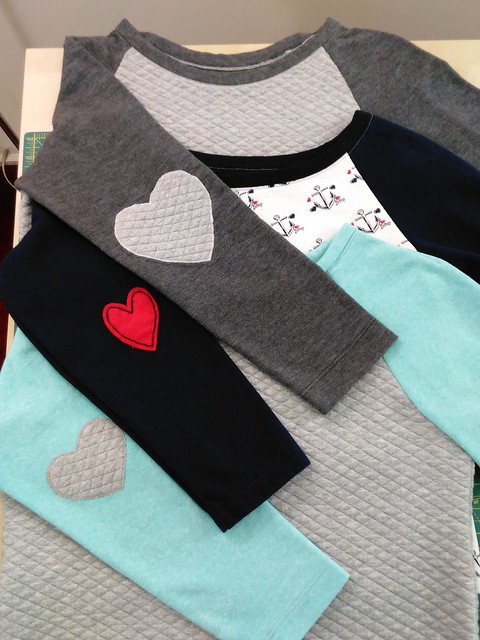
Version 1.0:  Juicy anchor stretch sweatshirt fabric; navy blue no-stretch sleeves from Joann's.
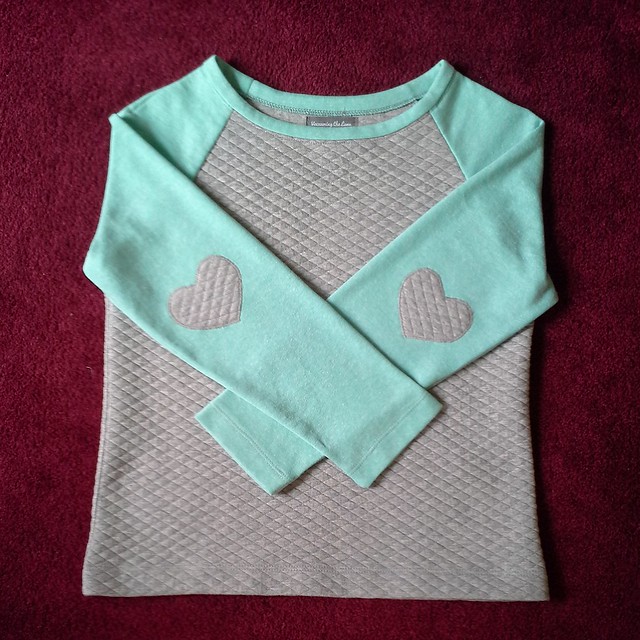
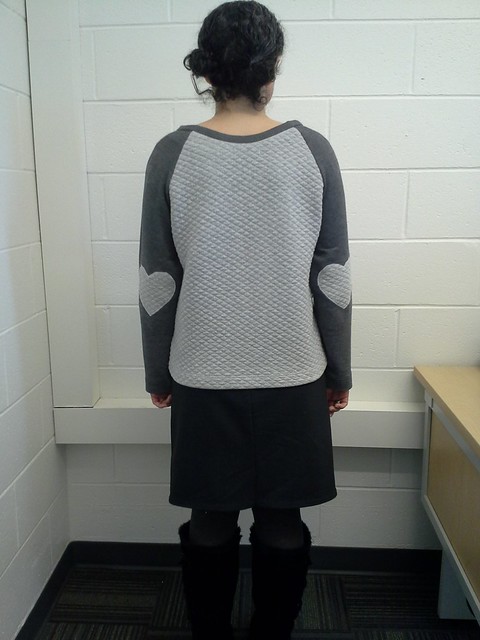
Version 2.0:  Pre-quilted gray soft-on-both sides stretch sweatshirt fabric from Joann's with darker gray contrasting stretch terry that I think has its origins at Kashi's.
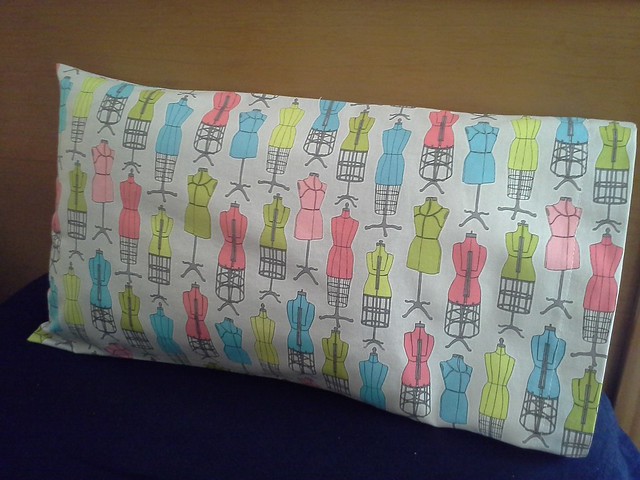
Version 3.0:  Pre-quilted gray gray soft-on-both sides stretch sweatshirt fabric from Joann's with stretch aqua terry from Joann's...plus a pair of sweatpants to boot!

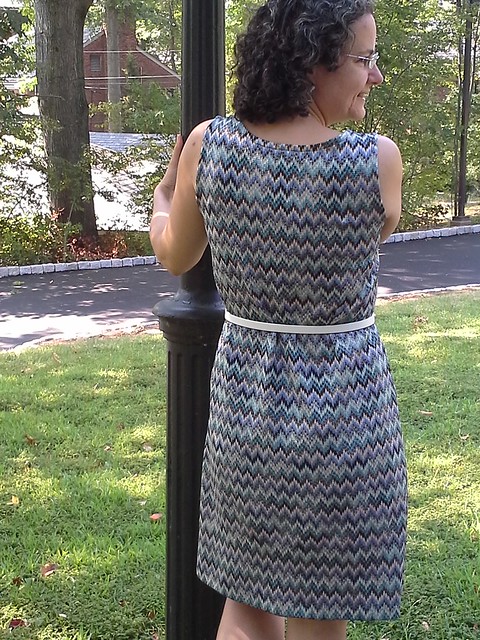
Note: I was planning on using the pre-quilted stretch sweatshirt fabric for a dress but then decided I would look too much like a roll of quilted paper towels and went this route.
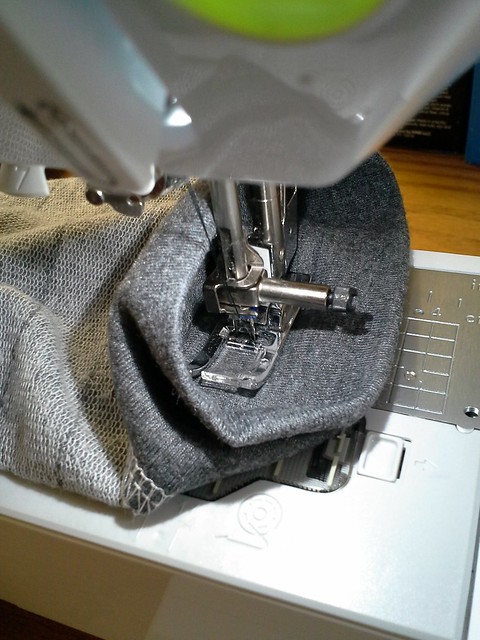
20160206_150708

Elbow Patches
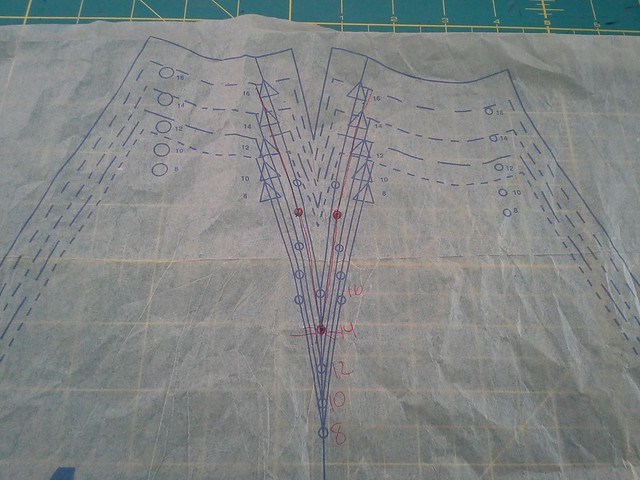
I used McCall's 6992 for all three sweatshirts, and added heart elbow patches to each one.  Like the three little bears, I think the first elbow patch I sewed on (the red one) is too small, the second one (the gray on gray) is too big and the third one is juuuuust the right size.

IMG_20160319_205505
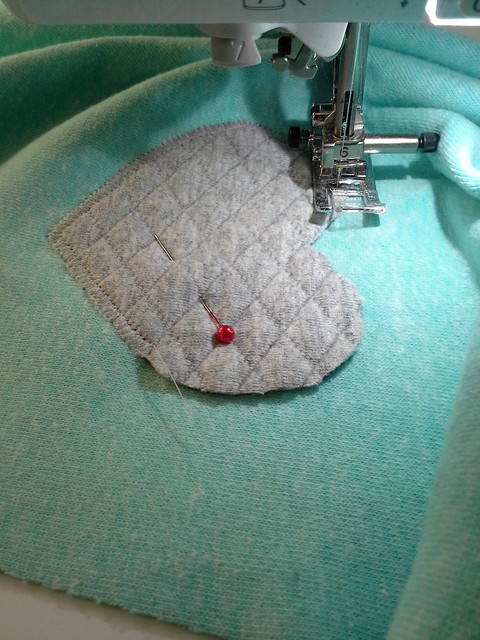
Tips for sewing elbow patches on stretch fabric

  • Interface the heart and the area of the sleeve the patch will be sewn to.
  • Never ever pick up the presser foot to pivot except at the two points
  • Don't use too tight a zig zag stitch (I have to look up what settings I used).
  • If there is part of the heart that doesn't look good, undo just that part and redo it.  You won't be able to tell where you stopped and started.
  • Always practice with samples first
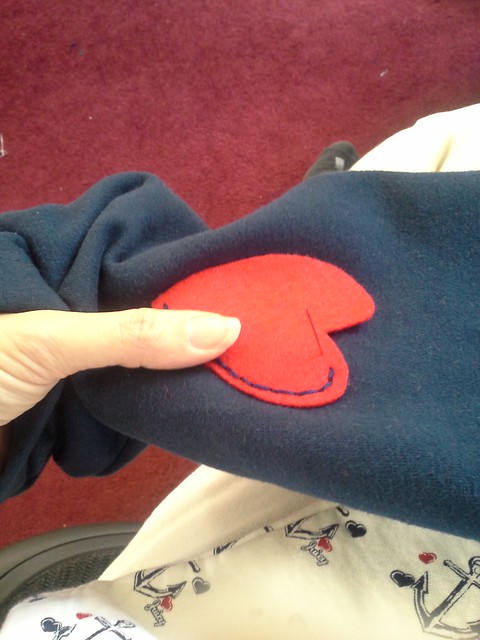
  • Triple check that your patches are in the right location, otherwise you will rip them both out when they both turn out to be too low or too high...ask me how I know.  :(
IMG_20160319_202310
IMG_20160124_212154
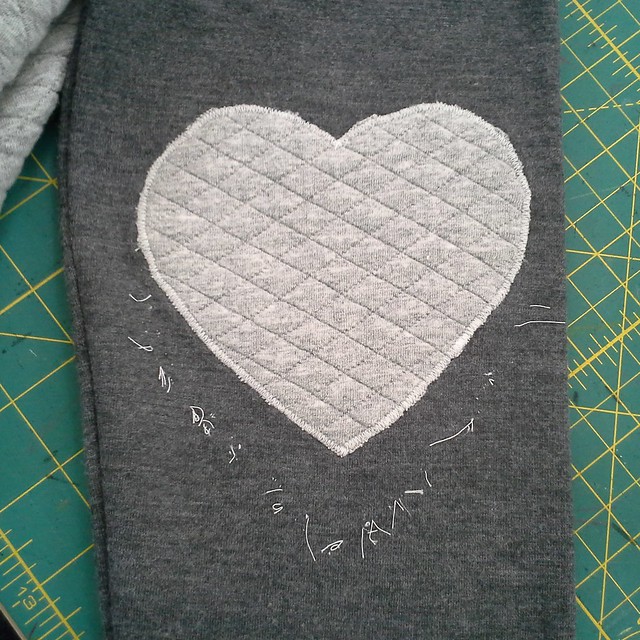
It was too low....the threads mark the former location....
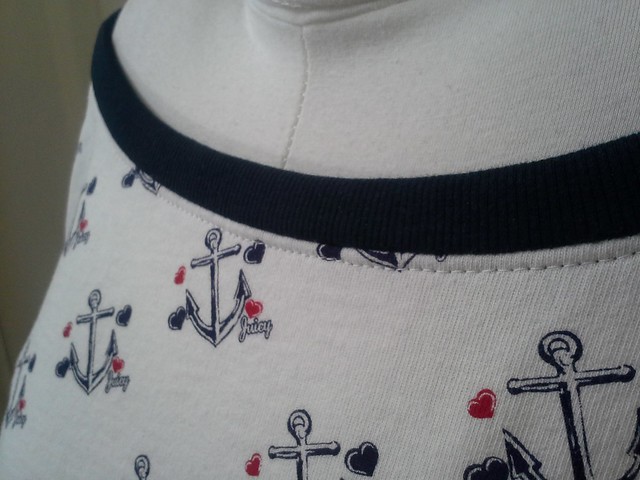
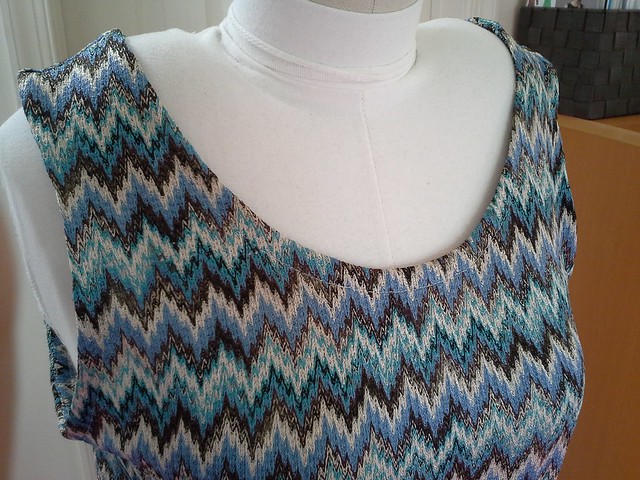
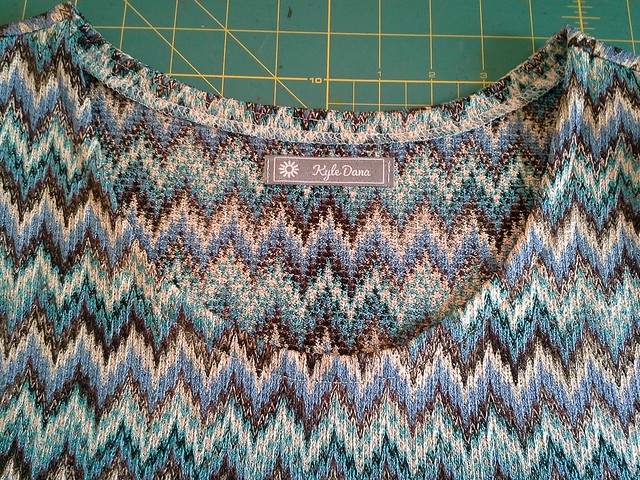
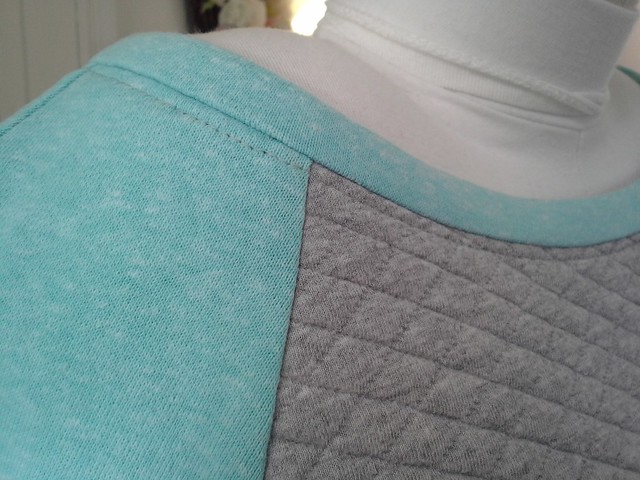
Neckline
I felt the neckline was too high on the first version, so I cut an inch off the neckline all the way around, but it came out too big.
For the second version, I cut the neckline an inch lower in CF and CB, but kept the rest of the neckline the same.
For the third version, I cut the neckline as per the pattern, and it was juuuuust right.  (No, I don't know why it felt too high the first time and just fine the third time!)
20160320_155844

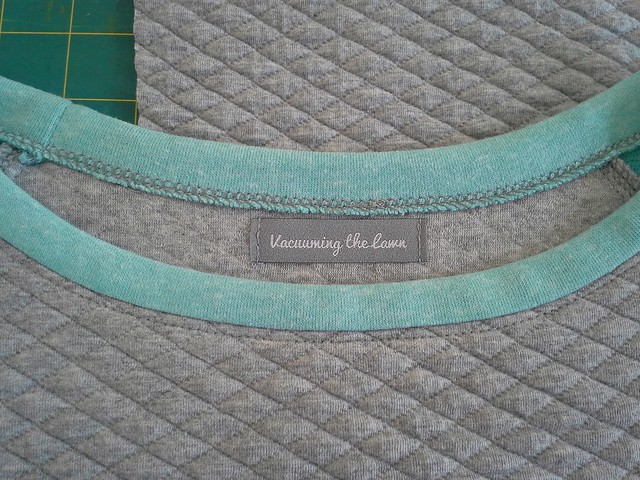
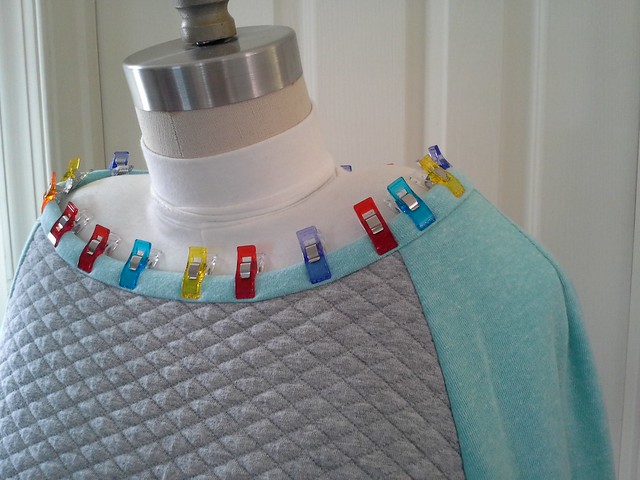
Binding the neckline
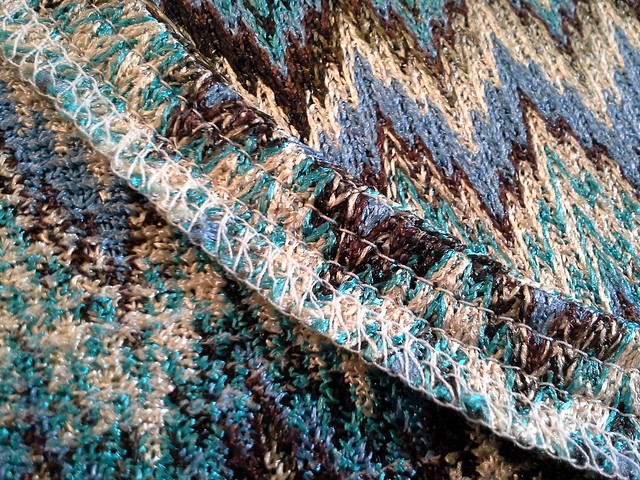
I bound the neckline by cutting a long strip of the contrasting knit crosswise, serge the long raw edges, stitch it down RS to RS while stretching the binding, then turn the binding to the wrong side, and stitch near, but not in, the ditch.  If I had sewn it the way the pattern instructs, the neckline would be higher overall.
20160124_144641
20160124_152917
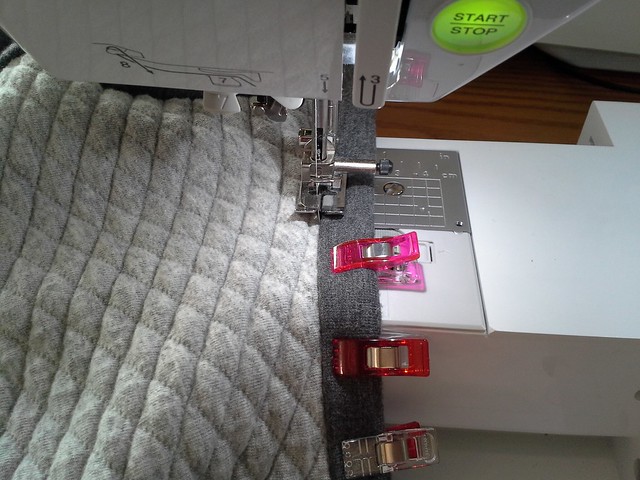
Stiching near but not in the ditch, using my blind hem foot as a guide.
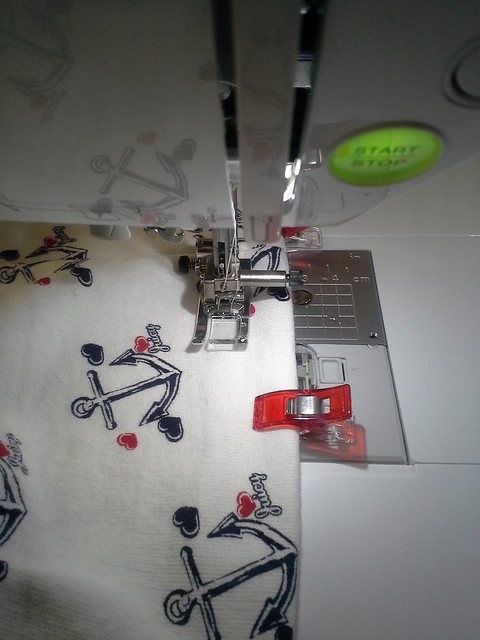
IMG_20160320_124519
20160320_155811
Hems
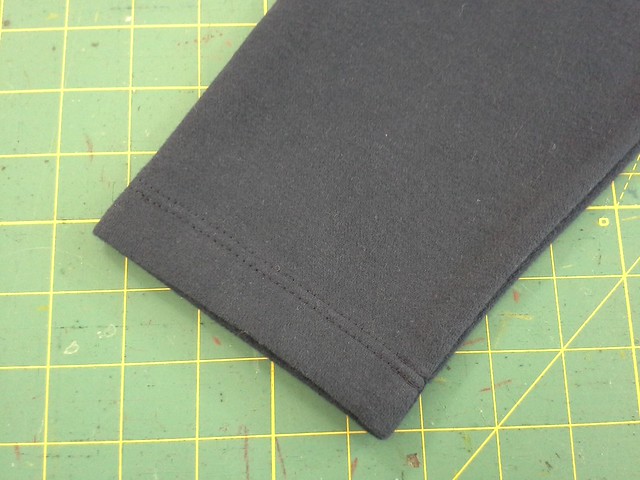
The raw edges were serged and then I twin needle stitched on my machine.
20160124_210932
Difficult to do on the sleeve hem...
20160320_201124
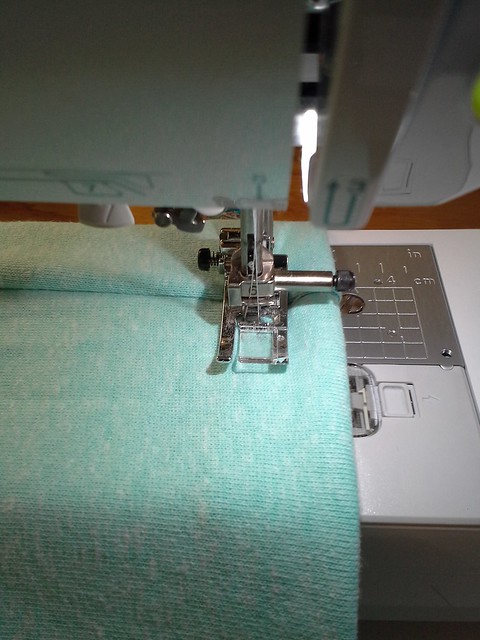
...but easier to sew on the pants.
Interior edges
I basted first on my sewing machine and then serged on my serger.  By the third version I suppose I could have just gone for it and serged it all on serger but I wasn't confident enough.
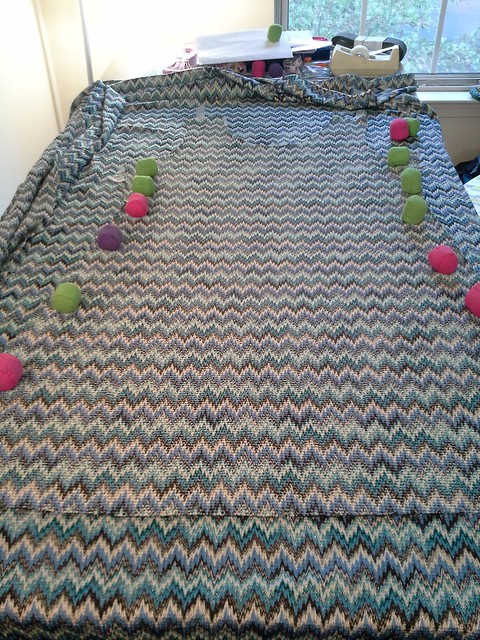
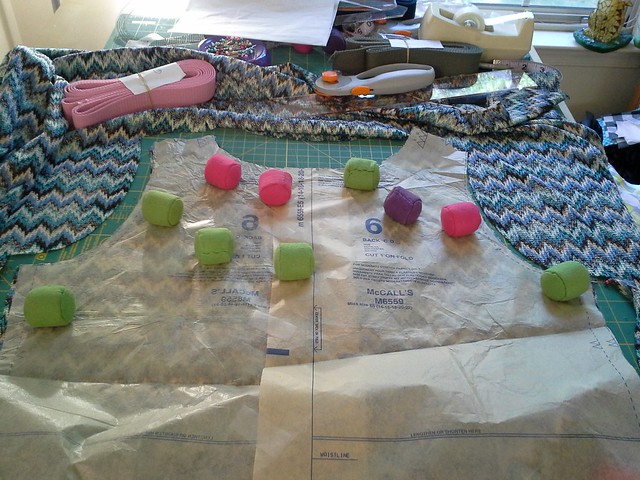
IMG_20160124_213420
Bonus!
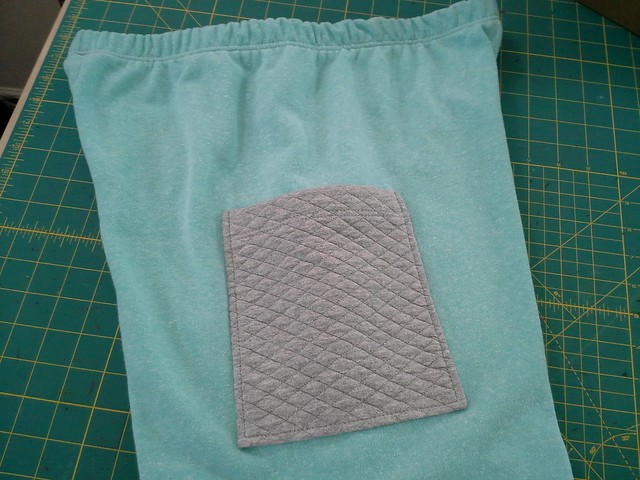
But wait, there's more...I also made sweatpants and added a pocket for my phone.  I meant for the placement to be like cargo pants pockets. The pocket wound up being too high, but conveniently located.


20160320_210730
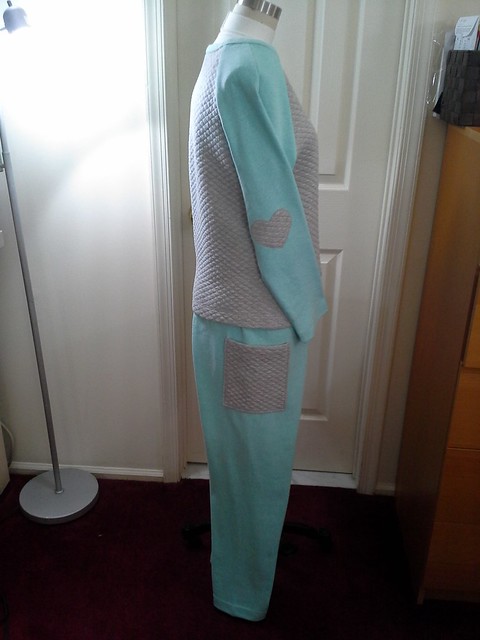
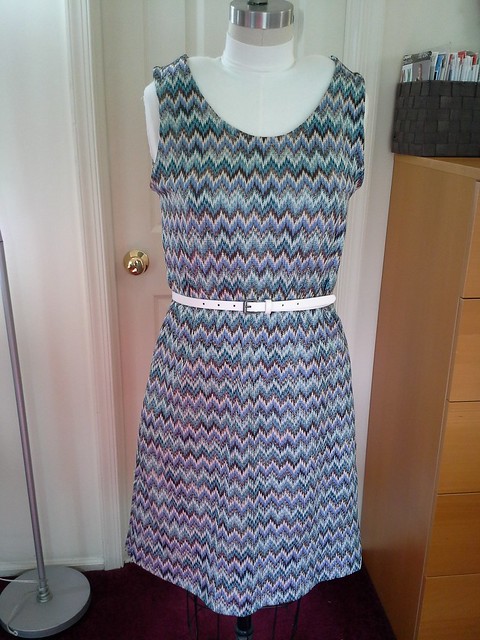
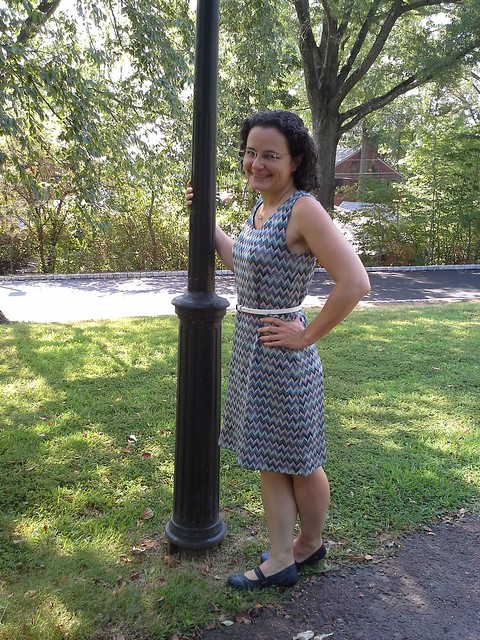
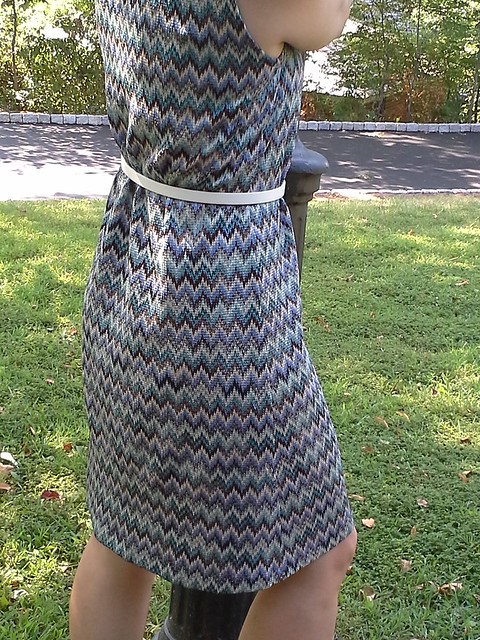
Is this photo kind of creepy?  I'm never ever owning a full body dressform, ever.
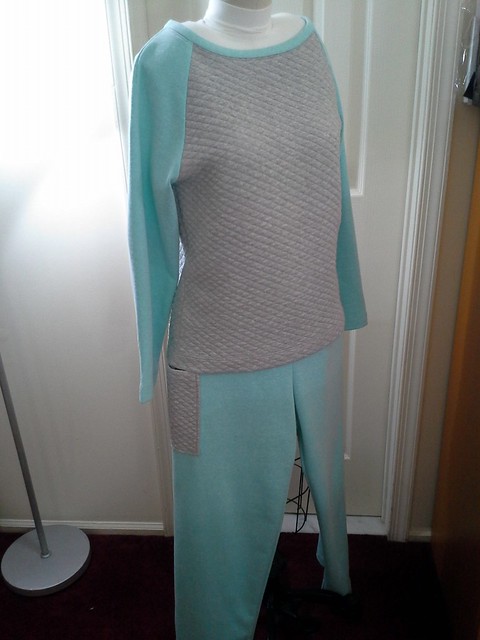
IMG_20160320_205059
Less creepy?
20160320_204758
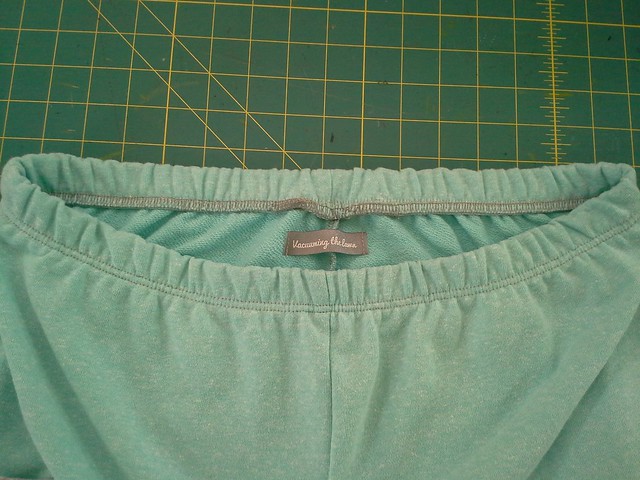
I used Pamela's Fantastic Elastic and her method for sewing the elastic to the pants, but I divide the pants and elastic into eighths instead of quarters.
20160320_204840


Overall Verdict
I like version 1.0, but the sleeves are non-stretch fabric, so not as comfy as they could be.
Version 2.0 is pretty awesome, because I love how the back of the quilted fabric feels--it is fantastic!
But I love love love version 3.0 because of the color combo and how both of the fabrics feel--super soft..

Thursday, January 7, 2016

McCall's 6992 I wear my heart on my (sweatshirt) sleeve

20151229_150509

Happy New Year!!!   Thanks for your comments on my year-end recap!

I had 11 glorious days in a row off for the holidays.  Most of the time I was either binge sewing or binge purging the house.  I was hoping after returning to work that I could keep up the machine sewing at night, but I really can't.  It's just not feasible for me, but I enjoyed every minute of binge sewing while it lasted!  (I mainly machine sew on weekends, though I can do some handstitching during the week.)

Let's talk about the sweatshirt, shall we???
McCalls 6992

The pattern is McCall's 6992.   I cut the size 14, except at the neckline which was a 12 (but read more about the neckline below, I wound up cutting it differently later).

The navy contrast sleeves are Joann sweatshirt fabric from my stash.  The big shocker was that the Joann's fabric looks like sweatshirt fabric and feels like sweatshirt fabric, but has no stretch.  Surprise!  UGH!    So for the neckband I had to use some stretchy ribbed knit from stash.
20151228_121946
 The anchor fabric is Juicy Couture sweatshirt fabric from the defunct Lucy's Fabrics (miss that site totally and completely.  I discovered Lucy's just before they changed their focus to rhinestones, and they stocked loads of wonderful knits that I loved.  Sniff.  When they sold off their knits, I bought the rest of the Juicy fabric.  I had made full-on pjs from this fabric years ago.).
20151228_141820
I pretty much trace all my patterns so that I can cut them single layer. On this pattern, I wanted the CF to be centered over the anchors.
20151229_105405
Stretch twin needle action for the hem.  Also you get a nice closeup of the anchors.
20151229_150922
20151229_150854
I twin needle stitched the hem of the sleeves, too.  I did not add the cuffs so the sleeve is a little bit short.  Next time I'll just add an inch to the sleeve pattern.
20151229_150716
Like many reviews on PR mentioned, the neckline of this sweatshirt is kind of high. I cut off 1.5" all the way around, but if I make this sweatshirt again, I'll just lower it in the CF and CB, not all the way around.  Now the neckline is a bit too wide.
20160103_160924
 I used rib knit from stash for the binding.
20151229_144650
There is a new dress shop in Princeton that has dresses with heart patches on the elbows. Later I heard from ATP that this is a trend that's all over Pinterest?  I didn't know! But I thought it would be cute to sew on some heart elbow patches to match the hearts next to the anchors.   I did not think of it til after the sweatshirt was sewn, though, so I cut them out of felt and then stitched them on by hand.
20151229_150432
So then it looked like that.  The hearts are from red felt, so I have no idea what they are going to look like after being washed.
20151229_164653
The pattern has a neat shoulder dart, though I had to mark it in red so I knew where it was for tracing!!  All those lines were confusing for my vacation brain!
20160103_160742
Completed front
McCalls 6992
The right elbow heart.
20160103_160844
Completed Back.  I think it would also be cute with one heart on one elbow and an anchor over the other elbow.

Overall I enjoyed working with this pattern, and the fact that it is a sweatshirt meant there wasn't much to do in the way of fit!  And everything was already in my stash! Perfect!

Be well!!!

Monday, August 17, 2015

McCalls 6559: My first dress sewn since November

20150816_162528
As I finished up sewing M6559 yesterday I realized that I have not sewn a dress since November!  And look at this, it's a bona-fide print, from Kashi at Metro Textiles, sewn up a little over two weeks after I bought it (which surely must be a record).  It is somewhat spongey and totally synthetic as all get out so I love it because it does not wrinkle.
20150817_104621
 I had a serious "want to make a dress" itch that I needed to scratch and this fit the bill nicely.  The pattern is just a front piece and a back piece, and I sewed some strips to bind the armholes and neckline. I had made this dress once before in an ITY polka dot last September.  This took me about 5 hours to sew this time, but I am a very slow seamster and if I had not futzed a lot with the bindings, I'm sure it could go faster.  If I had serged the raw edges and then twin needle stitched the armhole and neckline, it would have been much speedier.  Binding looks nicer but takes longer, for me at least.
20150816_162434
I am not overly crazy about how I used white thread to stitch down the binding at the neckline. The white stitching blends into the spongy fabric  vertically at the armholes but it is really obvious at the neckline, as it approaches horizontal-ness, at least to me.  Maybe I should have stitched it in brown, or maybe it would still drive me a bit crazy.
20150817_104651
I am pretty pleased with how the print pretty much lines up on the side seams.  The way I accomplished that was by first superimposing the front and back dress pattern pieces and noticing that, from the armhole down, the pattern piece is exactly the same.   I cut out the front piece, and then placed the cut-out front of the dress right side to right side on the fabric, lined up the print at the edges, and then cut out the back piece from the armhole down, like this:
20150816_073521
Then I put the back of the dress pattern down and cut out the back from the armhole up.
20150816_074917
(Yes, I bought the pattern twice, and then taped it together at the fold so that I could cut single layer and not have to trace the pattern piece, which is the ultimate lazy thing to do but it works!)

20150816_163333
Close-up of the neckline, above.
20150816_162855
Above is the binding on the neckline on the inside....
20150816_162912
And above is a closeup of the binding on the armholes on the inside.  This fabric is kind of spongy, so it was much easier to bind the neckline by leaving the serged edge exposed instead of folding the binding in half first like I did with the armhole binding.  Basically it's 4 layers vs 6.

20150817_104700
As this dress has no darts, I used a belt for shaping, which creates a few lines but doesn't bother me.
20150817_104621
All in all this was a great dress to get back in the dress-making saddle again.
20150816_213924
One random pillowcase I made this weekend.
20150816_214046
And another random pillowcase I made this weekend too.
20150816_133830
Close up of hydrangeas from the Princeton Farmers Market

Be well!