Showing posts with label skirt. Show all posts

Tuesday, July 5, 2016

Summer sewing dreams #1, #2, and #4 realized

IMG_20160627_071513
Hey!  So I just finished watching the finale of season 4 the GBSB and I cried, which really took me by surprise!!

So it is summer here in NJ, glorious sunny fantastic summer. Spring and summer are my favorite seasons and I hang on to them with all my might.  I eat outside as much as possible, sometimes staying outside til dark, looking at IG periodically while the sun sets.

Near the start of June I made a list of "summer sewing dreams".  I know there are people who sew with a plan or sew to make coordinated items.  I'm just not one of those people.  I sew what I like pretty much when I feel like it.  I'm also slow at sewing.  And sewing is supposed to be fun, not my own personal sweatshop.  So calling these ideas "plans" feels like setting myself up for disappointment, whereas calling these ideas "dreams" seems more appropriate somehow.  I make these kinds of lists frequently.  I like seeing all my "dreams" in front of me.
IMG_20160604_172509
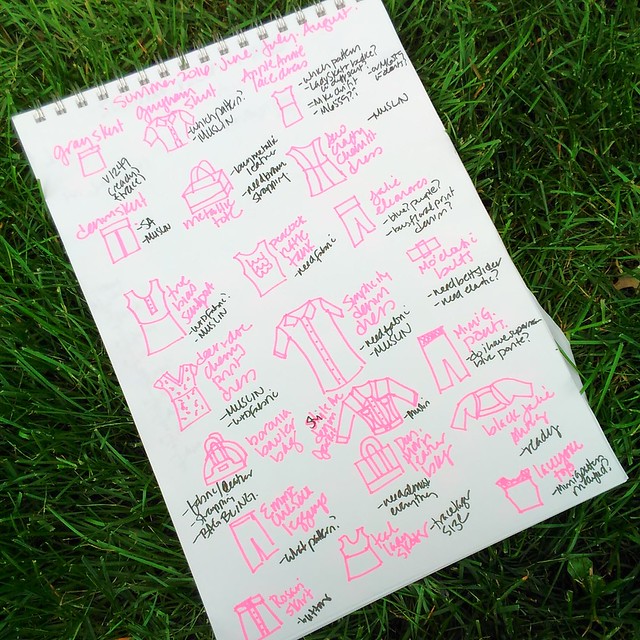
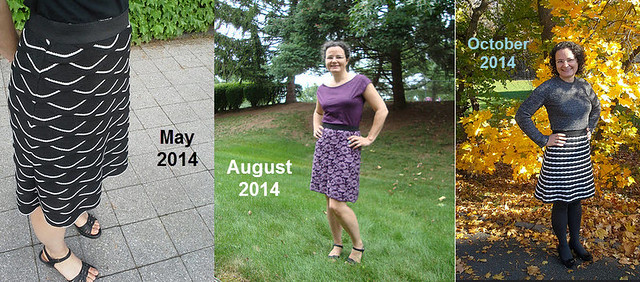
And somehow, sewing dreams 1, 2 and 4 happen to coordinate with each other (sewing dream #3 was the cherry print dress in my last post).
IMG_20160605_211526
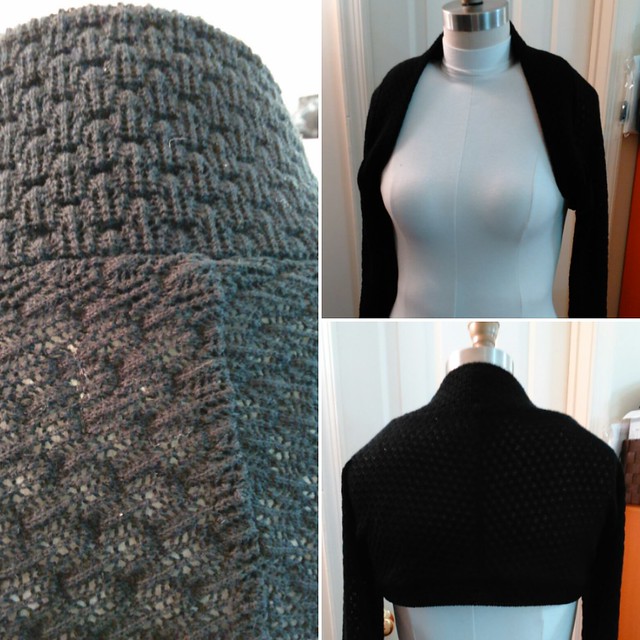
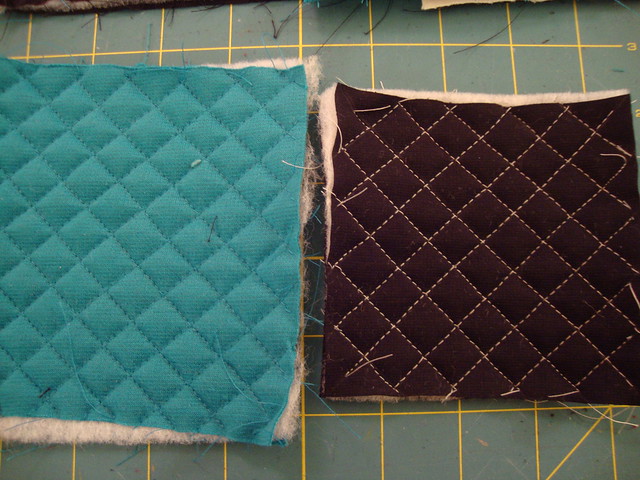
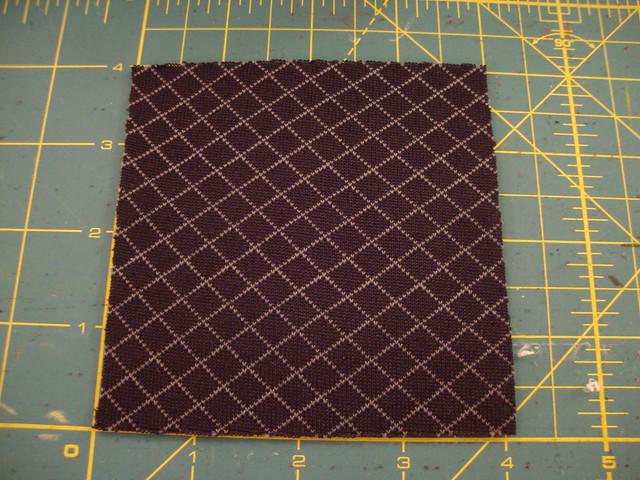
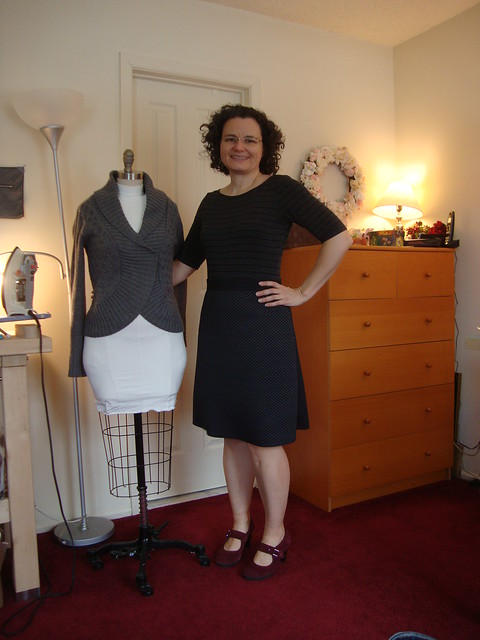
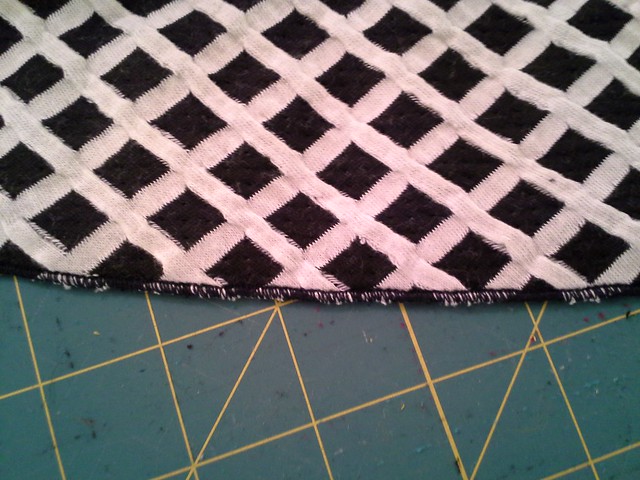
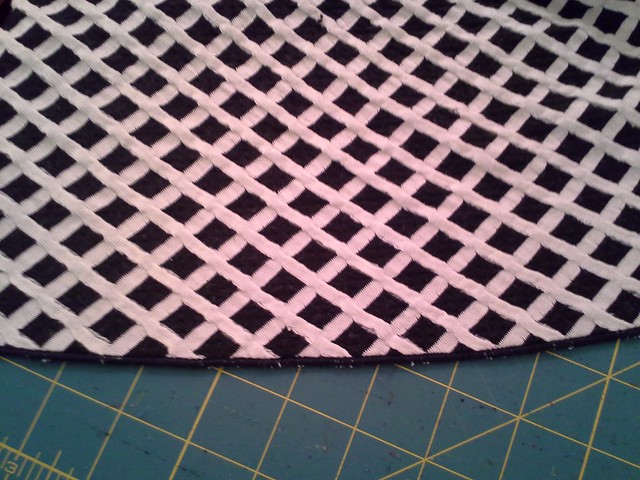
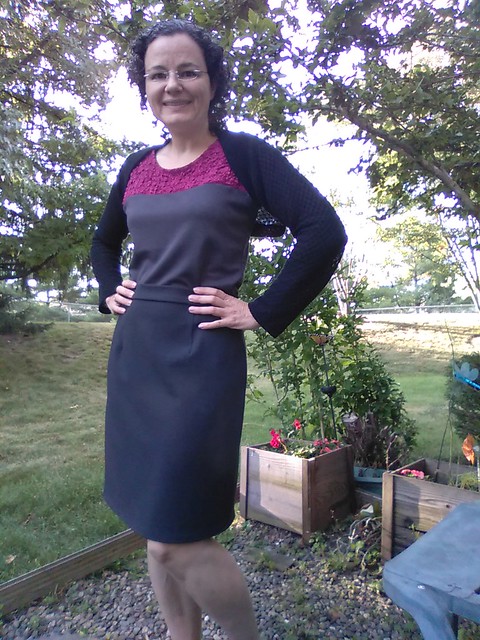
Sewing dream #1 is the Jalie 3246 shrug.  I wrote a big post last December with tips on how to sew this shrug.  After sewing for PR weekend, I took a 3.5 week long sewing break, and sewing the shrug seemed like a nice way to transition back to sewing.  The fabric is a delightfully textured cotton sweater knit from my fabric dealer Kashi (Metro Textiles) in NYC last year.  I bought 2 yards and I'm glad I did because it is not wide fabric at all!  Normally a yard is enough to make a shrug but not in this fabric.
IMG_20160627_070910
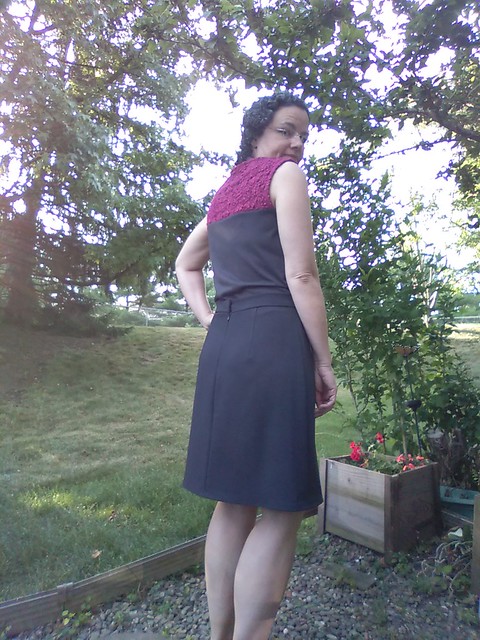
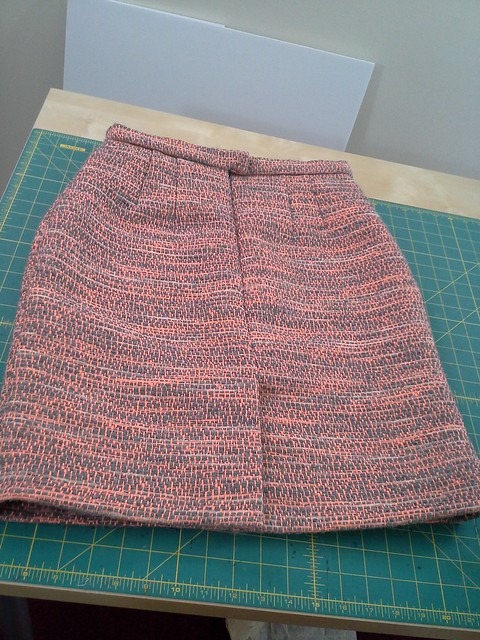
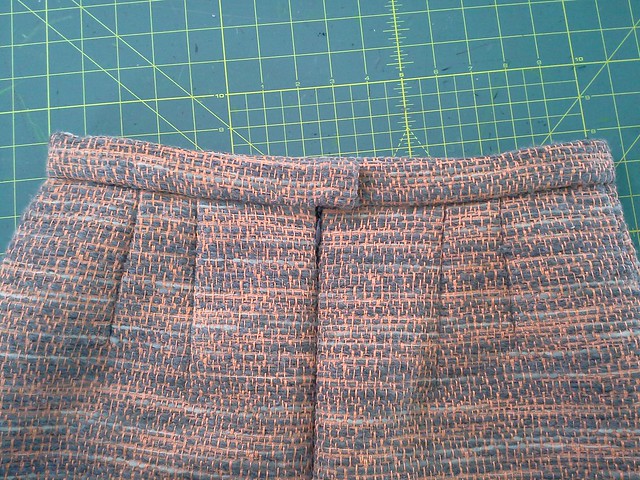
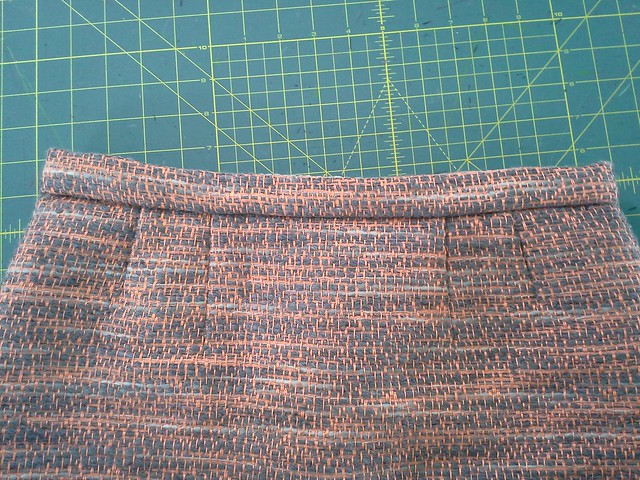
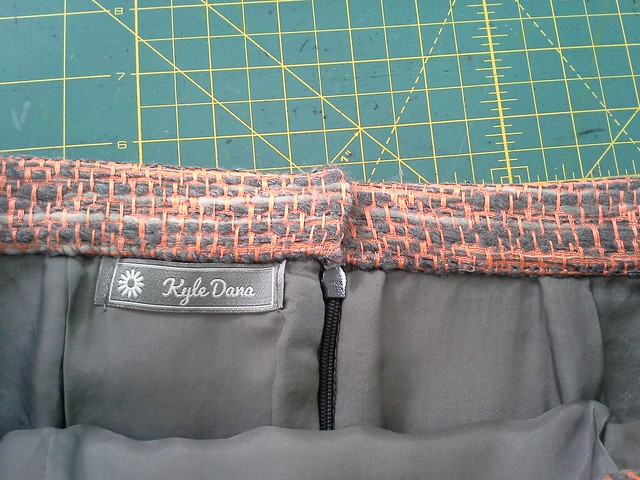
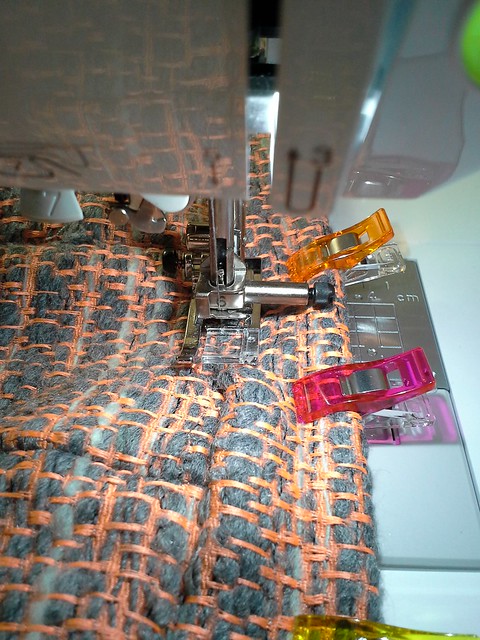
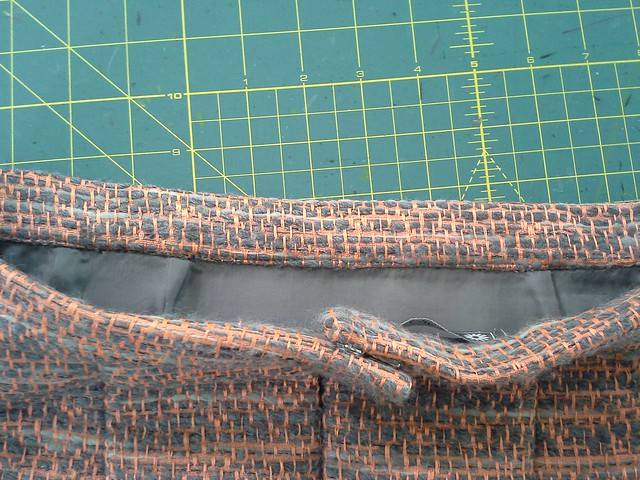
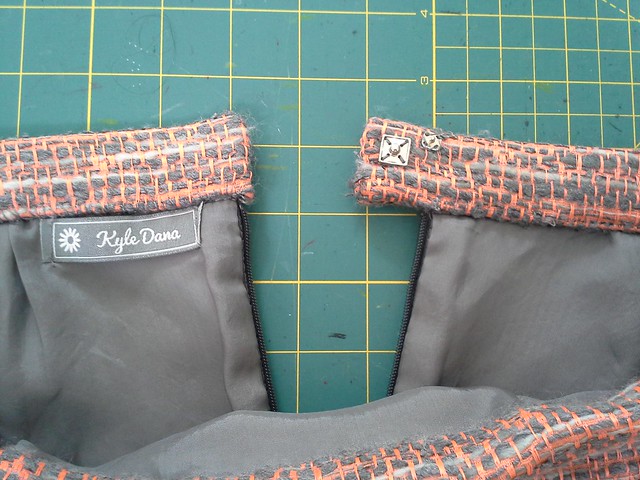
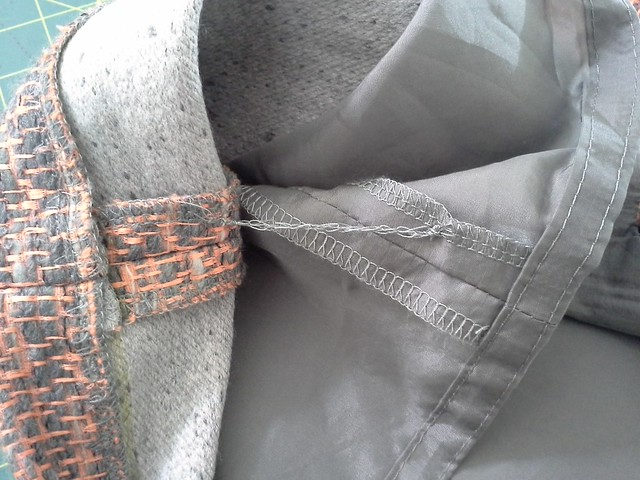
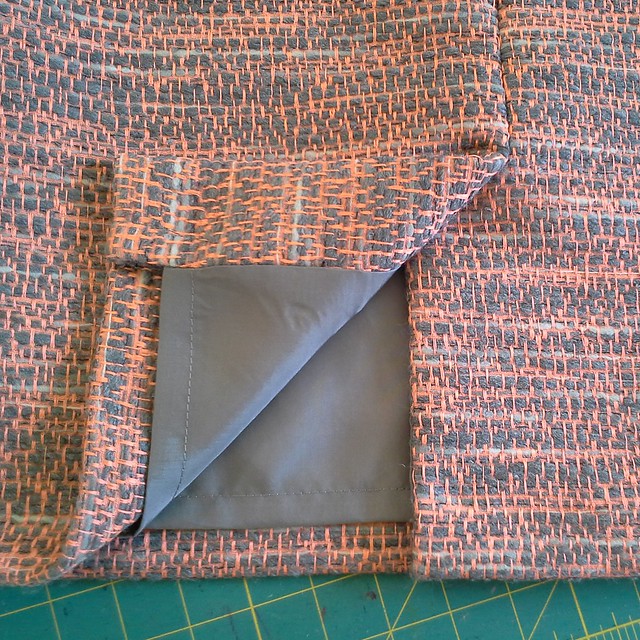
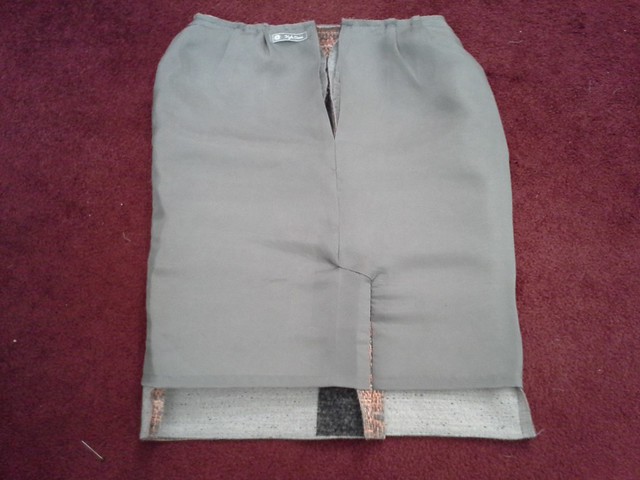
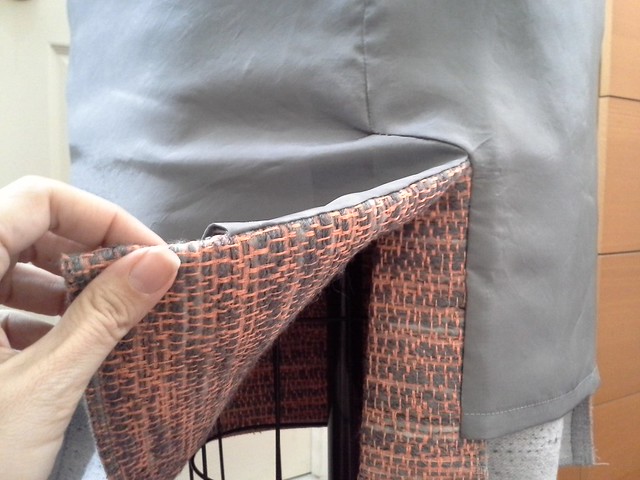
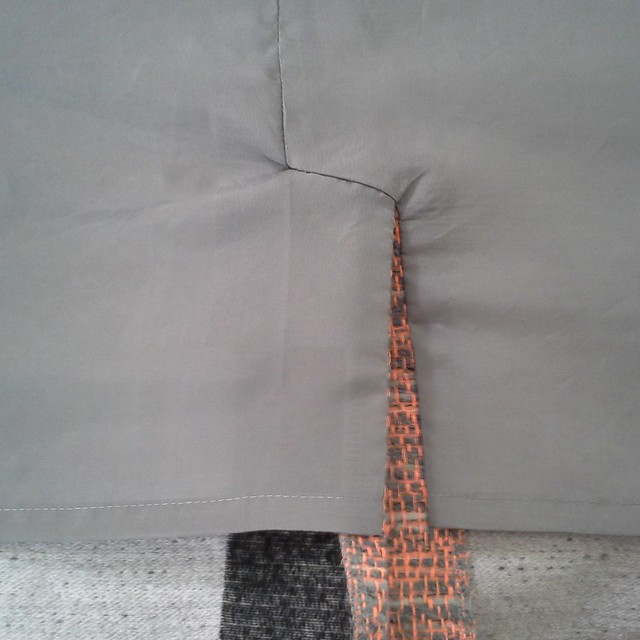
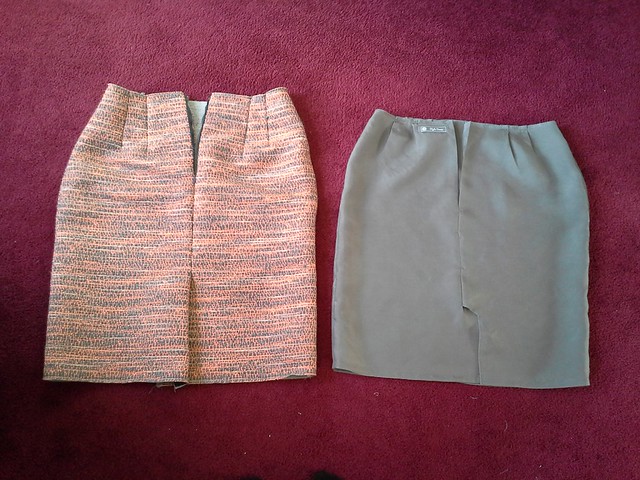
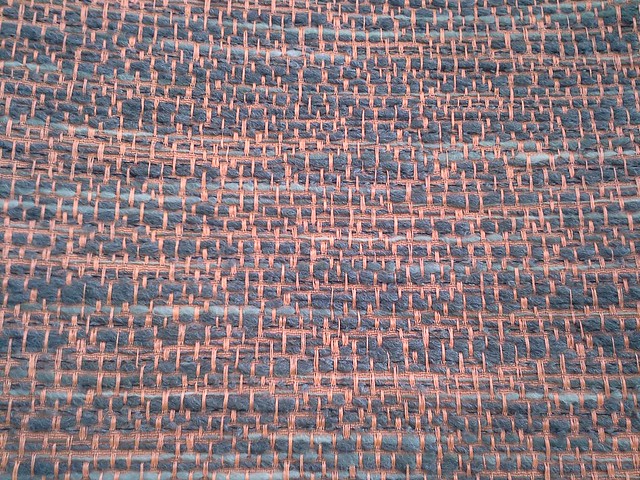
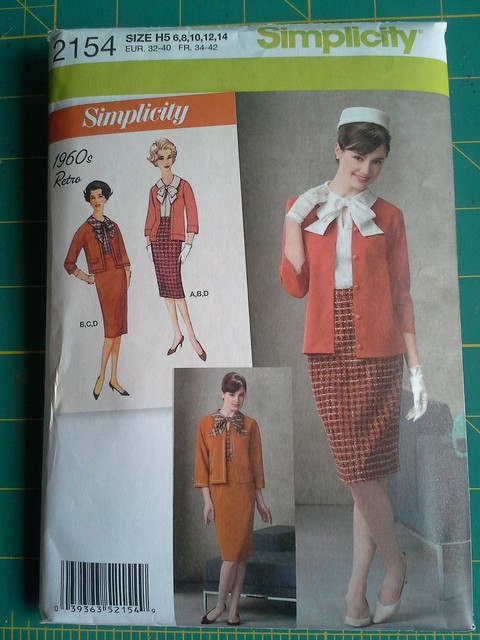
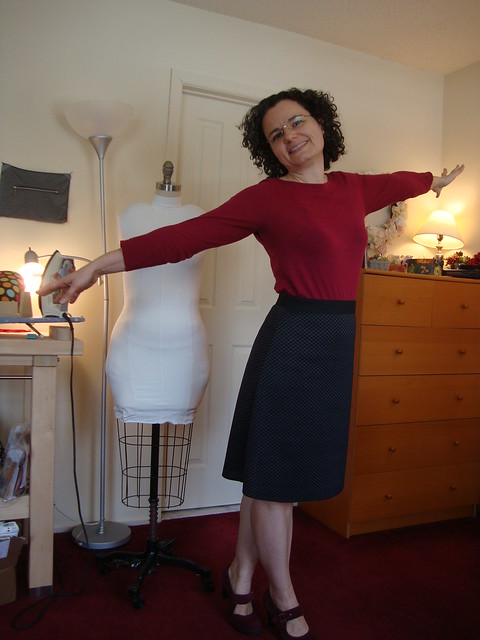
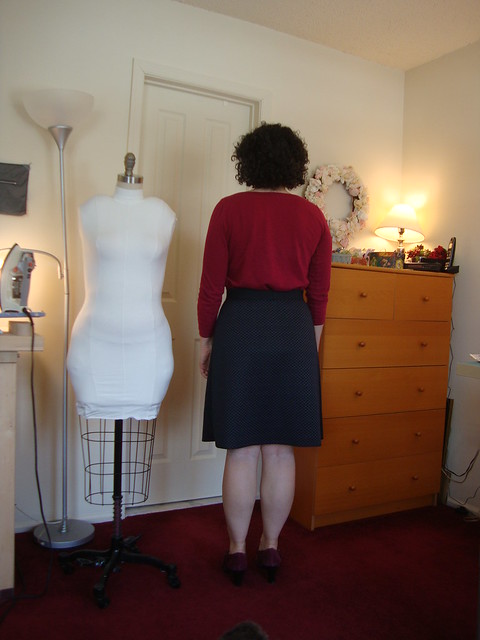
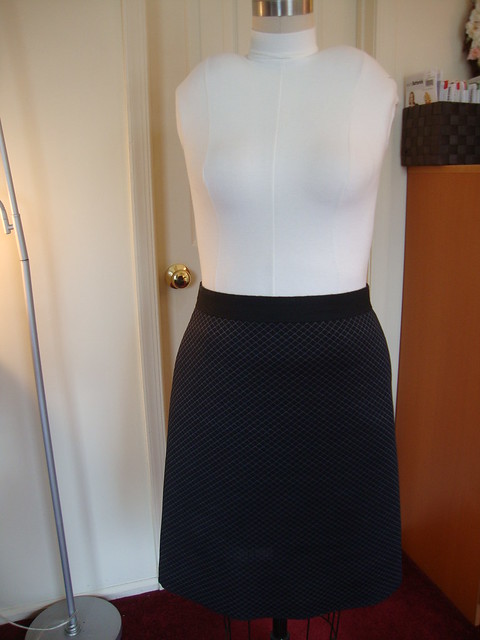
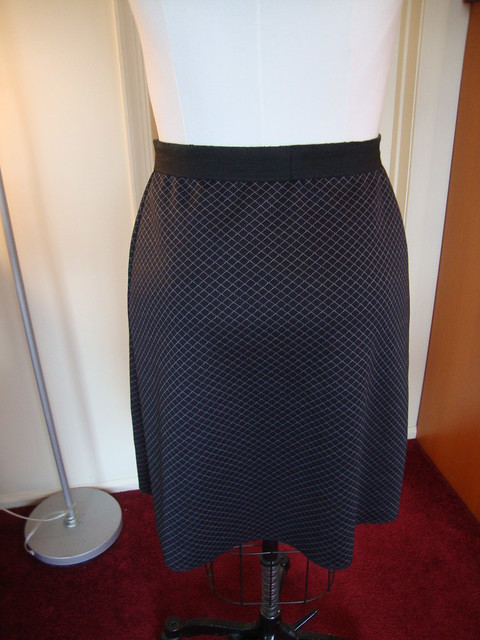
Sewing dream #2 is the gray skirt.  It's actually Vogue 1247, which I sewed back in 2011 in the same fabric, but this time I omitted the pockets and the horizontal seaming across the front and back of the skirt, which gives a rather lumpy appearance in this spongy fabric.
IMG_20160627_070908
This fabric is from Jomar in Philly and was purchased during PR weekend in 2010!  I have been wanting to sew this basic for ages, and needed to sew it to get it off my mind.
IMG_20160627_071145
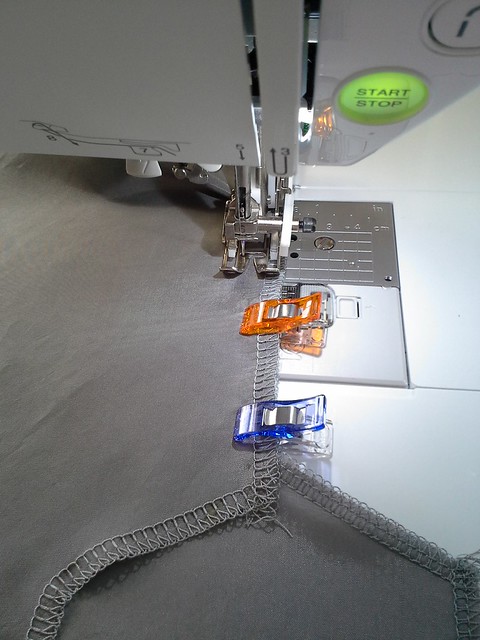
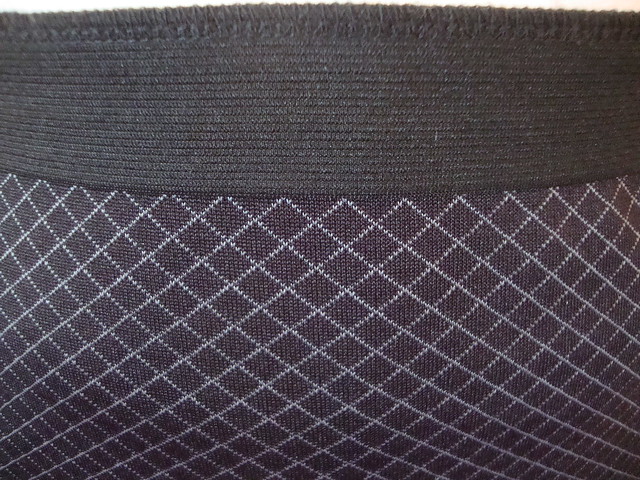
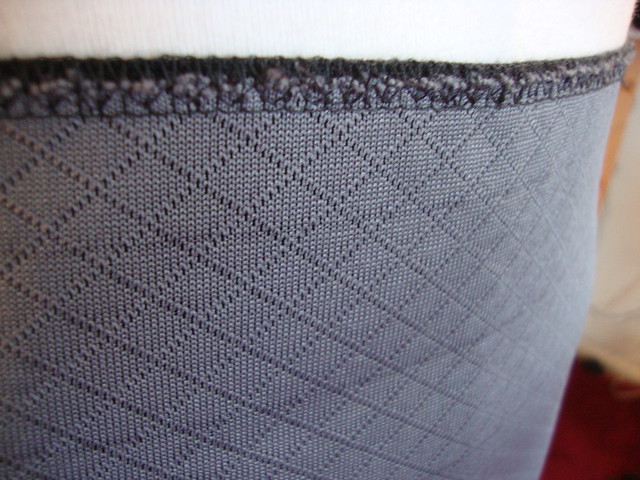
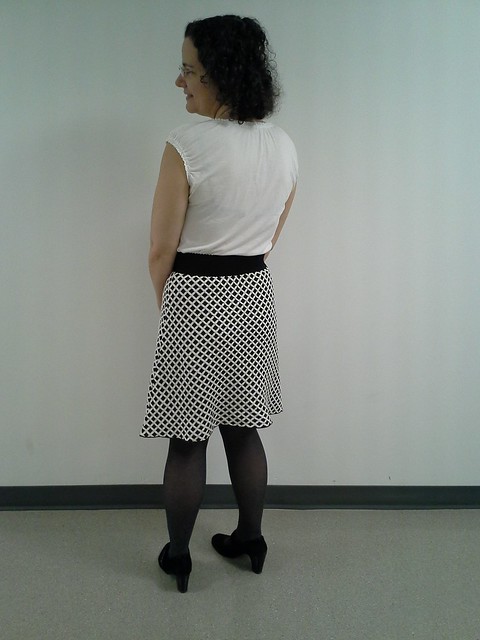
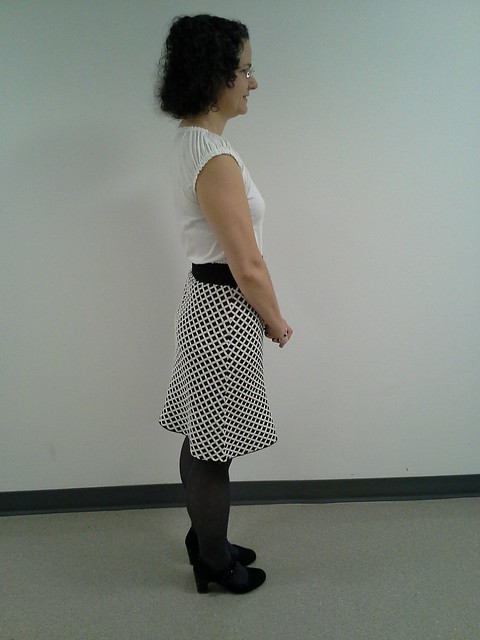
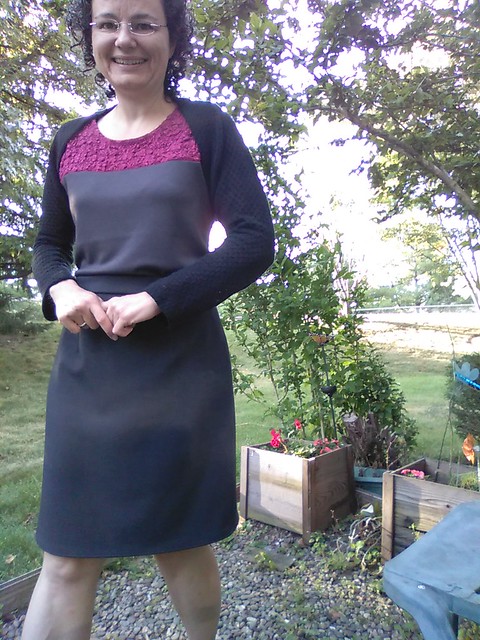
Sewing dream #4 is the lacy yoke top. This shot up to the top of my list when I saw the same lacy colorblocking on IG that rosiejanesews made.  I really liked Simplicity 8016 when it was released but did not want to do any new fitting, so I took S1283 (the pattern I used when I sewed a sweater from a cotton knit blanket) and cut it so that it had a yoke and a lower neckline.  The neckline and armholes are bound in Nike Dri-Fit then twin needle stitched from the top, and the hem is a rolled hem on my serger since I didn't lengthen the top enough.

IMG_20160626_110950
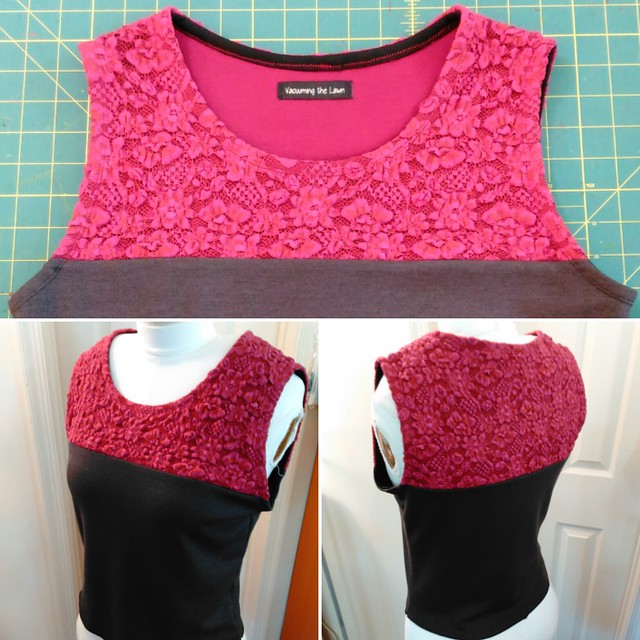
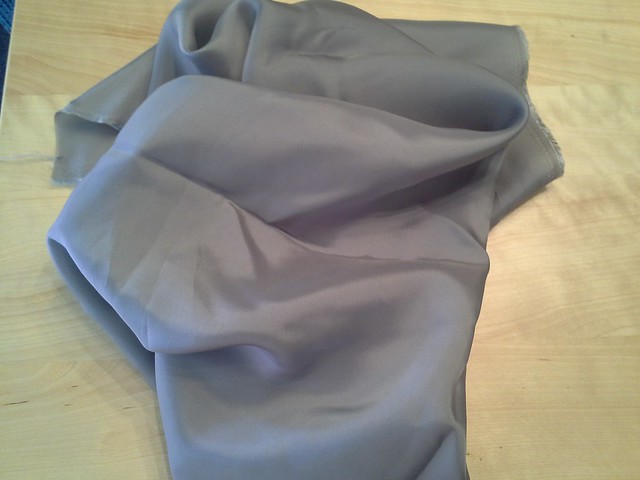
 The raspberry stretch lace is from Apple Annies online (2015) and is underlined with raspberry double knit from Michael Levine (2013).  The gray bottom piece is from some gray double  knit from who-knows-where-or-when.  The fit was waaay better in my chunky cotton sweater knit than it is in all this ponte, but it still makes me smile.

IMG_20160626_111550
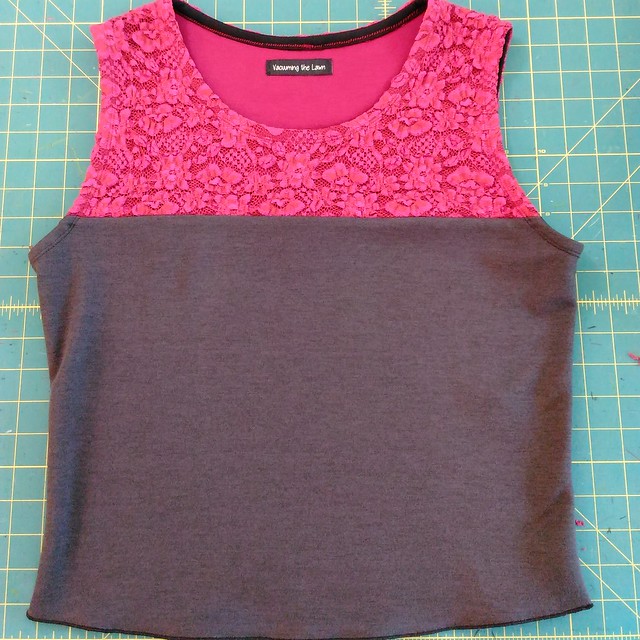
I originally sewed a piece of this lace into a tank top for the gym last year.  The raspberry stretch lace will make another appearance in a different incarnation here soon, so stay tuned!
IMG_20160627_071436

So how about you?  Are you living the (summer sewing) dream? Did you watch the GBSB??  Did you cry??

Be well!

Wednesday, March 2, 2016

Simplicity 2154 Epic Skirt Post #4: Zipper, waistband, square snaps, and thread chain

20160215_195323
Thank you for your comments from post 1 (the wool), post 2 (the rayon bemberg lining), and post 3 (sewing the lining to the kickpleat).

Today's Epic Skirt installment centers around the zipper, waistband, square snaps, and thread chain.

The zipper
Instead of sewing the zipper at the side seam as per the pattern, I sewed it at CB.

I followed Sunny Gal studio's tutorial on how to sew an invisible zipper without an invisible zipper foot.  I really enjoy this tutorial and have used it for a few years now.


IMG_20160214_140527
In my last post I wrote about my study garment, a brand new Talbot's skirt I bought at a thrift shop for $6.    I looked to see how the lining was sewn to the zipper and it was machine stitched on, so I did the same thing.  I had previously pressed back the opening of the lining where the zipper would be , so there was a nice press line there.  I had already basted the lining to the top of the skirt so I had to undo some of the basting so that I could flip the lining and skirt inside out in that area, then used my zipper foot to sew the lining to the zipper tape.    I then basted the lining back to the top of the skirt in that area.

The waistband
20160302_195440


I always cut my waistbands longer than they need to be, sew them on, then cut off the excess. That way I won't wind up with a waistband that's just a little too short.  Since the kickpleat, from the outside, is overlapped left over right, I did the same thing with the waistband and lapped it left over right. 

20160302_195355


20160302_195317
When I first basted the waistband on and sat down in the skirt, suddenly the whole thing was too small!  I undid the waistband and let out the side seams  near the top of the skirt and skirt lining (I had taken out some of the hip curve previously, and that was still fine, it was just the top of the skirt that was the problem. I will say at this point I was SO GLAD I had not serged the raw edges of the lining together-that instead I had serged the edges separately and then sewn them.  That meant I could still alter the skirt in this way--phew!!!

I then stitched in the ditch from the outside to sew the waistband down.
20160214_193337

20160302_195506


Square snaps
Square snaps were then sewn on, as I prefer snaps to a hook and eye.  The large square snap is from Botani and the small one is from Daytona Trim.
20160215_195159

Thread chain
The Talbots skirt had a thread chain (I don't know what else to call it) near the hem of the skirt to attach the bottom of the lining to the bottom of the skirt.  I made some serger tails and then hand stitched them on.
20160302_195240

What's Next??
The big reveal: me wearing the #epicskirt!  

Be well!

Sunday, February 28, 2016

Simplicity 2154 Epic Skirt Post #3: Lining a skirt with a kickpleat

IMG_20160214_154553
Thank you for your comments from post 1 (the wool) and post 2 (the rayon bemberg lining).  Today's Epic Skirt installment centers around lining a skirt with a kickpleat.
20160213_180539

I had sewn skirts with linings before (easy, just cut the lining an inch shorter than the skirt) and I had sewn skirts with kickpleats before (S2154 being one of them ~5 years ago, followed the instructions just fine) but I had never sewn a skirt with a lining *and* a kickpleat.

I looked in my pattern stash; I had no skirt patterns with lined kickpleats.

I looked at my RTW skirts; none of them had lined kickpleats.

Tutorial for drafting and sewing lining to a kickpleat
So, I googled and found this tutorial by Blue Ginger Doll for drafting and sewing a lining one of their skirt patterns with a kickpleat.  The first photo is "not found" but whatever it's of, it's not needed.

The drafting was pretty straightforward and non-scary.  Only the back of the skirt needs to be drafted; the front pattern piece can simply be turned up 1" for cutting out the lining.

I made two samples first using black to represent the exterior of the skirt and muslin to represent the lining.

I think Step 10 should be clarified to include "sewn stopping at 5/8" at the top of the kickpleat".

In the real deal, I sewed step 14 by hand, to have the greatest amount of control as Sarah Veblen would say.

I didn't worry about not understanding the whole tutorial up front, just followed step by step and wow, it came out looking pretty ok!

Also I did not sew the darts into the skirt as per the Blue Ginger Doll instructions, but rather converted the darts to pleats as I had seen Handmade by Carolyn using that technique.

Left over right
I sewed the samples on Super Bowl Sunday (which has no meaning to me!  I'm just using it as a marker in time);  the kickpleat overlaps right over left.  That Wednesday I went to a local consignment shop and a thrift store and found that all of the RTW skirts with lined kickpleats overlapped left over right (if you have the skirt right side out and are looking at the back of the skirt)

When I made the real deal, I reversed the tutorial instructions so that the left would overlap the right.
I also felt the kickpleat was too high and lowered the S2154 kickpleat by 1" (I had taken 3" out of the pattern at the lengthen/shorten line.)

20160213_181159

RTW investigation
I bought a Talbot's skirt (with tags and original $109 pricetag attached) for $6 at the thrift store.  It does not fit me but it has a lined kickpleat and could be used as a "study garment".
1. The kickpleat  exterior fabric is interfaced, on the wrong side, so I did this too.
2. The zipper exterior fabric is also interfaced, on the wrong side.  I had already sewn the zipper to the exterior fabric so I missed the boat on interfacing there.
3.  The Talbot's skirt was brand new, but the RTW skirts that had been worn all seemed to have a tear in the lining at the stress point where the lining is sewn to the exterior skirt.   As a result of this, I interfaced the lining too in the kickpleat area.
IMG_20160213_182939
Hemming the lining
I pressed up 1/2" (using the hot hemmer, on the wool setting with a dry iron and without a press cloth--my Black and Decker probably does not get as hot as a Rowenta) and stitched it down; then turned and pressed another 1/2" and stitched again for a double folded hem.

20160213_181358
Hemming the wool
20160214_164936
I serged the raw edge for a clean finish, then used the blind hem foot on my sewing machine to sew most of the hem.  I hand stitched the fiddly bits of the kickpleat then pressed with my Elna Press and it all came out looking ok!  Achievement Unlocked!

Next post!
So, I still needed to attach the lining to the zipper, add a waistband and snaps, and add that adorable little thread chain that keeps the lining attached to the bottom of the skirt...details next post!

Tuesday, February 23, 2016

Simplicity 2154 Epic Skirt Post #2: the rayon bemberg lining

20160213_151639
Thanks for your comments about Epic Skirt post #1!  Now it's time for post #2: The Lining Fabric.

The best lining for wool?
Having never lined wool before, I took to IG to ask what fabric to use as lining.   Rayon bemberg seemed to be the most popular response, and that is a fabric I don't have in my stash.  It is super slippery, and I haven't really worked with any super slippery fabrics before.  So it was adventure time!
20160223_183923
Vogue Fabrics swatch card of almost 40 colors of rayon bemberg.

Procuring rayon bemberg
A google search revealed that rayon bemberg is also called Ambiance. (Oh! So that is what Amanda S always lines her garments with!)  Joann's has it, but in limited colors.  Vogue Fabrics has it in almost 40 colors.  I've been swatching from online sites lately before buying the real deal, but somehow I felt confident enough to just go with 2 yards of "Gray" and also order a swatch card at the same time.  For just $5, they send you a card with swatches of every one of their rayon bemberg colors (there is a similar card for Sofia ponte knits!)

The fabric arrived and matches the light gray in the wool, nice!
20160207_092012
Pretreating rayon bemberg
Once again I took to IG to ask how to pretreat....should I take it to the dry cleaner?  The official washing instructions are "dry clean only."  Responses on IG ranged from dry clean"you can do that", to hover with steam, to throw it in the washer and line dry, to wash and dry that sucker but there will be wrinkles that won't come out.  I also read a spirited message board on PR which contained oodles of suggestions, including Dryel, and the advantages and pitfalls of front loading washers-- a whole world I didn't know existed!).

Since I had 2 yards, I cut 2 generous swatches and machine washed  them in cold, as I do all my clothes, in my standard issue totally non-fancy top-loading run-of-the-mill washing machine.  I line dried one swatch and washed and machine dried the other on high heat in my not fancy but is on a pedestal to make it easier on my back dryer.  Yes, there were wrinkles in both, but there were a lot less wrinkles in the machine dried sample.  I wound up doing another round of samples that I dried on low heat.  The samples did shrink.    I pressed the sample on the wool setting (yes!  I live dangerously!) with my Elna Press after spritzing with water first and found that the water spots did not come out.    The wrinkles were reduced and "good enough" for me.

For the real deal, I rough cut 2 pieces of the bemberg:  one piece for the  front and another piece for the two backs, making sure to keep one selvedge (for the front piece) and both selvedges for the backs.  I serged around the raw edges of the rough cuts, leaving the selvedge as-is.  Then I washed and dried just the rough cuts and pressed, without any water, with my Elna Press.

The process of washing, drying and pressing the rayon bemberg seemed to cause the fabric to lose some of its slippery quality, which I felt made it easier to work with.

Graining rayon bemberg
I registered for and watched the relevant parts of Sarah Veblen's PR class "Sewing with Slippery and Drapey Fabrics".   I used her snip and rip method for graining, which seemed to work quite well (so you definitely need the selvedge!)

Cutting rayon bemberg
Sarah is a die-hard "cuts with scissors" devotee whereas I am fully in the rotary cutter camp.  I used my Dritz pattern weights to hold the fabric in place.  For most fabrics I would only put weights on the pattern but for this I put weights over the whole thing: the pattern and the parts of the fabric not covered by the pattern.  I used a fresh blade in my rotary cutter.  My cutting mat is getting pretty old and manky, which provided some grippy texture. And I only cut out my pieces on the rough cut, which meant not dealing with too much fabric on my cutting table.  For the back piece, I cut the rough cut down the middle into two pieces and then cut the backs out single layer.


20160213_132136
Marking rayon bemberg
Somehow I did not test marking implements and went straight for the tailors wax which was a mistake in retrospect because after pressing the wax marks were highly visible.  Next time I would use chalk.  Also when I was cutting the lining I was lost in TLo's podcast about what it's like to attend NYFW and marked the darts as if I was sewing them in, when I convert darts to pleats in lining.

Serging rayon bemberg
I decided to serge the raw edges of the cut lining pieces before sewing instead of sewing and then serging.  I had to reduce the DF on my serger, but sadly I did not write down the setting I used; it was one or two notches below N.  I used the regular needles in my serger and they seemed fine.

Sewing rayon bemberg
Again I took to IG, where Lynn told me to use a walking foot and a microtex needle, which worked like a charm!  It wasn't so bad to sew, actually.  Pretty straightforward.  I didn't have to overly wonder clip it  either.  I've been preferring wonder clips to pins lately.  I sewed some samples first and lowered the foot tension down to 1 and the bobbin tension down to 1.8 or so, to get the least-puckered seams.
20160213_142029
Sewing from where the zipper would end to the "dot" of the kick pleat, with my walking foot and microtex needle.

Next post
The pattern did not call for a lining so I had to draft my own....and also learn how to attach the lining to the kickpleat.  How did I do it?  Next post!

Be well!

Sunday, February 21, 2016

Simplicity 2154 Epic Skirt Post #1: the wool

20160215_195431
Instead of writing one Epic Post about my #epicskirt, I'm going to spread it out into a few posts.

This skirt got me out of my sewing comfort zone in several ways:
  1. First time sewing with wool
  2. First time sewing with slippery lining fabric (rayon bemberg)
  3. Although I have lined skirts before, and sewn skirts with kickpleats before, this was my first time sewing a lined skirt with a kickpleat
  4. The pattern I chose did not have a lining which meant first time drafting a lining.
I really took my time with this skirt, taking the better part of two weekends to sew.

I'm somewhat allergic to wool. I can wear a wool coat if I have a scarf to protect my neck.  I don't wear wool sweaters because even with a shirt underneath, some part of the sweater touches my skin, which itches and pinks up.    I've considered this to be somewhat of a blessing as it means I have a whole category of fabric that I can't buy and stash. 

20151028_154214
At Elliott Berman, with a swatch of the fluoro fabric.

Well, at the end of last October, velosewer was visiting from Australia.  We were at Elliott Berman in NYC and she bought this textured wool, which she called "fluoro" because of the neon orange threads.   I was super attracted to this off-limits wool fabric, and thought, I can make a skirt that is fully lined, and wear it with tights and a shirt tucked in--all of my skin will be covered.  If I have to, I can wear gloves while sewing the wool.  (The Heidi Boyd Whimsy Kits use wool felt, and sometimes my fingers are itchy after stitching with them, but not always.)
20151028_204319


A-line or pencil skirt???
Since it was quite wide, I bought 3/4 of a yard of it.  Normally I sew A-line skirts (with my beloved NL6483), but I felt like this fabric wants to be a pencil skirt.  I sought advice on Instagram and the general agreement was yes, this fabric should be a pencil skirt.    I went with S2154, a skirt I last sewed in 2011, in the size 14.   I took 3 inches out of the length at the lengthen/shorten line.  I traced the front piece on Swedish tracing paper so that I could cut it out single layer.

20160221_091623

Pretreating wool
I asked velosewer how to pre-treat the wool and she said to take it to the dry cleaners.  I serged the cut edges and brought it to the dry cleaner who looked at me like I had 5 heads for wanting to dry clean a piece of fabric.   "What is this???" she said incredulously.  I replied, "It's a piece of fabric." She said she didn't know what to call it, and I said it would be a skirt, so she charged me the skirt rate.  Has anyone else had that reaction from a dry cleaner when pre-treating wool fabric?

Next:  Procuring some lining fabric.  Having never lined wool before, what would I use?   Details next post!

Be well!

Wednesday, January 28, 2015

Every Fabric is Its Own Universe: New Look 6843

New Look 6843 as another knit skirt
Since it's snowy and cold, I don't know when I will get to actually wear this skirt to work, hence the sewing room photos.
turquoise vs black/gray
Last fall I was on my quilted fabric kick.   Remember when I quilted these samples above?

 Well, in November I went to Kashi's with Tomasa for MPB Day and he had basically what I was trying to emulate:

LOVE this pattern!
I know, right?  It's not quilted, but it's the look I was going for.

It's also totally indestructible polyester, that thick and scratchy double knit kind, with a lot of body, and is slightly stretchy.
New Look 6843 as another knit skirt
Closeup of waistband on my skirt....on my dressform.
Interior of NL6843
The inside is gray

And it was $2 a yard.  I would have paid $20 because that pattern was exactly what I wanted and I love love love the small scale of it.

Kashi, darling, throw three yards of it in my box.  Thanks, love.
New Look 6843 as another knit skirt
Front
New Look 6843 as another knit skirt
Back
New Look 6843 as another knit skirt
On my topless Izzy.  I have a slip underneath because the fabric is not opaque, but my slip isn't nearly as long as the skirt....
New Look 6843 as another knit skirt
There is some gathering on the back of Izzy, but less so on me.

I went back to my TNT skirt pattern, New Look 6843.  I was thinking this would be a "quick and easy" project.

Don't get too comfortable.  Every fabric is its own universe.    Sadly I took no photographs of the missteps, but there were several!

I actually started with regular NL 6843 and cut it out my usual size and sewed in all 6 darts (2 in front, 4 in back).  and I thought it looked terrible.  It was SO obvious that the pattern was not matching where the darts were.  That little amt of stretch made a big difference.  It turned out to be gigantic.

So then I went to version of NL 6843, the one I traced off and folded out the pleat for knits.  Its stretch is minimal but enough that it makes a difference.

Basted the side seams and tried it on and it was still a bit big....

Sewed on the elastic waistband, but there was too much gathering, especially in the back.

Tried various things including adding darts to the back--small (just under the waistband)--longer ones (that could be seen), totally hated it.

Basted the side seams closer at the waist.  Reattached waistband.

Then I wound up with the waistband being too small!  There was no way I could wear that all day.

Finally I figured it out:

  1. Get the skirt to be relatively smooth front and back by basting the side seams accordingly. 
  2. Press the side seams.
  3. Take a length of elastic, position it over the skirt, find where it feels comfy.  Cut the elastic so there are a few inches on either side of where the join will be.
  4. Baste the elastic into a loop.
  5. Try the elastic on again and sit down in it.  If not comfy, try 2 and 3 again.
  6. Once comfy, cut the tails off the elastic so there is just an inch or so on either side of the join.
  7. Serge the side seams and press.
  8. Move the join to the center back (my preference, the join could be at the side seam).
  9. Now take tailors chalk and chalk where the elastic meets the side seams!!!  This was the key for me.  I was dividing my elastic and waistband into quarters, but my back at my waist is smaller than my front at my waist....resulting in a lot of gathering back there if I quartered it.
  10. Zig zag just the front of the waistband on!  Leave the back flapping around.
  11. Try on again and turn around.  Adjust the elastic.  If you have a sway back (as I do), I wound up pulling up the raw edge of the skirt in the center back, tapering to zero at the edges, to remove some of the slight pooling.  Take chalk and mark where the top edge of the elastic should be.
  12. Now zig zag the back on and try one more time....
  13. Good enough? Now serge it!
  14. If everything is how you like it, DO NOT PRESS the waistband if your elastic is the kind that loves steam.  I used Pamela's Fantastic Elastic, which I like quite a lot, but pressing it will shrink it down (hence the too-small waistband in one of my prior attempts).
Then there was the hem....Turning it under an inch and blind hemming looked terrible!  It destroyed the drape of the skirt.  The rolled hem didn't look good either...it is thick poly double knit after all. I wound up just serging the raw edge to maintain the drape.  And pressed the edge.

Also it is longer than usual....but I think it looks more elegant that way?
New Look 6843 as another knit skirt
Spoiler alert is on my dressform:  another new series I have forming in my head entitled "RTW Hacks".  That is the after.  You will giggle at the before.

Yesterday was a snow day, so I made my first ever skort (yes, skirt with shorts attached) out of performance fabric, for the gym.  Quite the adventure.  I think I'm hooked!

Be well!


Wednesday, November 19, 2014

A favorite is a favorite: New Look 6843

20141110_115709
Darlings, I'm not sure how many more of these NL 6843 skirts you can take, but here's another one.
20141110_115725
The fabric is the other one of the two black and white knits I purchased at Paron's at the end of Sept with ATP.
20141110_115721
The sides are matching-ish.
20141110_115715

It's my favorite A-line skirt pattern, NL 6843. This time I used the front for both the front and the back with the darts folded out.    This fabric wasn't as stretchy as the last skirt so I used two fronts.  I guess I could have used the back but with only two of the darts folded out instead of all four.

I wound up cutting it on the bias for interest, but this did make me feel a bit nauseous.  Ha ha.


20141109_145616

I haven't cut anything on the floor in a LONG time (like years) but this was the fast (and lazy) way for me to cut this out.  It was also a long time since I cut out fabric with scissors instead of my rotary cutter.

As far as hemming, I went with the 3 thread rolled hem.  Note to self: you, um, have to remove that left needle for the 3 thread rolled hem to look good--otherwise the serger is trying to loop around that left, threadless needle and the smaller the stitch width is, the worse it looks.  Sure, it's fine at a stitch length of 2, but anything smaller than that and it's not good.

I stabilized the hem with woven fusible interfacing.

This is what it looked like after one pass on the serger:
20141109_192124
So I went around a second time to fill it in a bit more:
20141109_203759
I might actually Sharpie marker the rest of those white spots out.  Did you know they make a Sharpie marker specifically for marking clothes?  Yes, they do!
20141110_115644
My coworker was right; the basement of our office had the perfect backdrop with its white, black, and gray lines.
20141110_115651

I wore it with a cardi last week.
20141110_115654
The oops shot. I was trying to decide how to pose next when she took the picture.
three-NL-6843-again
Here are the others in the NL6843 series....

20141116_190217
I wish you could smell this.

I did not sew last weekend because I read a novel and baked for the office Thanksgiving potluck. We have our potluck two Mondays before TG because a lot of people take the week of TG off, and this year that includes ME!

I make my cookies from scratch, using real butter, real sugar, real eggs, real vanilla extract...and almost twice as many walnuts as the Toll House recipe calls for.  I had not baked in a long time because of my huge work project and my coworkers were definitely appreciative.   My dessert was the first dessert to be completely eaten--all gone by the end of the afternoon.

Be well!